TEW-821DAP
8
© Copyright 2015 TRENDnet. All Rights Reserved.
Installaon
Make sure that all devices are powered o before starng installaon.
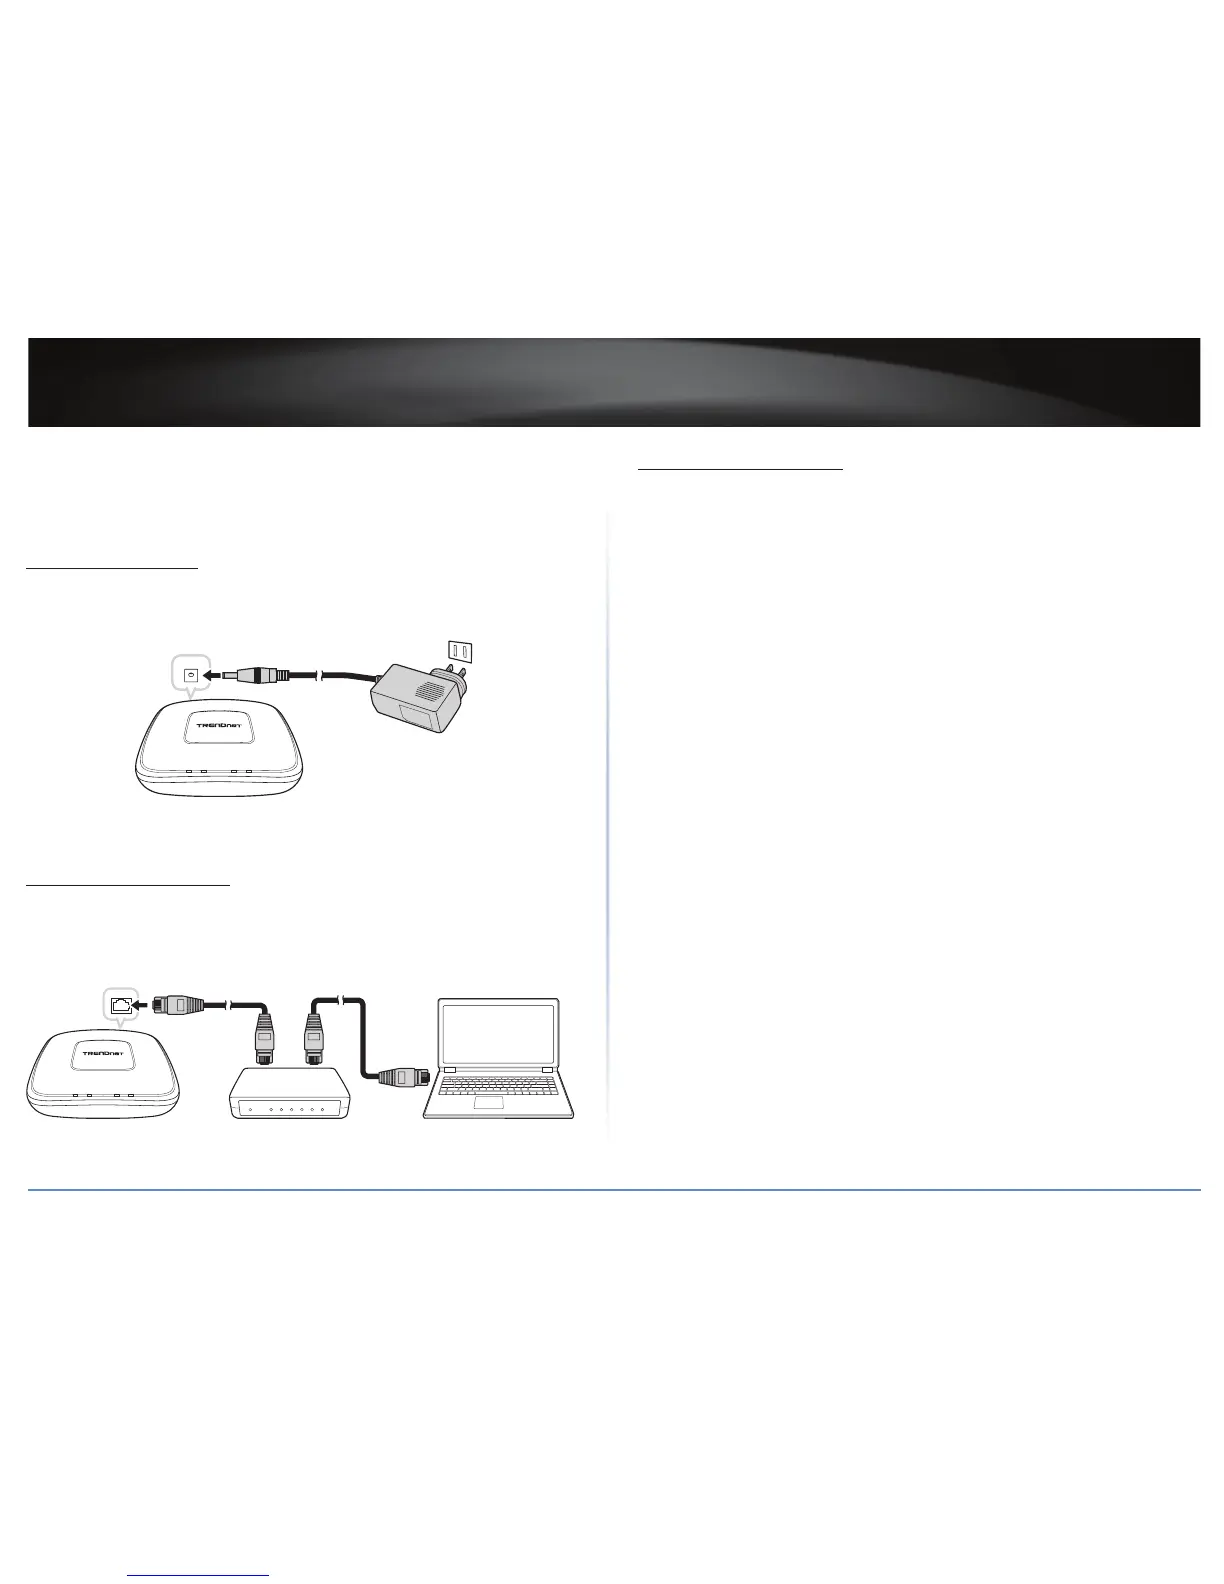
Connect the Power
1 Connect the power adapter to the power port of your access point.
2 Plug the power adapter to a power outlet.
The access point powers up automacally.
DC IN
LAN
PWR
5GHz
2.4GHz
ÍNote: Use only the supplied power adapter. Using other power adapters may cause
damage to the device.
Connect the Computer
1 Connect one end of the rst RJ-45 cable to the Ethernet port of your access point.
2 Connect the other end of the rst RJ-45 cable to the PoE switch.
3 Connect one end of the second RJ-45 cable to the PoE switch.
4 Connect the other end of the second RJ-45 cable to the LAN port of your computer.
LAN
PWR
5GHz
2.4GHz
LAN
TEW-821DAP PoE switch Computer
Check the Connecons
To ensure that all devices are properly connected, check the LED indicators on the front
of your access point. For basic installaon, the following LED must be lit:
9 Power LED
9 LAN LED
9 2.4G LED
9 5G LED
The lighted LED indicators vary depending on the type of connecon that you make. Refer
to “Front View” on page 6 for more informaon on LED indicators.








 To Next Page