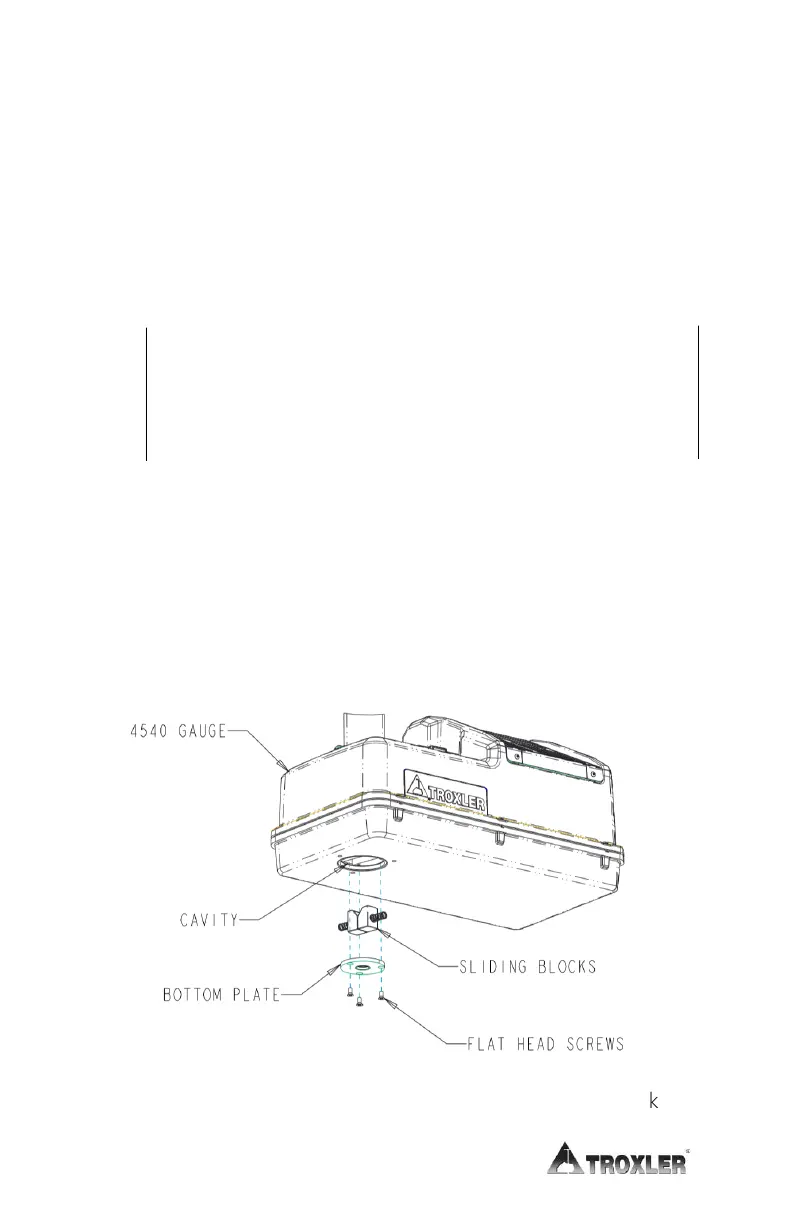
1. With the source rod in the SAFE (shielded) position,
place the gauge on its side.
2. Clean the heads of the three screws that hold the bottom
plate to the gauge base (see Figure 8). Using a Phillips
screwdriver, remove the three screws and remove the
plate.
3. To reduce radiological exposure, stand to one side of the
gauge. Paying close attention to the position of the sliding
blocks, remove the blocks and the springs.
NOTE
Although the activity of the source is low, all efforts should
be made to keep your hands away from the source
4. Using a stiff brush or rag soaked in alcohol, clean the
sliding blocks and the cavity.
5. Apply a light coating of Magnalube-G paste to the sides,
bottom, and top angled surfaces of the sliding block.
6. Re-install the springs and sliding blocks with the angled
sides up. Use a small screwdriver or other narrow tool to
ensure the springs are straight.
7. Re-install the bottom plate. Do not over-tighten screws!
Ensure that the source rod moves up and down freely.
Figure 8. Cleaning the Tungsten Sliding Block

 Loading...