2DA/2DB
1-5-37
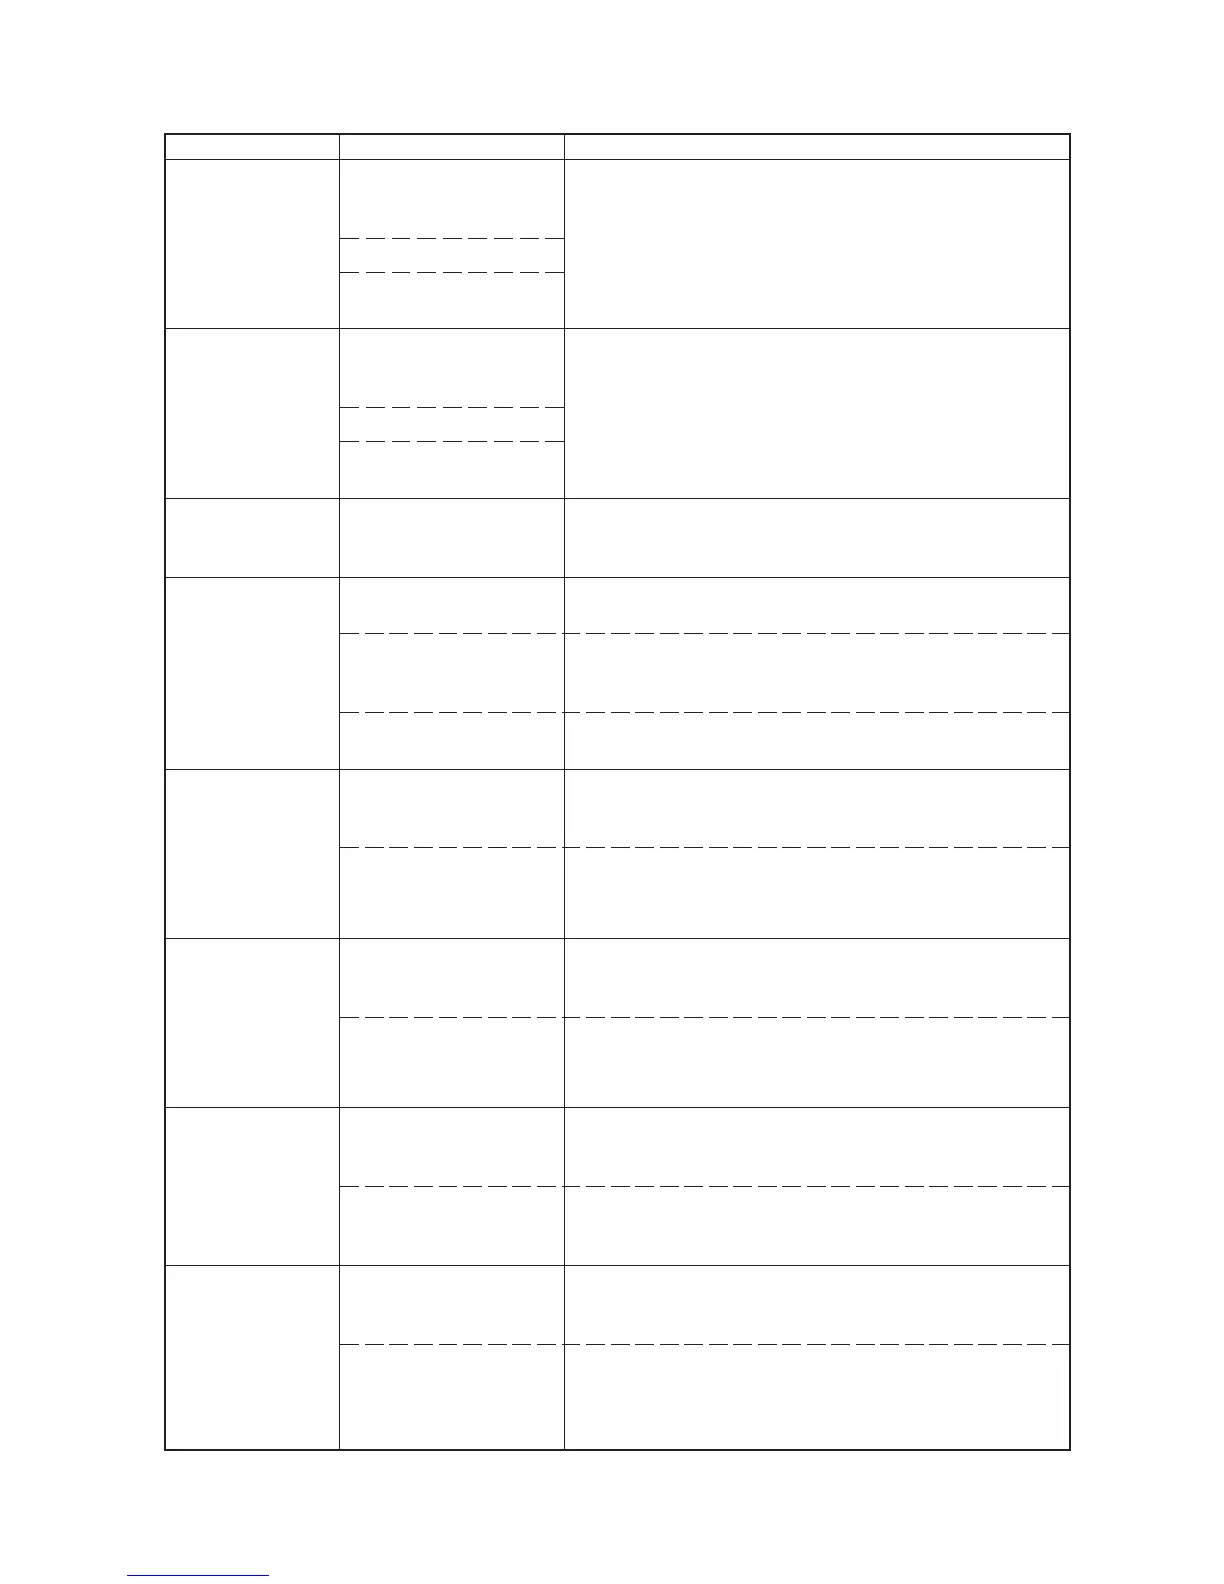
Problem Causes Check procedures/corrective measures
(19)
Transfer charging is
not performed.
(20)
No developing bias
is output.
(21)
The original size is
not detected.
(22)
The original size is
not detected cor-
rectly.
(23)
The message re-
questing paper to be
loaded is shown
when paper is
present in the
drawer 1.
(24)
The message re-
questing paper to be
loaded is shown
when paper is
present in the
drawer 2*.
(25)
The size of paper in
the drawer 1 is not
displayed correctly.
(26)
The size of paper in
the drawer 2* is not
displayed correctly.
Poor contact in the high-
voltage PCB connector
terminals.
Defective engine PCB.
Defective high-voltage
PCB.
Poor contact in the high-
voltage PCB connector
terminals.
Defective engine PCB.
Defective high-voltage
PCB.
Defective original detec-
tion switch.
Original is not placed cor-
rectly.
Poor contact in the original
size detection sensor con-
nector terminals.
Defective original size de-
tection sensor.
Poor contact in the paper
switch connector termi-
nals.
Defective paper switch.
Poor contact in the drawer
paper switch connector
terminals.
Defective drawer paper
switch.
Poor contact in the paper
length switch connector
terminals.
Defective paper length
switch.
Poor contact in the drawer
paper length switch con-
nector terminals.
Defective drawer paper
length switch.
See page 1-5-27.
See page 1-5-27.
If the level of YC18-5 on the engine PCB does not change when
the original detection switch is turned on and off, replace the
original detection switch.
Check the original and correct if necessary.
Reinsert the connector. Also check for continuity within the con-
nector cable. If none, remedy or replace the cable.
Check if sensor operates correctly. If not, replace it.
Reinsert the connector. Also check for continuity within the con-
nector cable. If none, remedy or replace the cable.
If the level of YC8-2 on the engine PCB does not change when
the paper switch is turned on and off, replace the paper switch.
Reinsert the connector. Also check for continuity within the con-
nector cable. If none, remedy or replace the cable.
If the level of YC5-2 on the drawer main PCB does not change
when the drawer paper switch is turned on and off, replace the
drawer paper switch.
Reinsert the connector. Also check for continuity within the con-
nector cable. If none, remedy or replace the cable.
Check if YC22-1,2,4 on the engine PCB goes low when the pa-
per length switch is turned on. If not, replace the paper length
switch.
Reinsert the connector. Also check for continuity within the con-
nector cable. If none, remedy or replace the cable.
Check if YC4-5,6,8 on the drawer main PCB goes low when the
drawer paper length switch is turned on. If not, replace the
drawer paper length switch.
*: 20 ppm model only.