1-3-35
2DA/2DB
1-3-10 Installing the fax system (option)
<Procedure>
Install the optional Memory module DIMM (32MB).
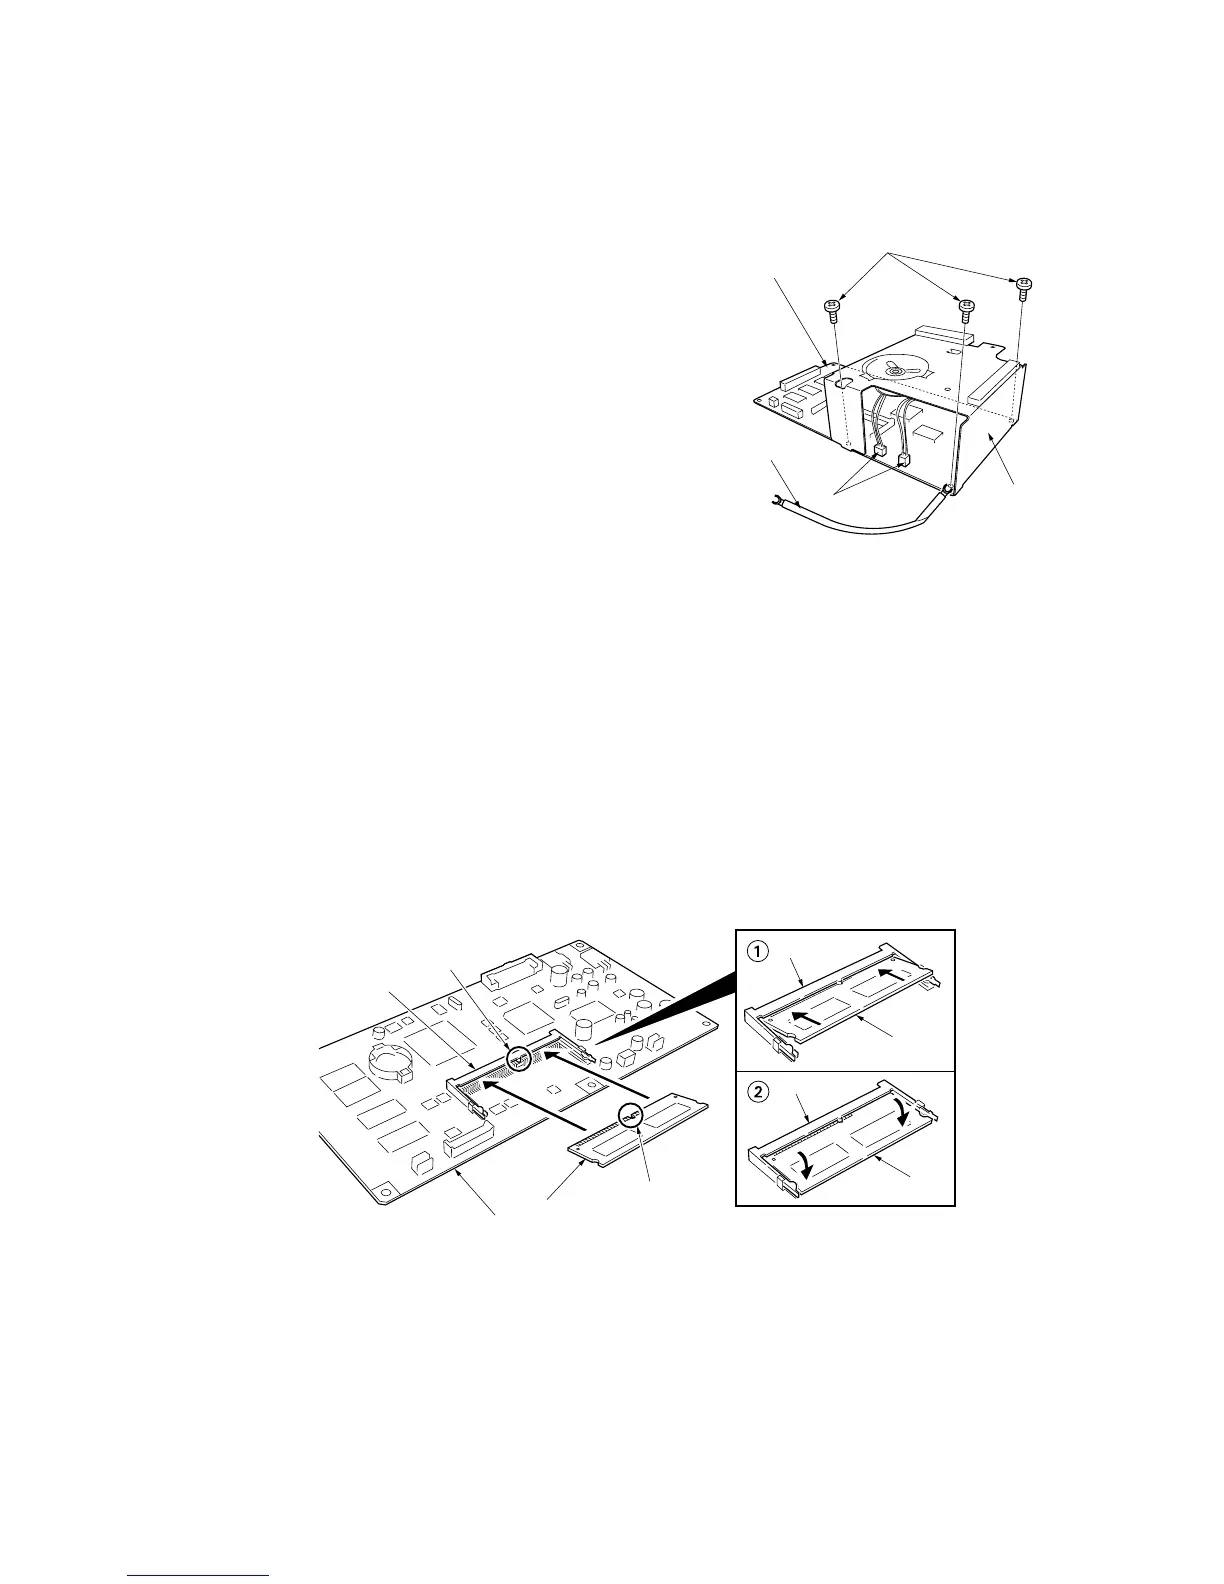
1.Remove the two connectors of the fax control PCB
assembly.
2. Remove the three screws and remove the mounting
plate and the ground wire.
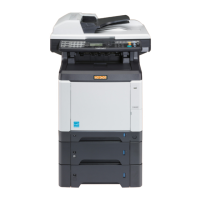
3. Insert the memory module DIMM at an angle into the
memory slot so that the notch of the memory DIMM
is positioned to the projection of the memory slot on
the fax control PCB assembly. (1)
4. Push the free end of the module down toward the
board. (2)
5. Attach the mounting plate and the ground wire that
have been removed by Procedure 2 with the three
screws to their original positions.
6. Connect the two connectors that have been removed
by Procedure 1.
Screws
Fax control PCB assembly
Mounting plate
Connectors
Ground wire
Memory module DIMM
Notch
Memory module DIMM
Memory module DIMM
Memory slot
Memory slot
Projection
Memory slot
Fax control PCB assembly
Figure 1-3-65
Figure 1-3-66