1-3-36
2DA/2DB
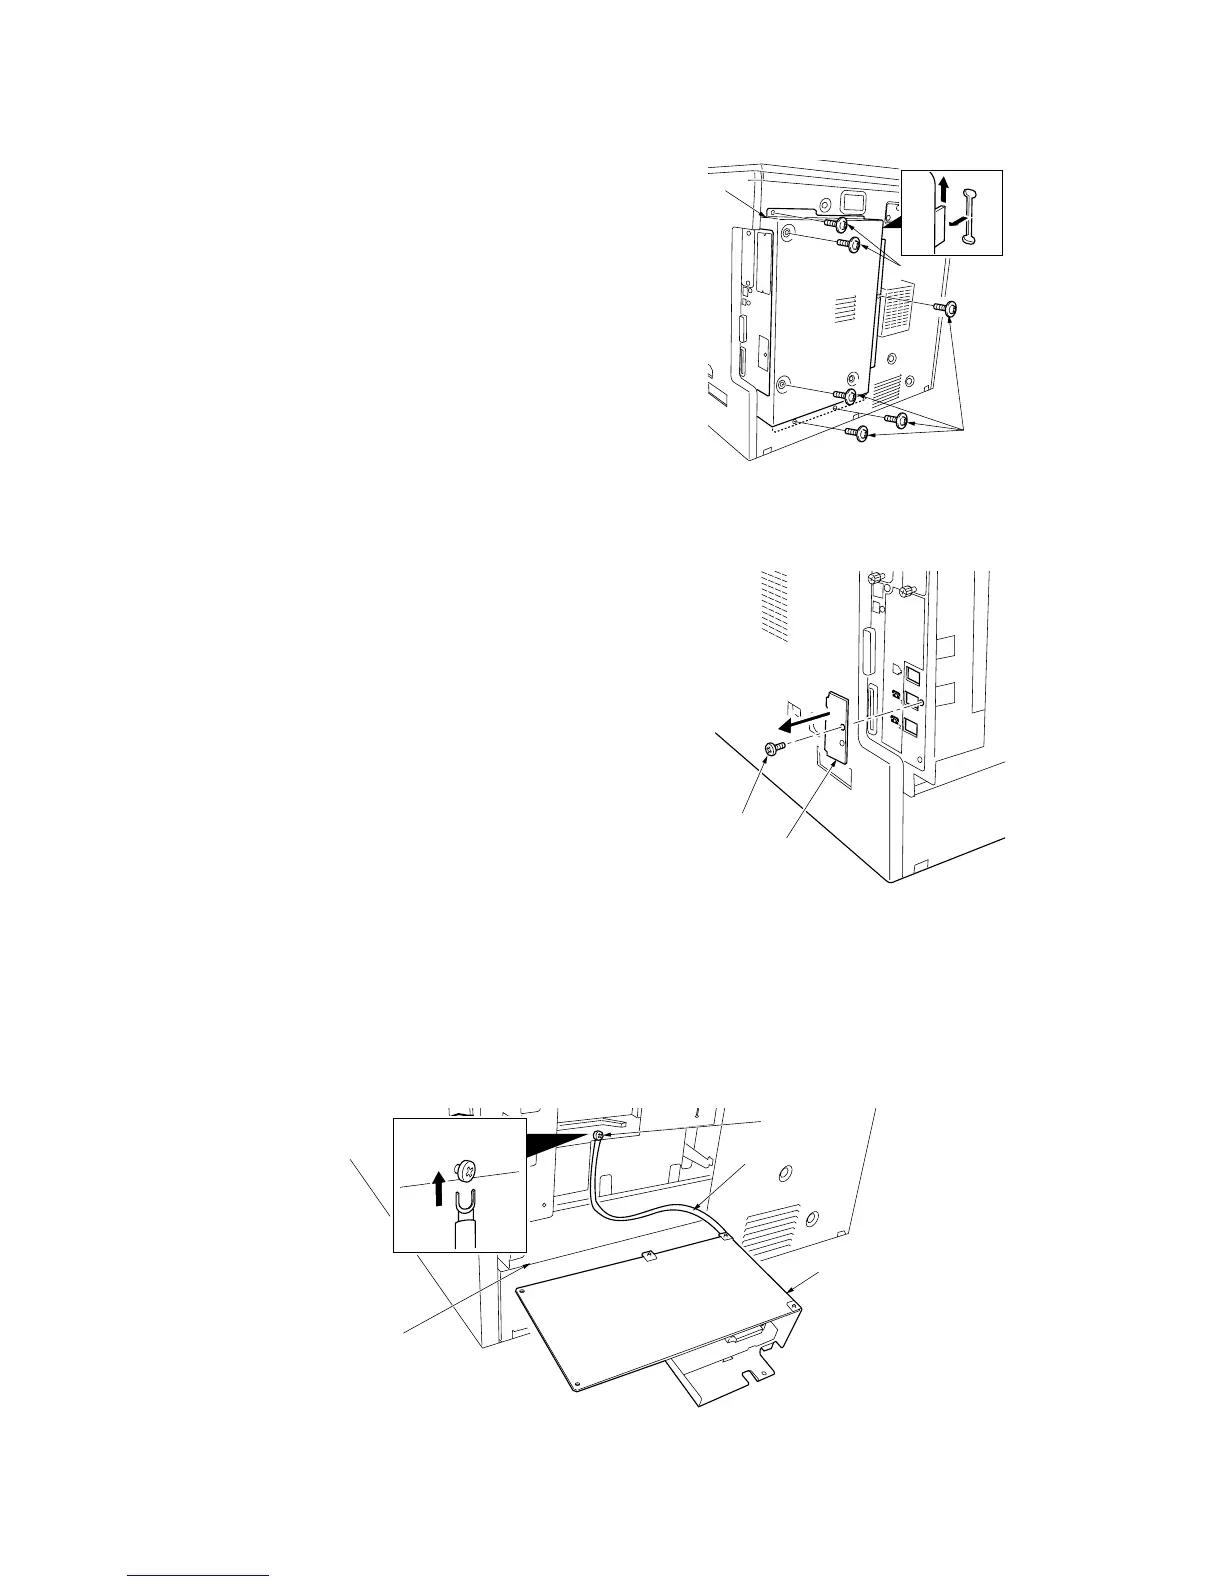
Remove the shield cover.
7. Remove the six screws, lift the shield cover and then
remove the cover.
Remove the modular cover.
8. Remove the screw and take off the modular cover.
Attach the fax control PCB assembly.
9. Loosen the screw on the printer board.
10. While taking care that the mounting surface of the
board does not contact the frame section of the rear
cover, insert the U terminal of the ground wire of the
fax control PCB assembly and secure it with the
screw.
Screws
Screws
Shield cover
Screw
Modular cover
Fax control PCB assembly
Screw
Ground wire
Frame section
Figure 1-3-67
Figure 1-3-69
Figure 1-3-68