1-3-9
2DA/2DB
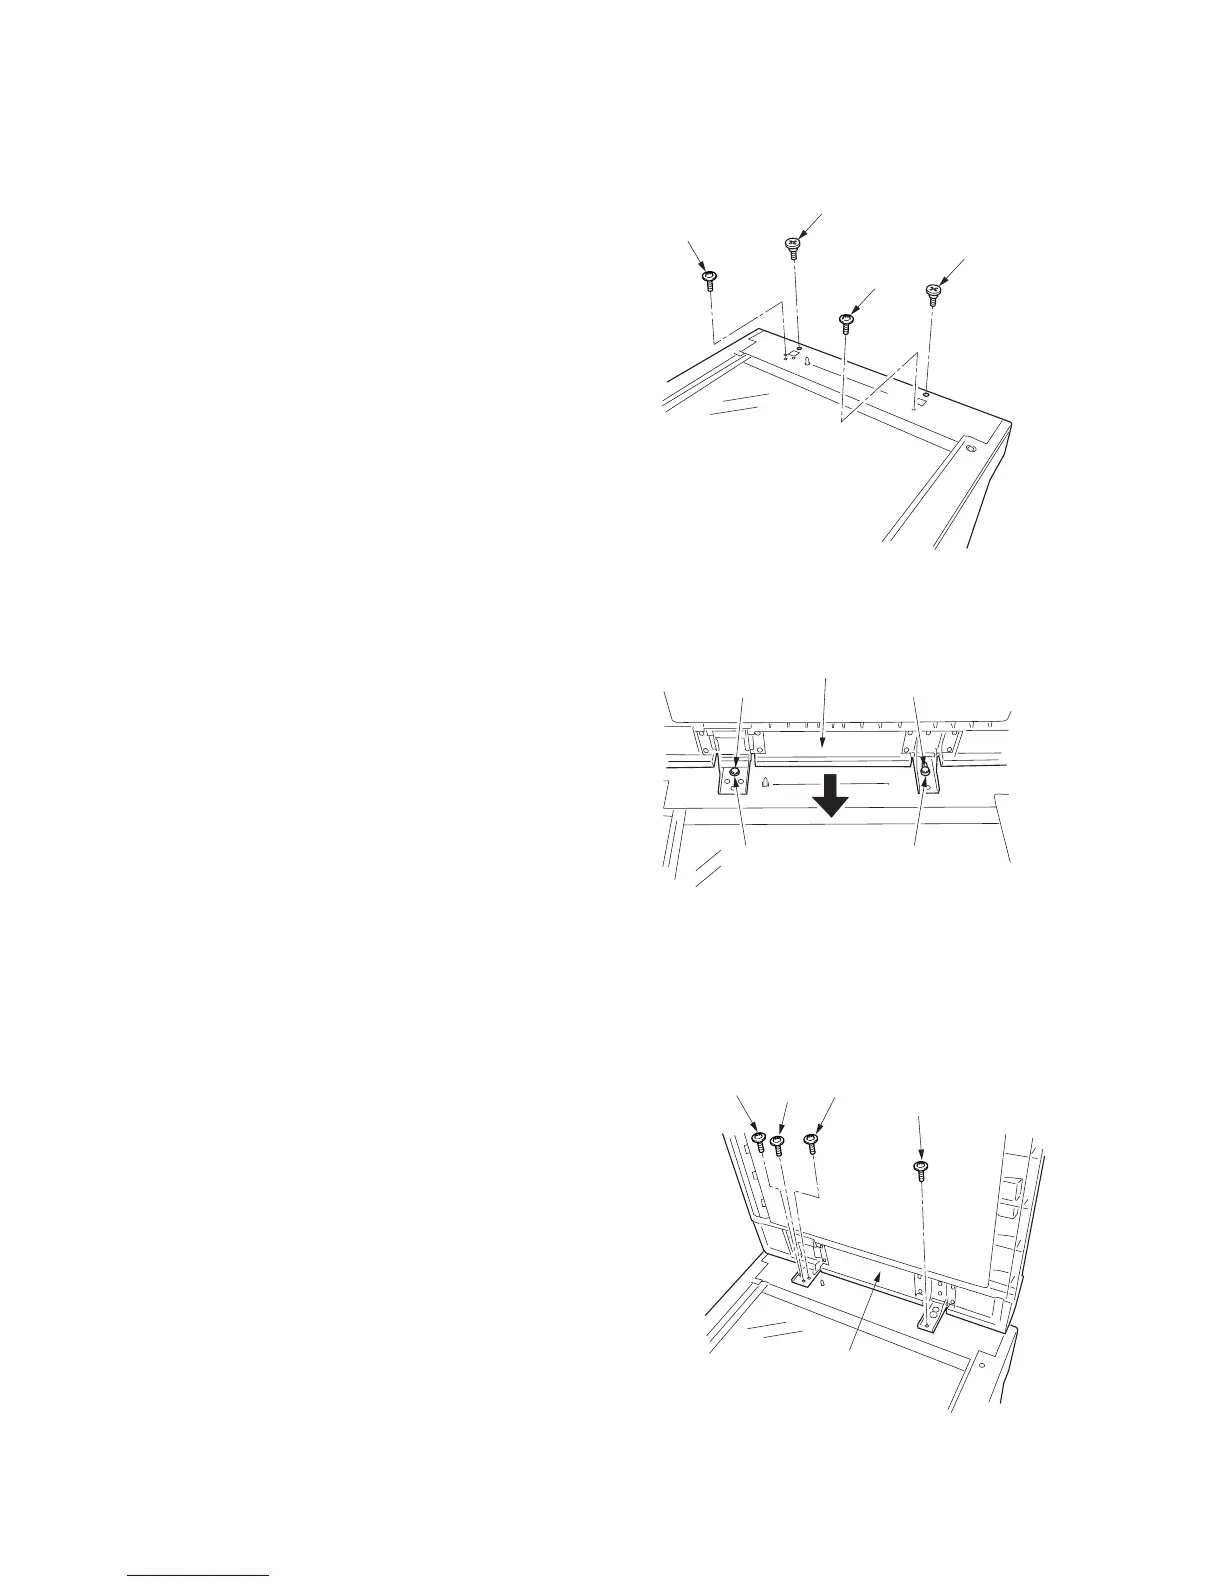
1-3-4 Installing the DP (option)
<Procedure>
1. Remove the original holder and remove the two
screws from the rear top cover.
2. Pass the two pins through the screw holes of the rear
top cover and attach them to the lower frame.
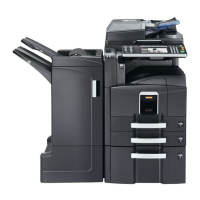
3. Place the DP on the MFP by fitting the pins into the
holes at the hinge sections of the DP and sliding
them toward the front side.
4. Secure the DP with the two TP Taptite chromate
screws M4 × 10 and the two screws that have been
removed in step 1.
Screw
Screw
Pin
Pin
Figure 1-3-10
Pin
Hole Hole
Pin
DP
Figure 1-3-11
Screw
TP Taptite
chromate
screw M4 × 10
TP Taptite
chromate
screw M4 × 10
Screw
DP
Figure 1-3-12