CAD computer network integ-
ration
The CAD/ CAM integration workflow is as follows:
1.
Prepare the machine and the CAD computer (
Ž
page 19
)
2.
Access the CAM computer (
Ž
page 20
)
3.
(Optional)Set up WiFi access for the machine
(
Ž
page 23
)
4.
Integrate the CAD and CAM/CNC software (
Ž
page 24
)
NOTICE
Danger caused by default passwords and
network intrusions
The default passwords mentioned in this public docu-
ment allow everyone to access the corresponding
devices via the network and/ or the internet. This can
lead to data theft, data corruption and damaging of
the machine and other devices.
Have the network integration of the machine and
other connected devices carried out by a qualified
network and IT specialist.
Have the specialist change the default passwords
after installation and secure your network against
intrusion. Ensure that passwords are recorded and
handed to you.
Ensure that the user
camcomputer
is automatically
signed-in at Windows
®
startup. Otherwise, the
machine will not be operational. You must re-
enable the automatic sign-in when you change the
password for this user.
Ensure that the user
camcomputer
has admin-
istrator privileges. Otherwise, the machine will not
be operational.
Be aware that changing the passwords for the pre-
defined user accounts may require a recon-
figuration of the machine’s network connection
and the CAD/CAM integration.
For remote maintenance, you can use
TeamViewer. Start the application via the icon on
the desktop of the CAM computer.
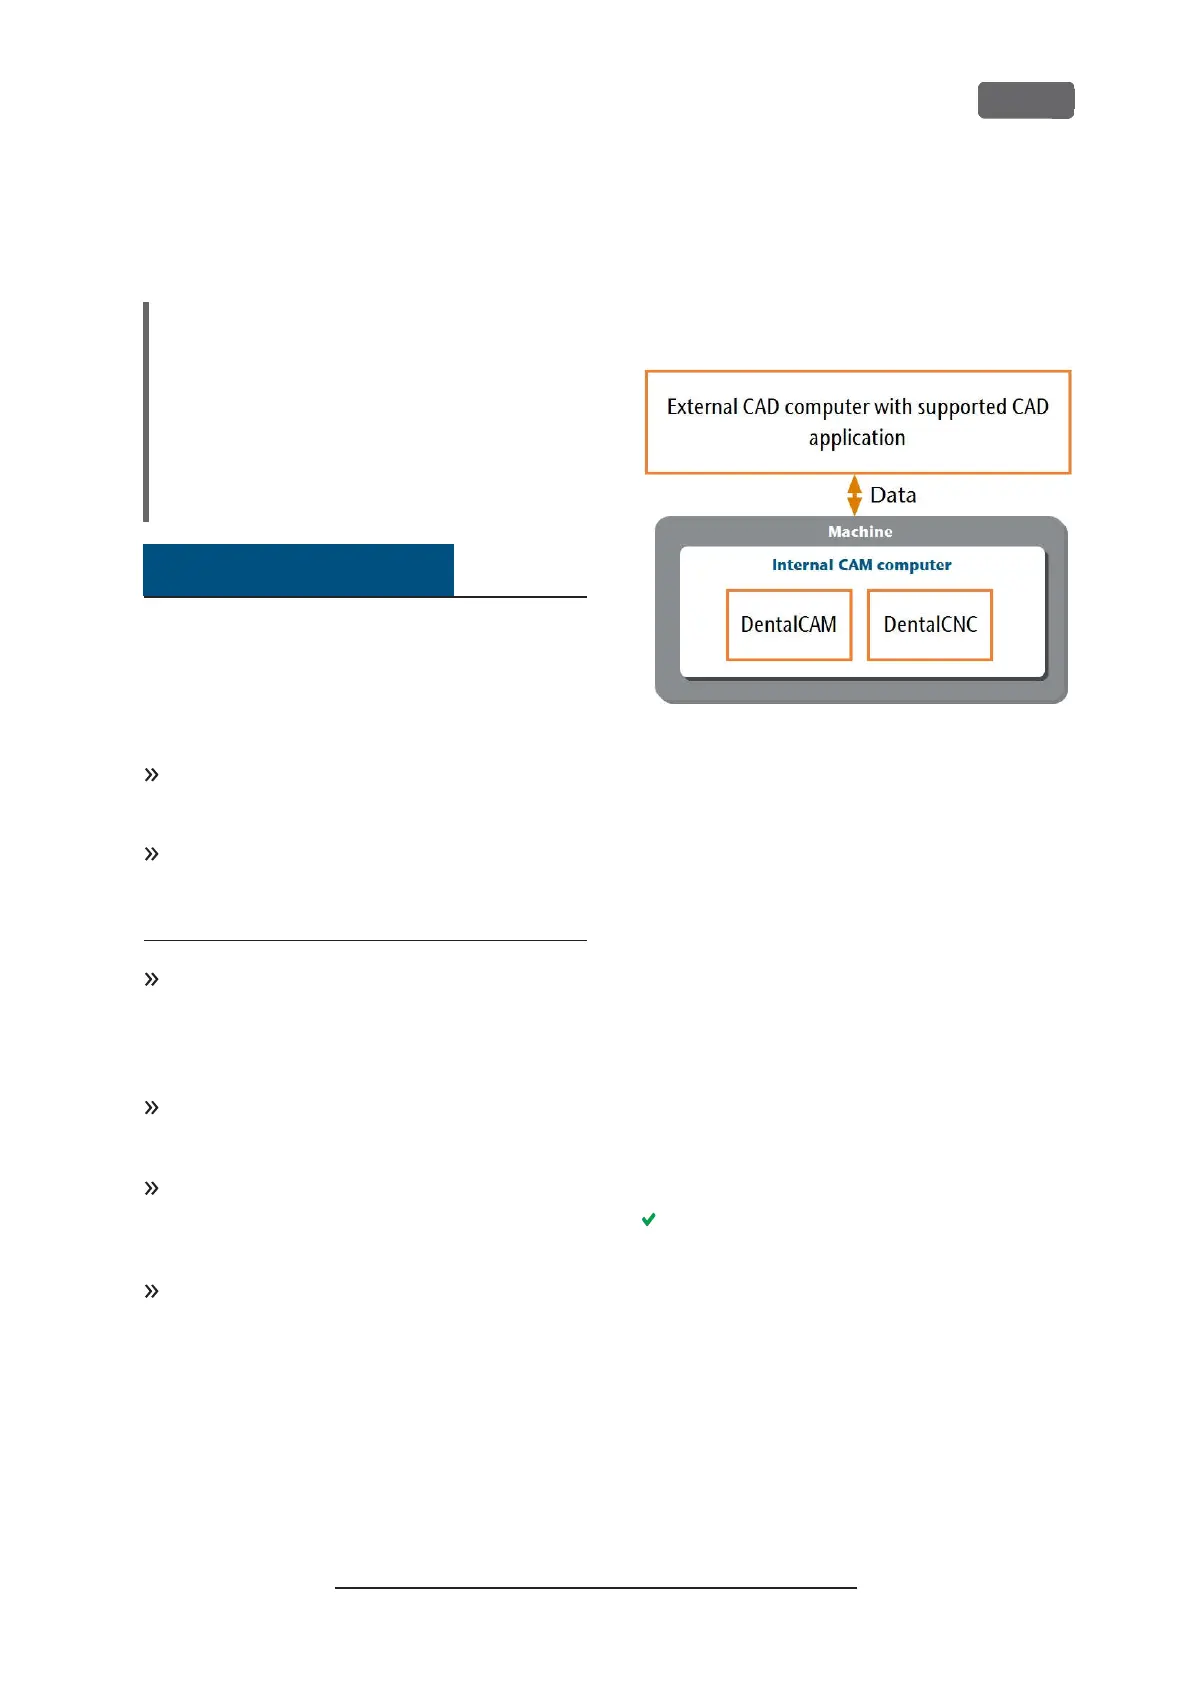
Internal CAM computer
The machine is equipped with an internal CAM
computer running the manufacturing software
DentalCAM DentalCNC. Manufacturing data is trans-
ferred as follows:
F
IG
. 11 – D
IAGRAM
: D
ATA TRANSFER IN CASE OF
CAD/ CAM
INTEGRATION
Preparing the machine and CADcomputer
Before you can set up the CAD/ CAM integration, you
need to prepare all hardware and software compon-
ents.
1.
Shut down the machine.
2.
Install the CAD application on the CAD computer.
Ensure that the CAD application is licensed to use
the Z4 for manufacturing.
3.
Ensure that the CAD computer is configured for
network connectivity. This includes WiFi access if
desired.
4.
To connect the machine to a wired network, con-
nect the machine and the CAD computer to the
local network with Ethernet cables. Do not dir-
ectly connect the CAD computer to the machine.
If a DHCP server is available in the local network,
the integrated CAM computer will automatically
try to obtain a valid IP address.
5.
To connect the machine to a WiFi network, pre-
pare the machine as follows.
a.
Connect the CAD computer to the Ethernet
port of the machine with an Ethernet cable.
b.
For the moment, deactivate WiFi access on
your CAD computer.
Otherwise, the CAD computer will not find
the CAM computer.
Z4 – Installing the machine
EN 19
Original Operating Instructions:Z4
Version: 12/5/2018