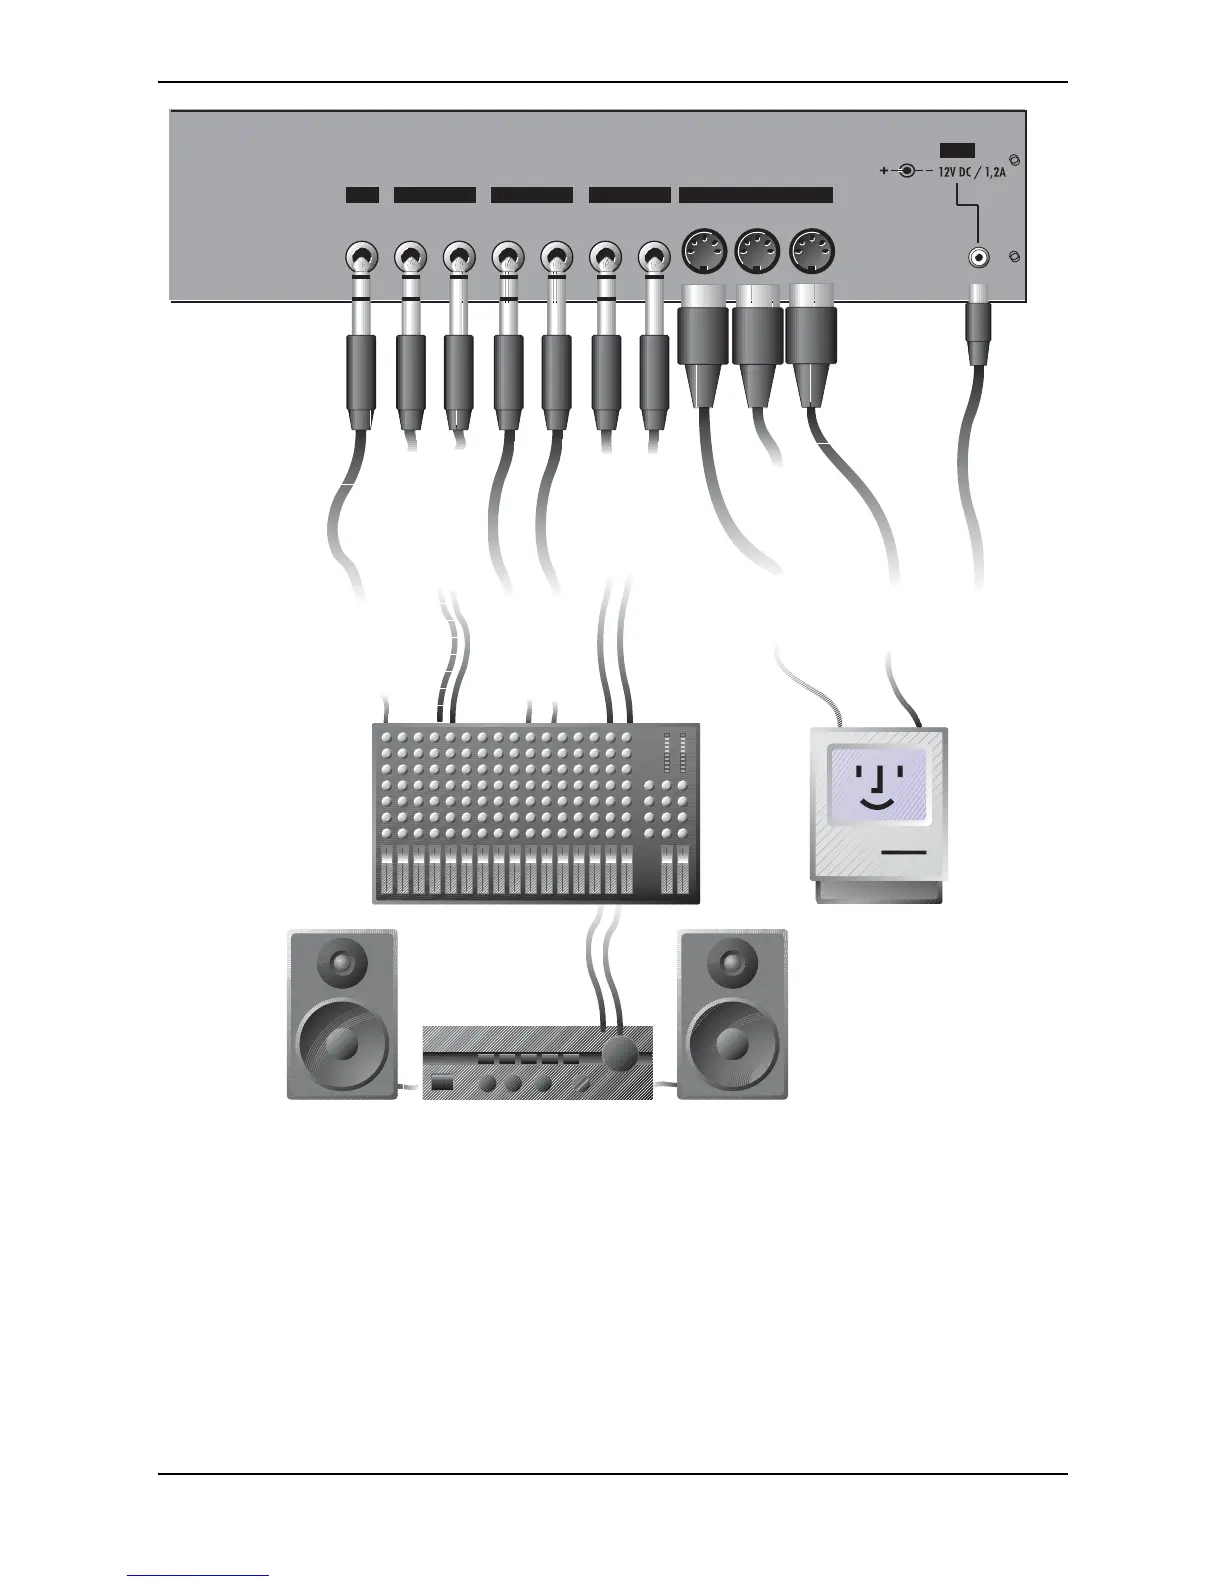
Setup and Connection – Connections
21 Waldorf microQ User´s Manual
In Thru Out
MIDI
MAIN OUT SUB OUT 1 SUB OUT 2IN
Left/Stereo Right/Mono Left/Stereo Right/Mono Left/Stereo Right/MonoStereo
POWER
External In
from mixing desk or
audio source
Tip: Left Signal
Ring: Right Signal
Main Output
to mixing desk,
headphone or
amplifier
Left/Stereo:
Tip: Left Signal
Ring: Right Signal
MIDI Thru
to MIDI In of further
tone generators
Sub Output 1
to mixing desk or
amplifier
Left/Stereo:
Tip: Left Signal
Ring: Right Signal
Sub Output 2
to mixing desk or
amplifier
Left/Stereo:
Tip: Left Signal
Ring: Right Signal
MIDI Out
to MIDI In of a
Computer or tone
generator
MIDI In
from MIDI Out of a
Computer or a MIDI
Masterkeyboard
Out
In
Power Supply
Socket
for an external
power supply
Connections microQ rack version
☞ To connect the devices:
1. Turn all units off.
2. Connect the microQ’s main audio outputs Main Out to your mixing console.
Optionally connect the auxilliary audio outputs Sub Out 1 and Sub Out 2 too.
3. To play the microQ rack version you need a MIDI master keyboard. Connect its MIDI Out
jack to the microQ´s MIDI In jack . Instead of this you can also connect the microQ to a
MIDI computer system.
4. If you want to use a computer, connect your computer´s MIDI Out jack to the microQ’s
MIDI In jack and the computer´s MIDI In jack to the microQ’s MIDI Out jack .
 Loading...