19
Version 2.0.4 | © 2016-2021 wallPen GmbH
Components
4.2 Assembly
4.2.1
Basic Assembly
Before you start setting up, make sure that there is enough room for the wallPen to do
the printing you plan to do.
· Are there any obstacles?
· Is the ceiling height above the entire print area sufficient?
· Is the wall ceiling and floor free of steps, beams, nails or other obstructions such as
cables or pipes?
· Is the print area itself free of grease, clean and dry?
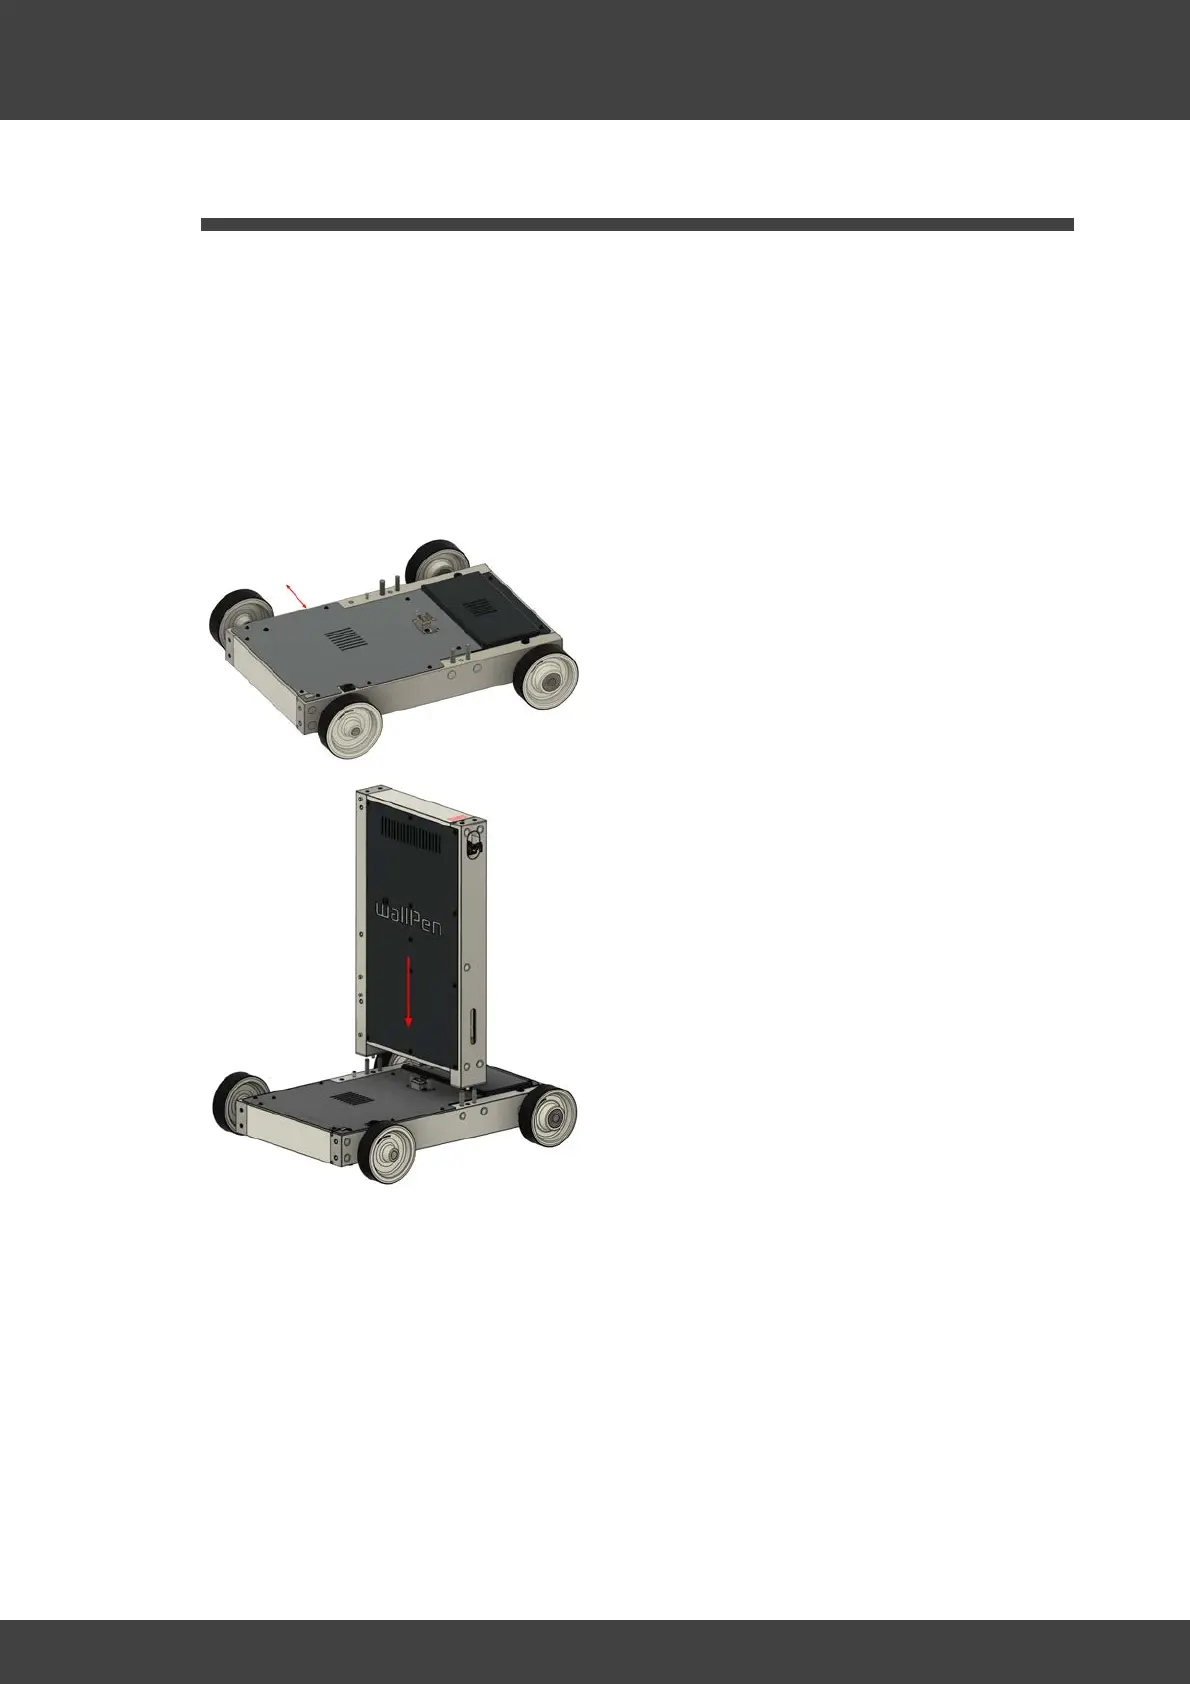
Place the platform with the steering facing
to the right and the frame profile of the
platform as shown on the left approx. 25
cm parallel to the wall to be printed.
Hold the control cabinet vertically over the
locating pins with the switches facing the
steering.