wallPen E2 | User Manual
96
Color Management
7.5 Dot Gain
A "dot gain" refers to the effect that ink
drops appear larger on the printed
substrate making the printed image to
be darker than intended in the artwork.
More precisely, halftone dots are
never transferred in the same way in
every technical transfer, but are
deformed in some way typical of the
process. This results in deformations,
enlargements, sometimes even in a
certain reduction.
If, for example, you would like to print
an area with an area coverage of 40%,
this area will be displayed rather
darker due to the course of the drops,
as shown in the table as an example.
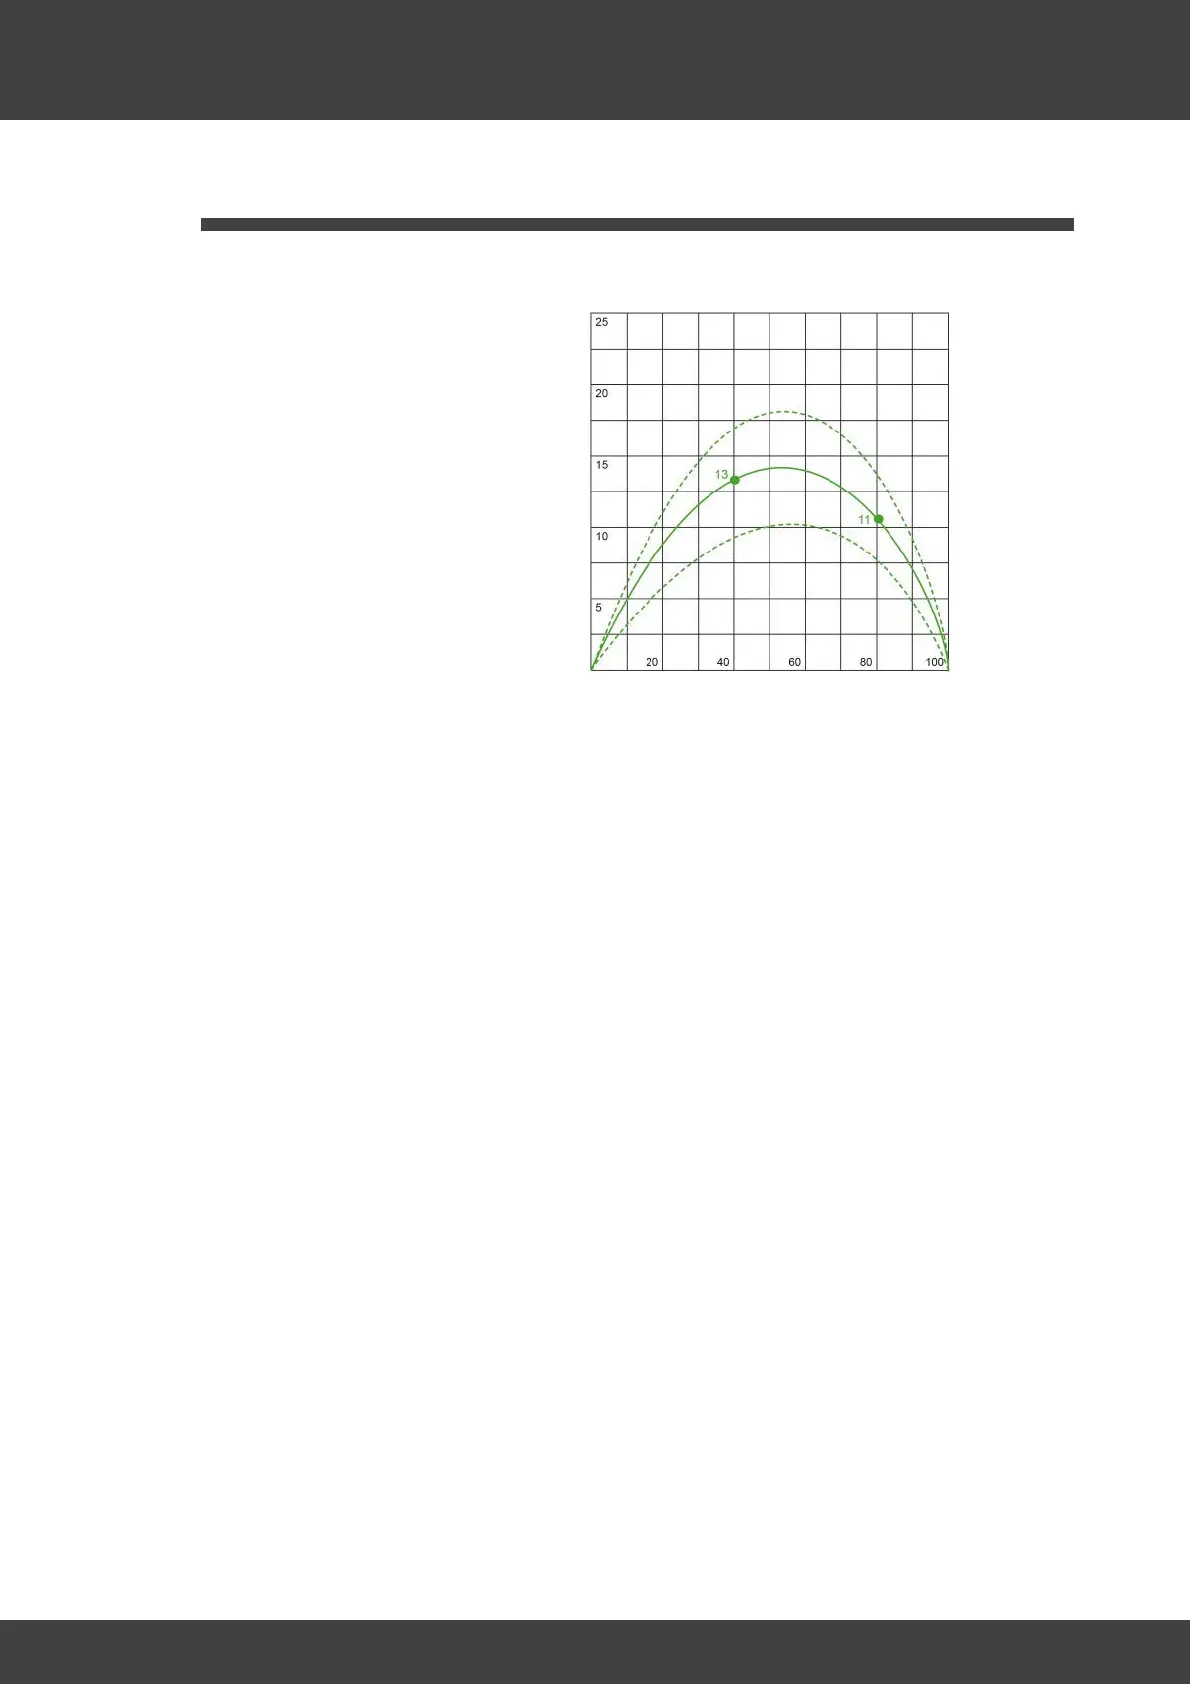
The horizontal axis of the table shows the ink coverage from 0 to 100 %. The vertical
axis indicates the percentage of the green dot gain curve around which the printer
prints some coverage more intensively. The dashed lines here just indicate the
tolerance field. In this example, an area coverage of 40% is actually printed with 53%
coverage (plus 13%). An area coverage of 80% is printed with 91% (plus 11%).
The dot gain should be largely compensated by the ICC profile used, but can also be
corrected in Photoshop using the "gradation curve" function by reducing the intensity
of the mid tones by a few percentage points. Such a manual correction of the dot gain
is always associated with some experience and test prints, but then brings usually very
satisfying results. Without correction of the Dot Gain a print result often appears too
dark. A seemingly logical correction at first glance by reducing the intensity in the
wallPen Processor fades the image not only in the midtones, but overall. It is better to
either leave the correction to a suitable ICC profile or to do it "manually" in a software
like Photoshop.
So suitable way to compensate dot gain is to use the function "Curves..." in Photoshop
or Affinity Photo similar to the curve shapes shown in the screenshots below....