59
Version 2.0.4 | © 2016-2021 wallPen GmbH
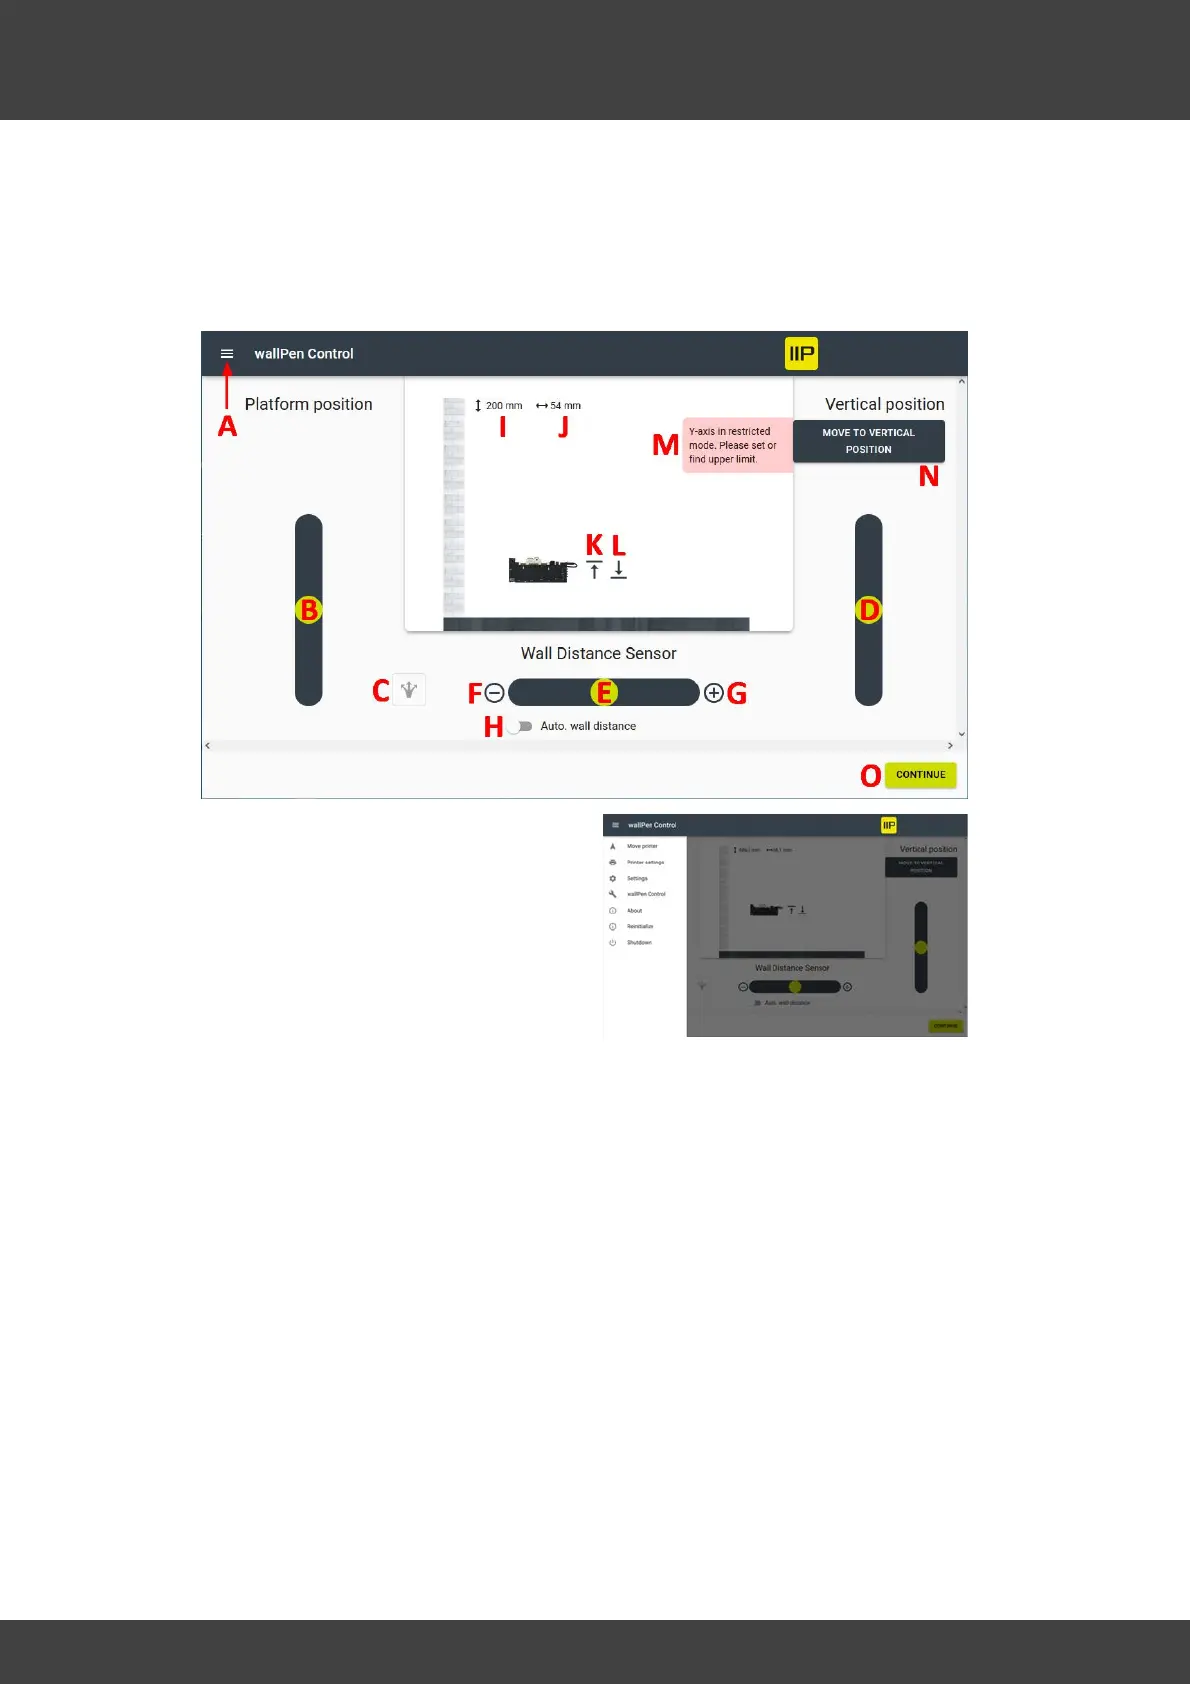
wallPen Control
5.2.2
Positioning
Overview
A - Accessing the main menu (see Chapter
"Software / wallPen Control / Settings"
below)
B - Drag the ball upwards to move the platform forward. Drag the ball downwards to
move the platform backwards.
C - Change the platform slider to a circle in order to steer the platform in case the
printer is not track mounted.
D - Drag the ball upwards to move the slide upwards. Drag the ball downwards to
move the slide downwards.
E - Drag the ball to the left (-) to move the printhead closer towards the substrate.
Drag the ball to the right (+) to move the printhead away from the substrate.
F - Push (-) to move the printer stepwise closer to the substrate. Each touch of the
button moves the printhead by 0.5 mm.
G - Push (+) to move the printer stepwise away from the substrate. Each touch of the
button moves the printhead by 0.5 mm.
H - This switch activates the laser sensor's automatic wall distance system to maintain
the current distance to the substrate in real time.