4.3.1
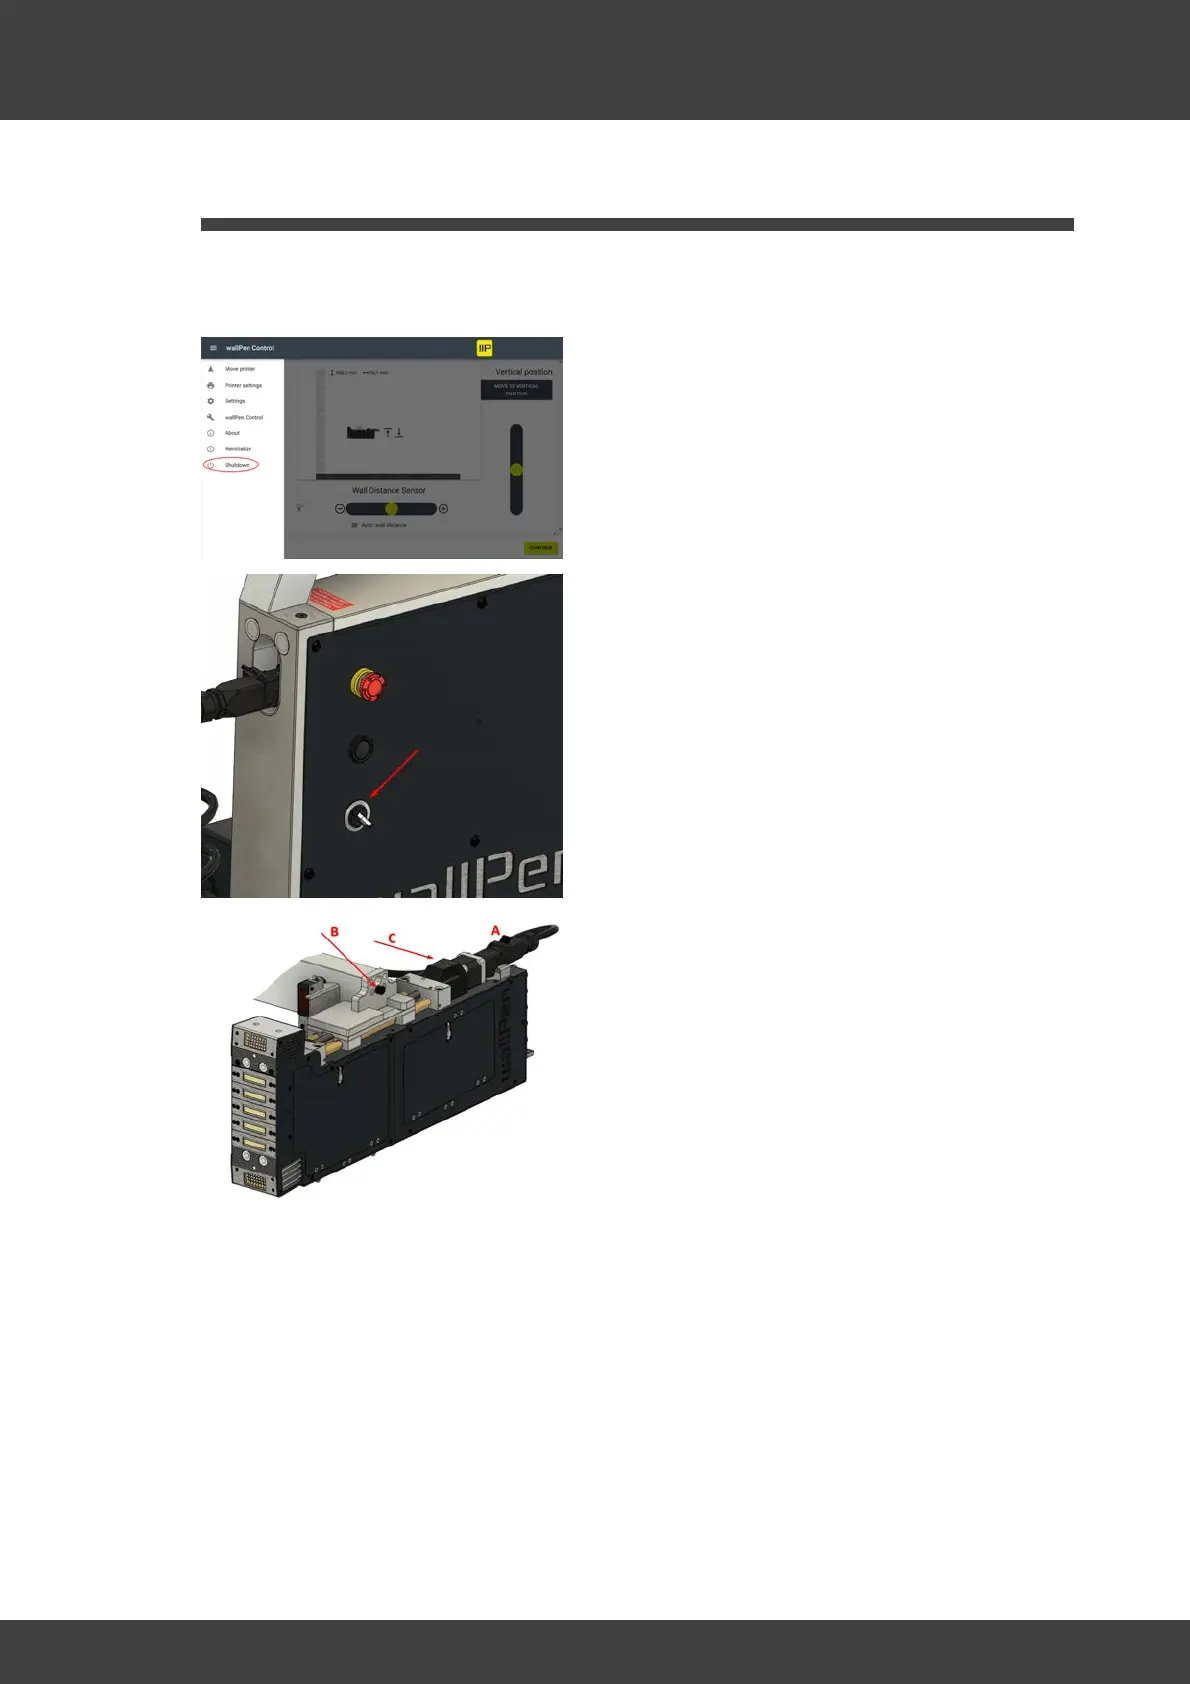
Select "Shutdown" from the main menu of
the wallPen Control software (see Chapter
"Software / wallPen Control / Settings")
No matter in which of the four possible
positions the printhead unit is mounted,
proceed according to this principle when
disassembling it:
Unlock the plug (A) by lifting the plastic
bracket upwards, pull it off to the rear and
lay the cable to the side so that it cannot be
damaged during further disassembly.
Remove the screw (B) and make sure that
the printhead unit does not slip off the two
pins while it is no longer secured. To be on
the safe side, hold it in position with one
hand.
Hold the printhead unit with both hands,
carefully pull it sideways from the locating
pins, hold it horizontal (C) and carefully
stow it in its transportation bag.
WARNING: Always handle the printhead
unit with the utmost care! It should always
be held, transported and stored in a