890557_d•en•01.07.2014 We reserve the right to carry out improvements
77
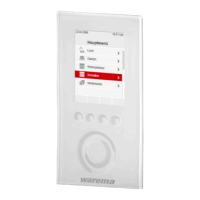
7.2.11.1 Hand-held transmitter 1
In this menu line, you can assign the first radio transmitter to the channel of
the Wisotronic or delete a radio transmitter already assigned again.
Use the touchwheel to select the [
Hand-held transmitter 1] menu line by
turning and pressing it. (The terms "Channel: --- and ID: --- change their
colour).
Select the desired channel (1...8) on the hand-held transmitter if you want to
allocate the 8-channel version of the EWFS Hand-held transmitter.
If you have not yet done so, open the battery compartment of your EWFS
Hand-held transmitter and press the L learn button in the battery compart-
ment.
The channel and the ID (serial number) of the EWFS Hand-held transmitter is
now shown on the right in the display.
The [Delete] function button deletes this assignment again; the [Cancel]
function button cancels the change.
7.2.11.2 Hand-held transmitter 2,3,4
Proceed as follows to learn in additional EWFS Hand-held transmitters:
Move the selection curve and selection bar with the touchwheel to the cor-
responding line and proceed as described in 7.2.11.1.
7.2.11.3 Hand-held transmitter
identifier
This menu line is for display purposes only. When you press a button on a
hand-held transmitter, the channel and the ID are displayed there at the right
for approx. 1 second to confirm the reception. After you have activated one
of the four upper lines by pressing the touchwheel, these values are ac-
cepted for that location.
Hand-held transmitter