DISASSEMBLY
PROCECURES
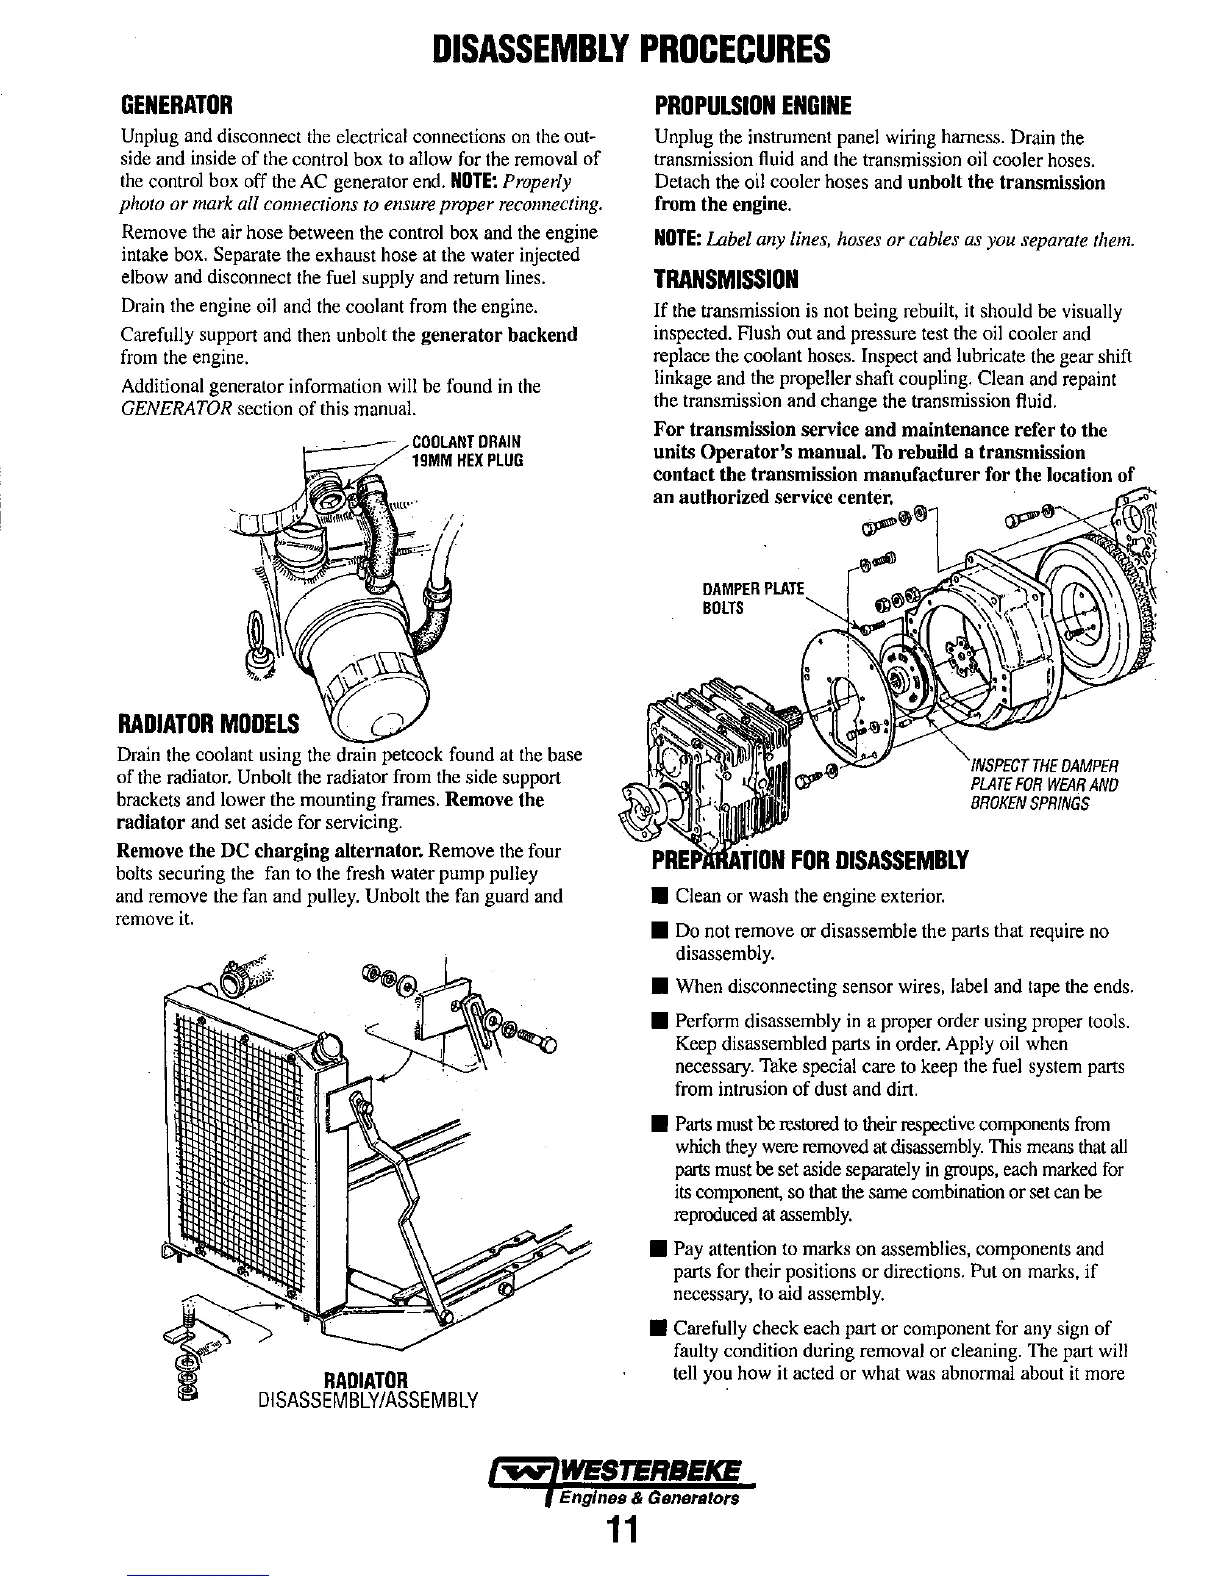
GENERATOR
Unplug
and
disconnect
the
electrical connections
on
the out-
side
and inside of the control box
to
allow
for
the
removal of
the
control box off the
AC
generator end.
NOTE:
Properly
photo or mark all connections
to
ensure proper
reconnecting.
Remove
the
air hose between
the
control
box
and
the
engine
intake
box.
Separate the exhaust hose
at
the water injected
elbow
and
disconnect the fuel supply
and
return lines.
Drain the engine
oil
and
the
coolant from the engine.
Carefully support
and
then unbolt
the
generator backend
from
the engine.
Additional generator information will be found
in
the
GENERATOR
section of this manual.
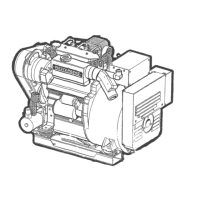
RADIATOR
MODELS
COOLANT
DRAIN
19MM
HEX
PLUG
Drain the coolant using
the
petcock found at
the
base
of
the
radiator. Unbolt the radiator from
the
side support
brackets and lower the mounting frames. Remove the
radiator and
set
aside for servicing.
Remove the DC charging alternator. Remove the four
bolts securing
the
fan
to
the fresh water pump pulley
and
remove the
fan
and pulley. Unbolt the
fan
guard
and
remove
it.
RADIATOR
DISASSEMBLY/ASSEMBLY
PROPULSION
ENGINE
Unplug
the
instrument panel wiring harness. Drain
the
transmission
fluid
and
the transmission
oil
cooler hoses.
Detach
the
oil
cooler hoses
and
unholt the transmission
from the engine.
NOTE:
Label any
lines,
hoses or cables
as
you
separate
them.
TRANSMISSION
If
the
transmission
is
not being rebuilt,
it
should
be
visually
inspected. Flush out and pressure test the
oil
cooler
and
replace the coolant hoses. Inspect
and
lubricate
the
gear shift
linkage
and
the
propeller shaft coupling. Clean
and
repaint
the transmission and change the transmission fluid.
For
transmission service
and
maintenance refer to the
units
Operator's
mannal,
To
rebuild a transmission
contact the transmission manufacturer for the location
of
DAMPER
BOLTS
''''',"<I'T
"u<DAMPER
PLATE
FOR
WEAR
AND
BROKEN
SPRINGS
PREPlUtAil(IN
FOR
DISASSEMBLY
• Clean
or
wash
the
engine exterior.
• Do not remove
or
disassemble the parts that require
no
disassembly.
• When disconnecting sensor wires, label and
tape
the
ends.
• Perform disassembly
in
a proper order using proper
tools.
Keep disassembled parts
in
order. Apply
oil
when
necessary.
Take
special care
to
keep
the
fuel system parts
from intrusion of dust and dirt.
•
Parts
must
be
restored
to
their
respective
components
from
which
they
were
removed
at
disassembly.
This
means
that
all
parts
must
be
set
aside
separately
in
groups,
each
marked
for
its
component,
so
that
the
same
combination
or
set
can
be
reproduced
at
assembly.
• Pay attention
to
marks on assemblies, components
and
parts for their positions or directions. Put on marks, if
necessary,
to
aid assembly.
• Carefully check each part or component for
any
sign of
faulty condition during removal or cleaning. The part
will
tell you how
it
acted
or
what
was
abnormal about
it
more
~
WESTERBEKE
Engines & Geners/ors
11