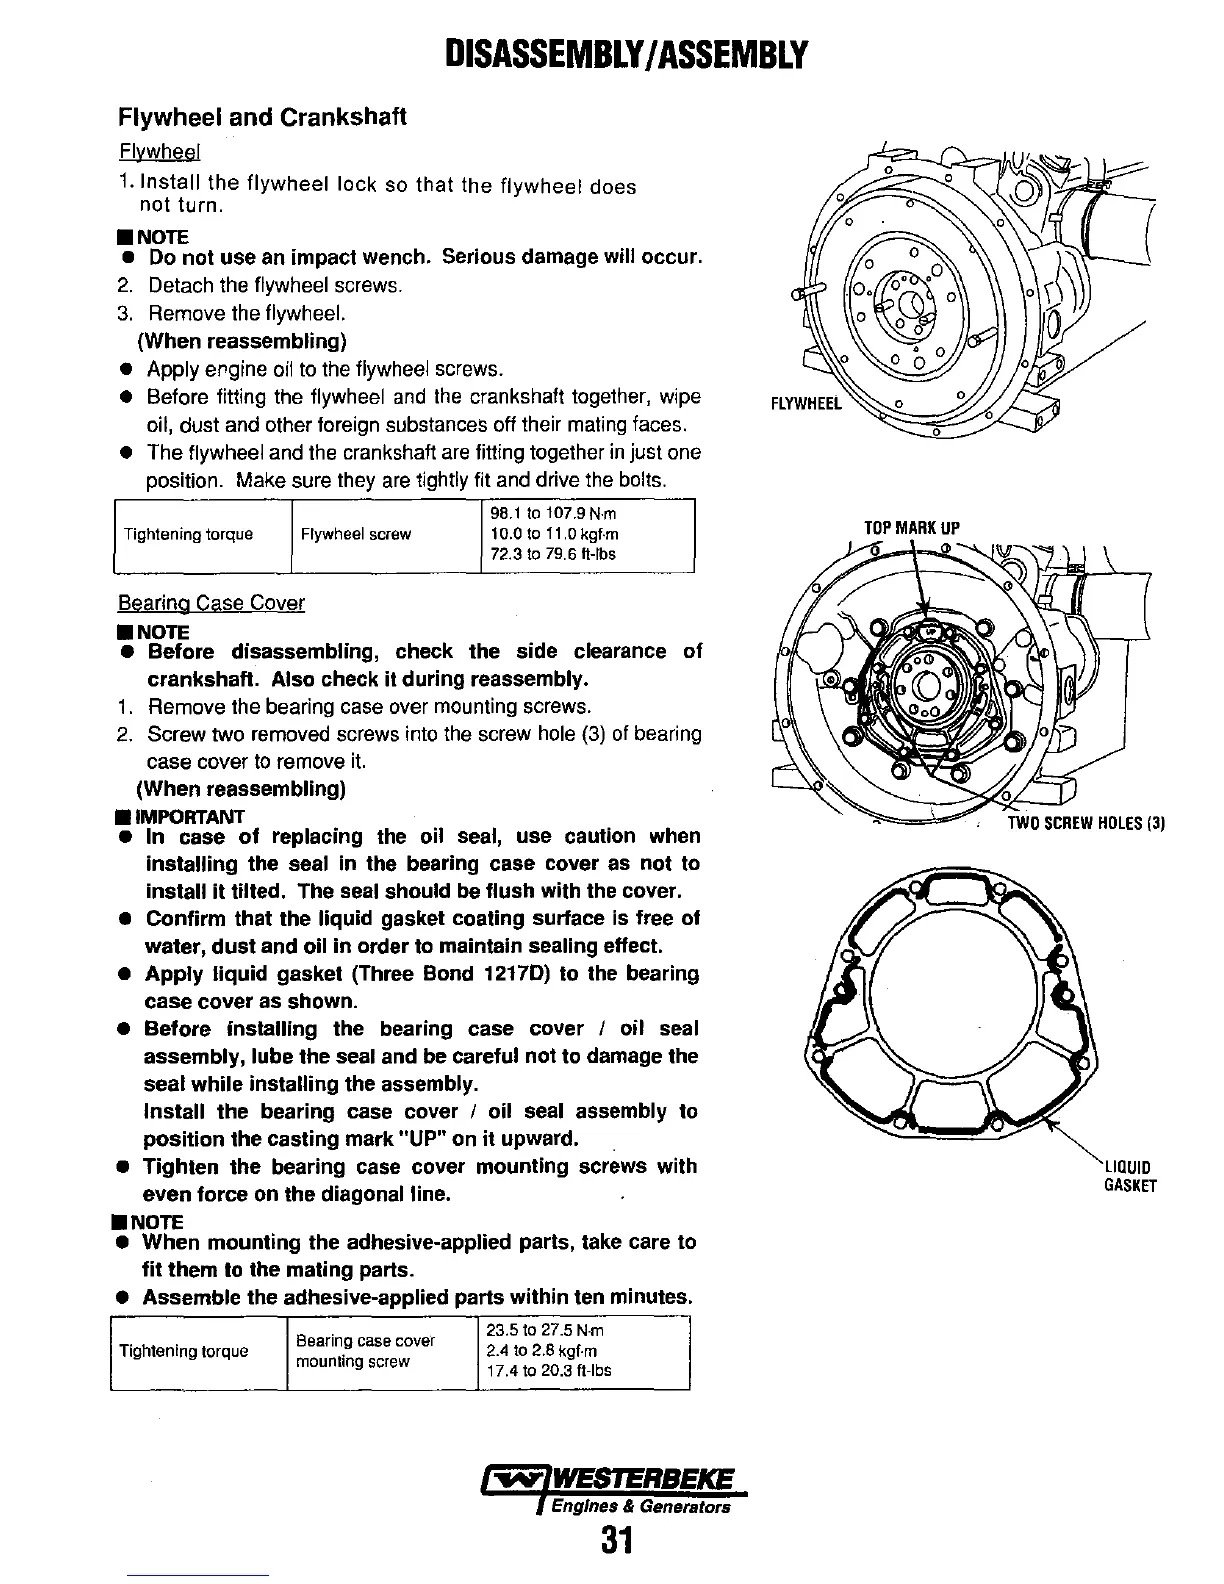
Flywheel and Crankshaft
Flywheel
DISASSEMBLY
I
ASSEMBLY
1.
Install the flywheel lock
so
that the flywheel does
not turn .
•
NOTE
•
Do
not
use an impact wench. Serious damage will occur.
2. Detach
the
flywheel
screws.
3. Remove the flywheel.
(When reassembling)
• Apply ergine
oil
to
the
flywheel
screws.
• Before fitting the flywheel
and
the
crankshaft together, wipe
oil, dust and other foreign substances
off
their
mating
faces.
• The flywheel
and
the
crankshaft
are
fitting together
in
just
one
position. Make sure they
are
tightly fit
and
drive
the
bolts.
Tightening torque
Flywheel
screw
Bearing Case Cover
•
NOTE
98.110 107.9
N·m
10.0 to 1 t
.0
kgf·m
72.3 to 79.6 «-Ibs
• Before disassembling, check the side clearance
of
crankshaft. Also check
it
during reassembly.
1.
Remove the bearing
case
over
mounting screws.
2.
Screw two removed screws into
the
screw
hole
(3)
of
bearing
case cover
to
remove
it.
(When reassembling)
•
IMPORTANT
• In case
of
replacing the oil seal, use caution when
installing
the seal in the bearing case cover as not to
install
it
tilted. The seal should
be
flush with the cover.
• Confirm that the liquid gasket coating surface is free
of
water,
dust
and oil
in
order to maintain sealing effect.
•
Apply
liquid gasket (Three Bond 12170) to the bearing
case cover as shown.
• Before installing the bearing case cover I
oil
seal
assembly,
lube the seal and be careful not to damage the
seal while installing the assembly.
Install
the bearing case cover I oil seal assembly to
position
the casting mark "UP" on
it
upward.
• Tighten the bearing case cover mounting screws with
even force on the diagonal
line .
•
NOTE
• When mounting the adhesive-applied parts, take care to
fit
them to the mating parts.
• Assemble the adhesive-applied parts within ten minutes.
Bearing
case
cove'r
23.5 to 27.5
N·m
Tightening torque
2.4 to 2.8 kgf·m
mounting
screw
17.4 to 20.3 «-Ibs
Engines & Generators
31
TOP
MARK
UP
TWO
SCREW
HOLES
(3)
LIQUID
GASKET