CI6X SERIES SPECTROPHOTOMETER
50
Renaming a Sample
The last measured sample can be renamed from the default time and date stamp if desired.
To rename a sample:
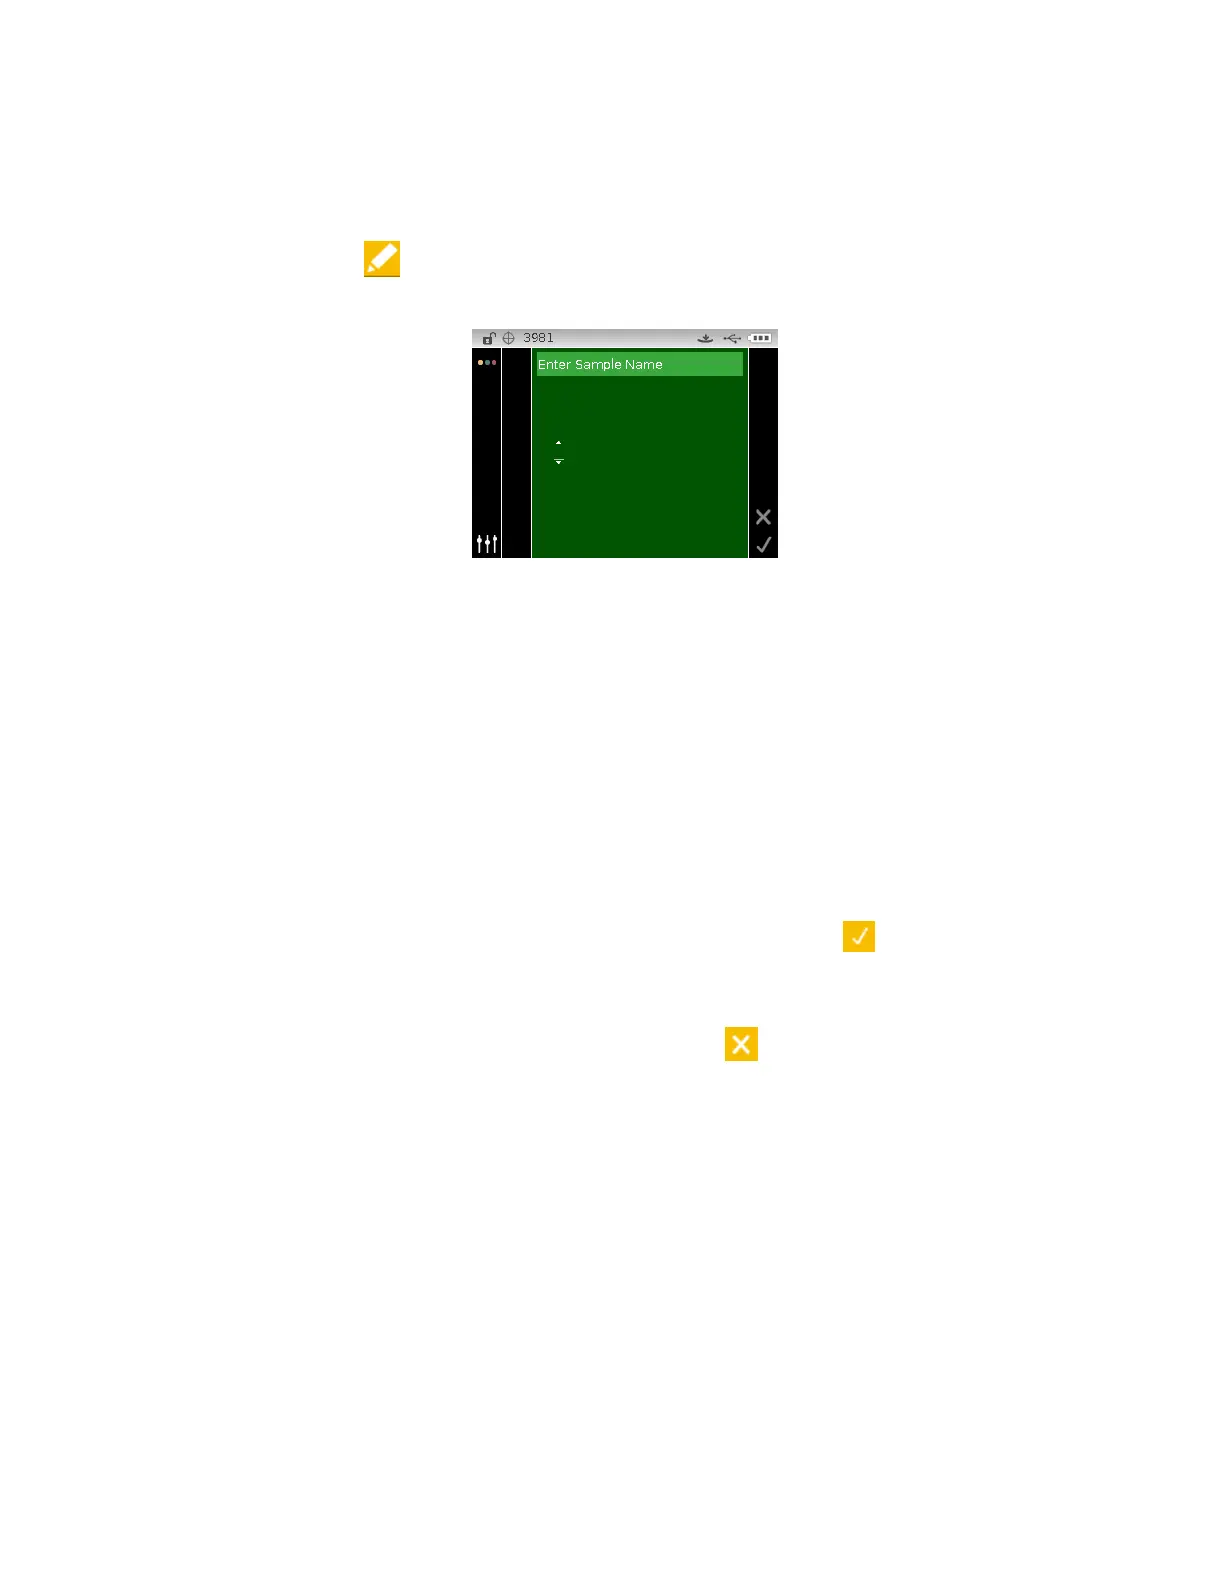
1. Select the Edit icon
and tap the Select button.
2. Tap the Left navigation button to move the highlight to the Enter Sample Name screen.
3. Tap the Select button to access the option.
4. Use the Up or Down navigation buttons to page through the alphanumeric list for the first
character of the name.
NOTE: You can also use the navigation control to rapidly scroll through a list by touching the
control between the arrows and circle left or right.
5. Tap the Select button set the first character.
6. Tap the Right navigation button to move the two arrows to the next character space and tap
the Select button.
7. Use the Up or Down navigation buttons as previously explained to set the character and tap
the Select button.
8. Continue until all characters for the name are set.
9. Tap the Right navigation button and highlight the Checkmark icon
in the Progress
Column.
10. Tap the Select button to save the name for the sample.
NOTE: To exit the name without saving, highlight the Exit
icon in the Progress Column and
tap the Select button.
Measurement Averaging
NOTE: Measurement Averaging must be activated in Configuration before averaging can be
performed. Refer to the Configuration Mode for procedure on setting averaging.
When the averaging function is activated, all modes (except calibration) require multiple
measurements per sample. Measurements are typically taken at various locations on a sample to
achieve average data values. Averaging should be used when measuring non-uniform samples,
textured materials, and any dark or high chroma colors.
The following example has an average setting of 2.
To measure using averaging: