October 2012
4-67
ColorQube 8570/8870 Service Manual
REP 4.1, REP 4.2
Repairs and Adjustments
Xerox Internal Use Only - Revised, 3rd Revision
REP 4.1 Preheater Lift Solenoid
Parts List on PL 4.1 Item 1
Removal
1. Remove the Control Panel Cover (REP 1.5).
2. Remove the Control Panel (REP 1.6).
3. Remove the Left Side Cover (REP 1.10).
4. Remove the Right Side Cover (REP 1.11).
5. Remove the Exit Cover (REP 1.7).
6. Remove the Ink Loader (REP 1.8).
7. Remove the Outer Duplex Guide (REP 3.4).
8. Remove the Upper Duplex Guide and Solenoid (REP 3.5).
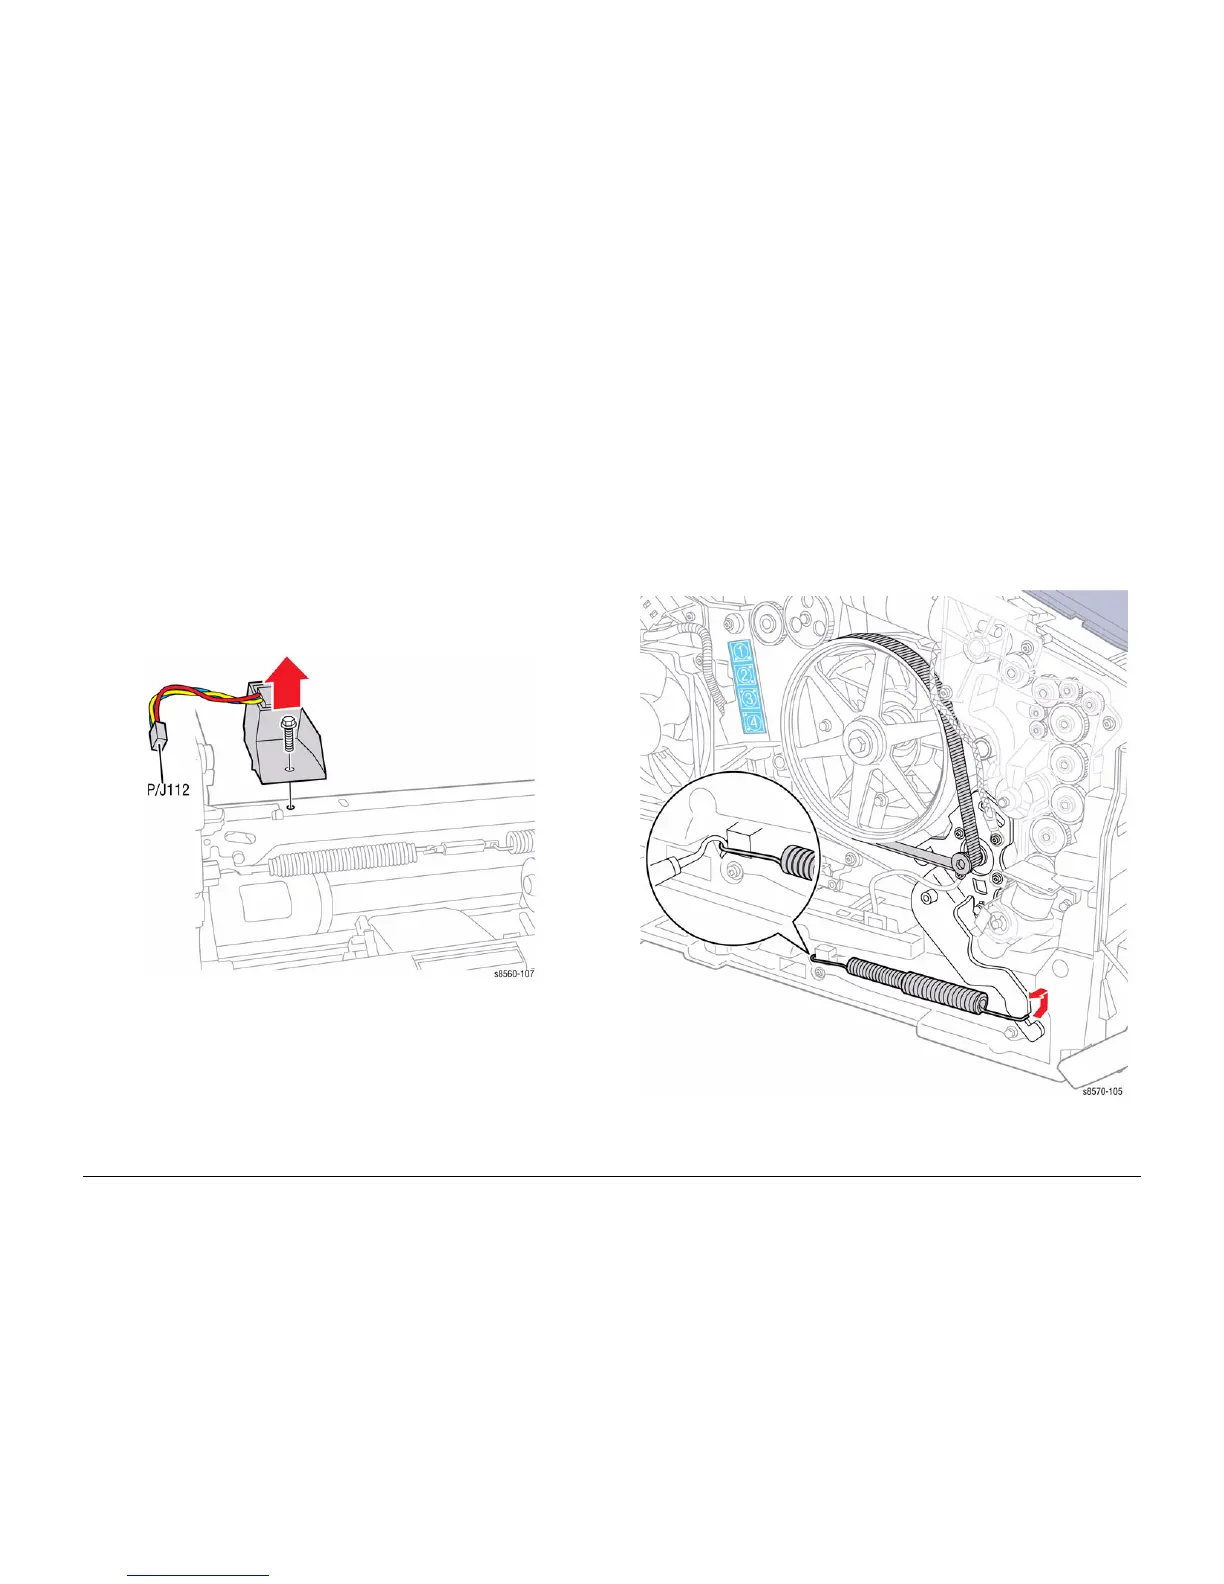
9. Disconnect the Preheater Lift Solenoid wiring harness connector P/J112.
10. Remove 1 screw that secures the Preheater Lift Solenoid to the Transfix Load Module.
11. Remove the Preheater Lift Solenoid.
Figure 1 Removing the Preheater Lift Solenoid
REP 4.2 Y-Axis Motor Assembly
Parts List on PL 4.1 Item 2
Removal
1. Remove the Control Panel Cover (REP 1.5).
2. Remove the Left Side Cover (REP 1.10).
3. Release tension on the Y-Axis Belt by pulling the end of the Spring Arm toward the side of
the printer.
4. Hold tension with one hand while removing the Y-Axis Belt with the other.
5. Remove 1 screw that secures the Ground Wire to the Y-Axis Motor Assembly.
6. Remove the Y-Axis Spring using either a spring hook or pliers, Brace the printer to pre-
vent movement while removing the spring.
Figure 1 Removing the Y-Axis Spring

 Loading...


