October 2012
4-98
ColorQube 8570/8870 Service Manual
REP 6.2
Revised, 3rd Revision - Xerox Internal Use Only
Repairs and Adjustments
REP 6.2 No Paper Sensor
Parts List on PL 6.1 Item 2
Removal
1. Remove the Front Door (REP 1.1).
2. Remove Tray 2.
3. Remove the Pick Assembly and Retard Rollers (REP 3.10).
4. Remove the Lower Inner Duplex Guide (REP 3.2).
5. Remove the Inner Simplex Guide (REP 3.1).
6. Release the 4 hooks that secure the No Paper Sensor to the left side of the Pick Assem-
bly recess.
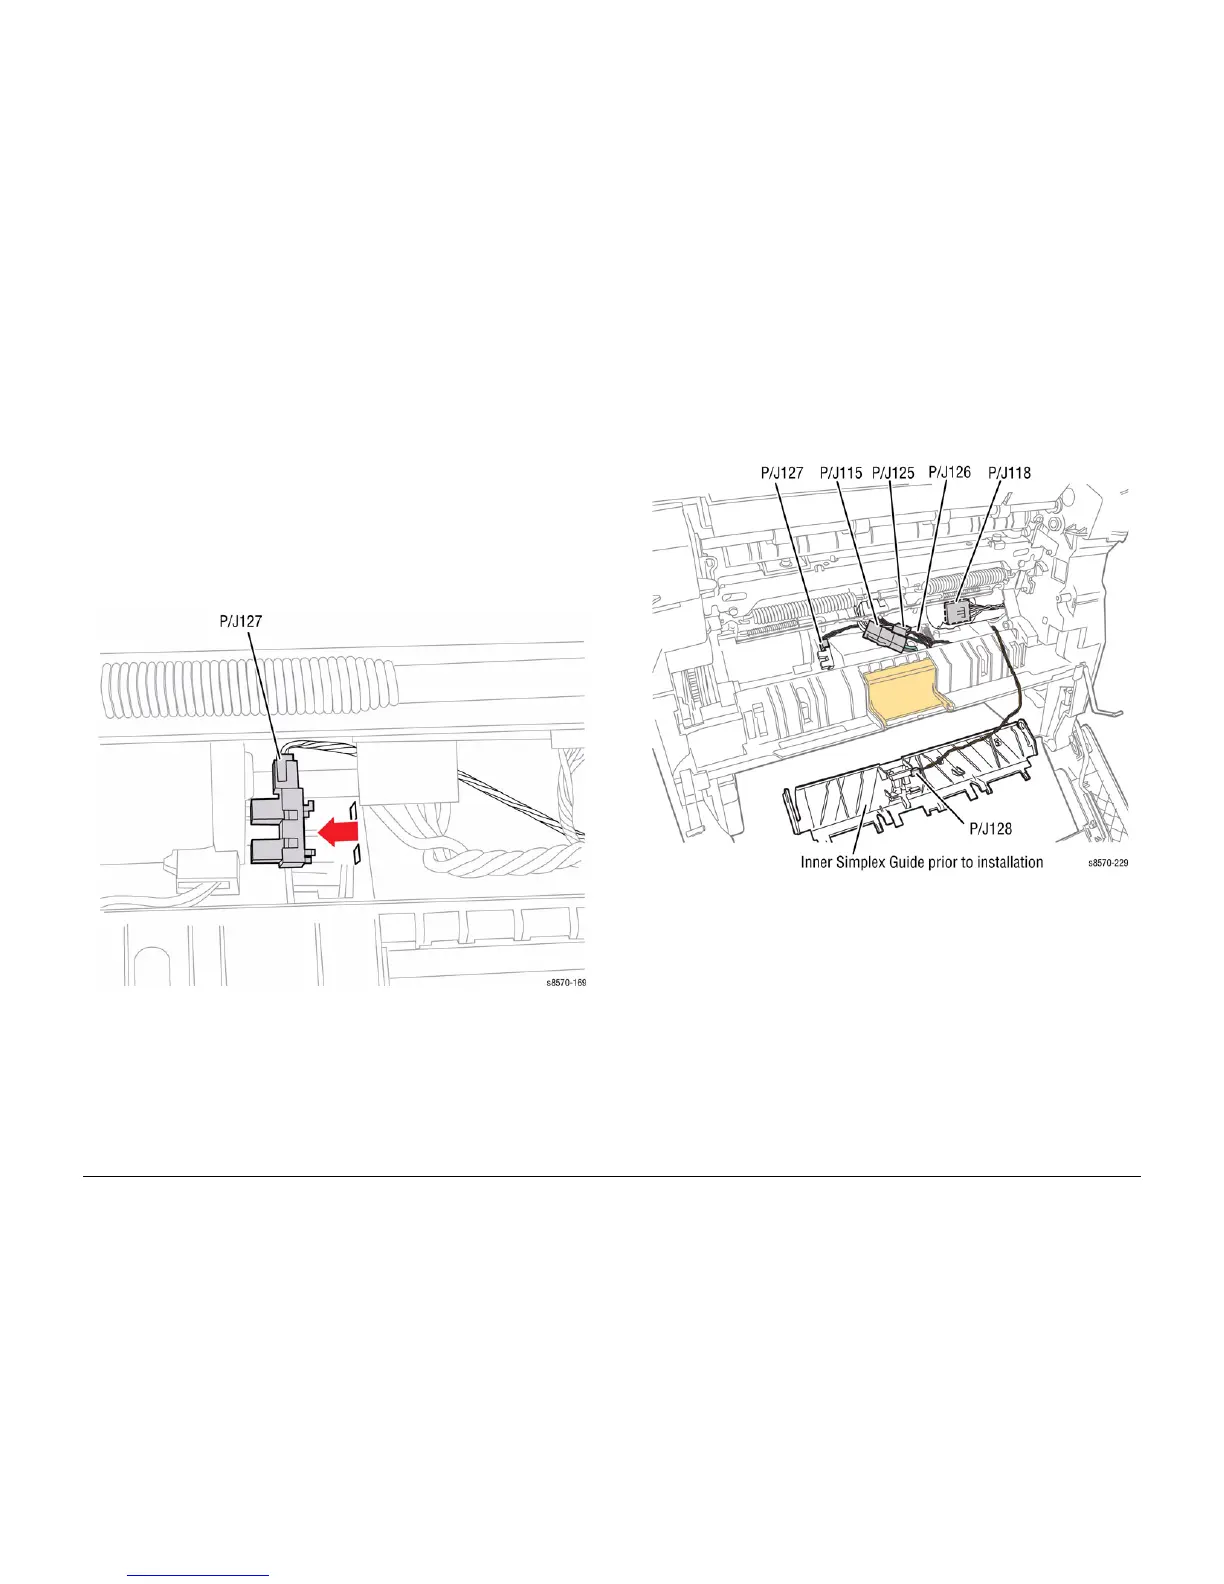
7. Disconnect the wiring harness connector P/J127 from the wiring harness and remove the
Sensor.
Figure 1 Remove the No Paper Sensor
Replacement
Disconnect the Preheater Assembly wiring harness connectors P/J125 and P/J115 to make
additional room to replace the Sensor. Release the lock on the wiring harness connector P/
J115 to remove it from the Preheater Assembly.
Figure 2 Wiring Connector Locations

 Loading...


