October 2012
4-97
ColorQube 8570/8870 Service Manual
REP 6.1
Repairs and Adjustments
Xerox Internal Use Only - Revised, 3rd Revision
REP 6.1 Paper Size Switch
Parts List on PL 6.1 Item 1
Removal
1. Remove the Control Panel Cover (REP 1.5).
2. Remove the Right Side Cover (REP 1.11).
3. Remove Tray 2.
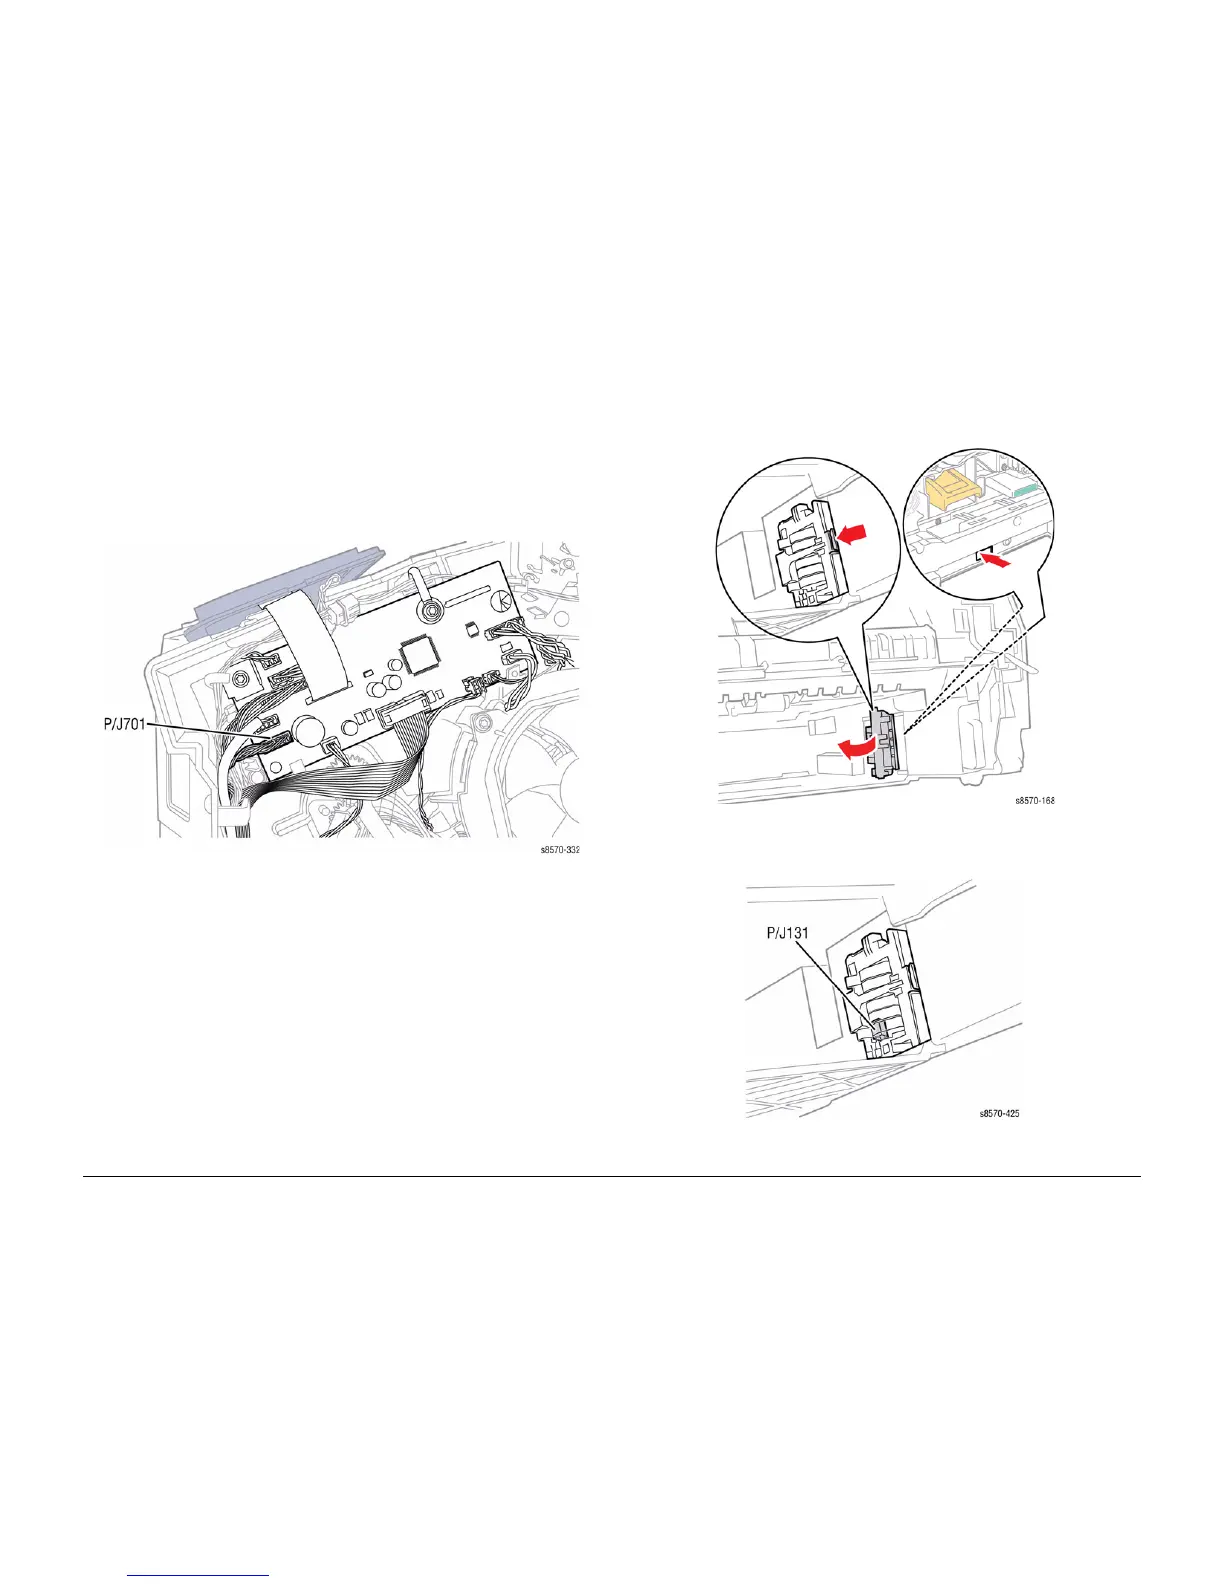
4. Disconnect the Paper Size Switch wiring harness connector P/J701 from the I/O Board.
5. Unlace the harness from the retainers.
Figure 1 Disconnecting the Wiring Harness Connector
6. From the right side of the printer, push the Paper Size Switch inward while pushing the
latch rearward the latch rearward and releasing the front of the switch from the chassis.
7. Pull the wiring harness through the opening in the chassis and remove the switch from the
tray cavity.
Figure 2 Removing the Paper Size Switch
8. Disconnect the wiring harness connector P/J131 from the Paper Size Switch.
Figure 3 Disconnecting the Wiring Harness Connector

 Loading...


