12 / 99 www.xovis.com
By clicking it, the following dialog appears:
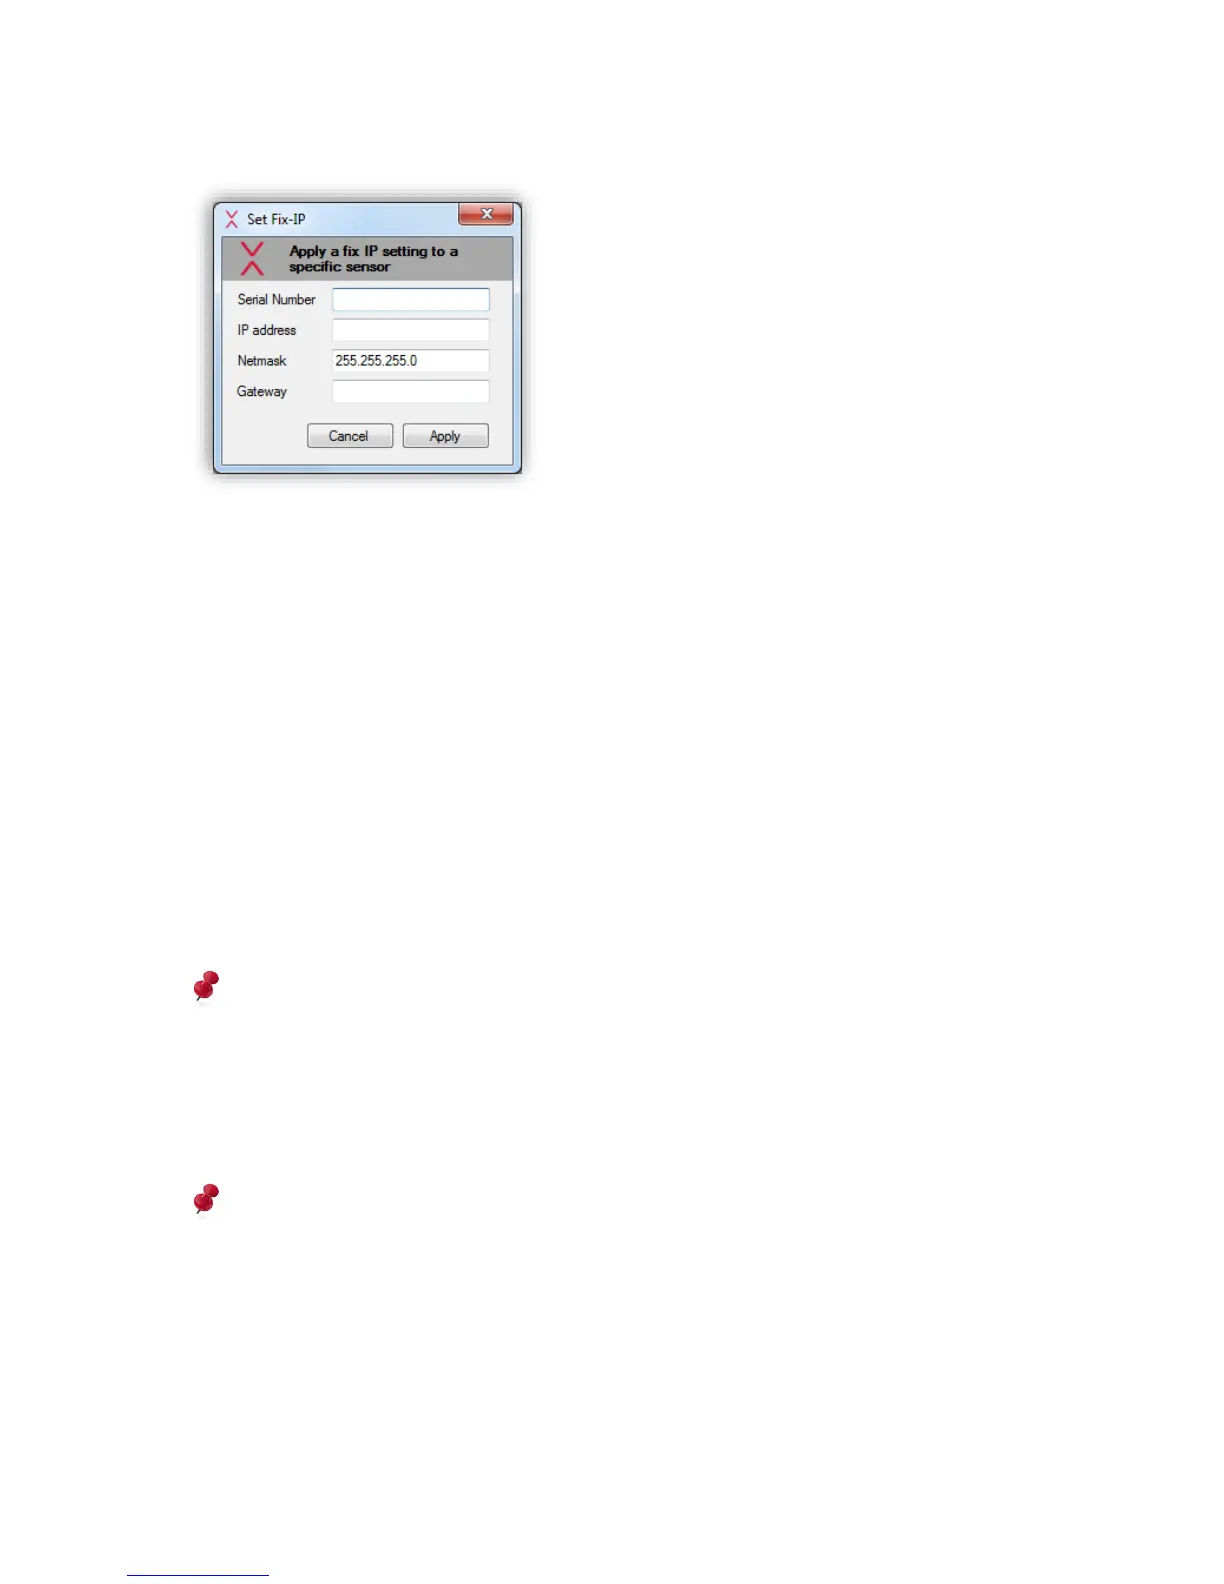
Figure 11: Set Fix-IP dialog
In the first field, the serial number of the sensor needs to be specified. The correctness of
this number is very important and needs to be in the format XX:XX:XX:XX:XX:XX (X to be
replaced). The serial number can be found on the back side of the sensor or on the package
in which the sensor was delivered.
In the fields “IP address”, “Netmask” and “Gateway”, the desired network settings need to be
specified, i.e. the fix IP settings to be applied on this sensor. All fields are required. When
pressing “Apply”, the specified settings are sent to the sensor and a message informs the
user to be patient for 20 seconds. After this time, the sensor should have come up with the
new IP settings.
If the PC running the Xovis Sensor Explorer is located in the same IP range or allows routing
to the IP range of the previously configured sensor, the Xovis Sensor Explorer is now able to
discover the sensor when specifying the proper IP range and clicking again on the “Scan”
button.
The sensor needs to be attached to the same physical subnet as the Windows PC running
the Xovis Sensor Explorer.
As the static IP was only set temporarily and will be lost with the next reboot of the sensor it
is now important to apply the desired IP settings permanently using the web interface (see
following chapters).
After temporarily applying a static IP with this procedure, it is important to permanently
set the fixed IP-address in the web interface afterwards!