CRANKCASE
5-78
• Tap on one side of the crankcase with a
soft-face hammer. Tap only on reinforced
portions of the crankcase, not on the crank-
case mating surfaces. Work slowly and
carefully and make sure the crankcase
halves separate evenly.
EAS25580
CHECKING THE CRANKCASE
1. Thoroughly wash the crankcase halves in a
mild solvent.
2. Thoroughly clean all the gasket surfaces and
crankcase mating surfaces.
3. Check:
• Crankcase
Cracks/damage → Replace.
• Oil delivery passages
Obstruction → Blow out with compressed air.
ET5YU1022
CHECKING THE BEARINGS AND OIL SEAL
1. Check:
• Bearings
Clean and lubricate the bearings, then rotate
the inner race with your finger.
Rough movement → Replace.
• Oil seal
Damage/wear → Replace.
EAS25590
CHECKING THE OIL PIPE
1. Check:
• Oil pipe
Damage → Replace.
Obstruction → Wash and blow out with com-
pressed air.
EAS25610
CHECKING THE OIL PUMP DRIVE
1. Check:
• Oil pump drive gear
• Oil pump driven gear
Chips/pitting/roughness/wear → Replace the
defective part(s).
ET5YU1023
INSTALLING THE BEARING RETAINER
1. Install:
• Bearing retainer “1”
NOTE:
• Install the bearing retainer “1” with its “OUT”
mark “a” facing outward.
• Apply locking agent (LOCTITE
®
) to the threads
of the bearing retainer bolt.
EAS25690
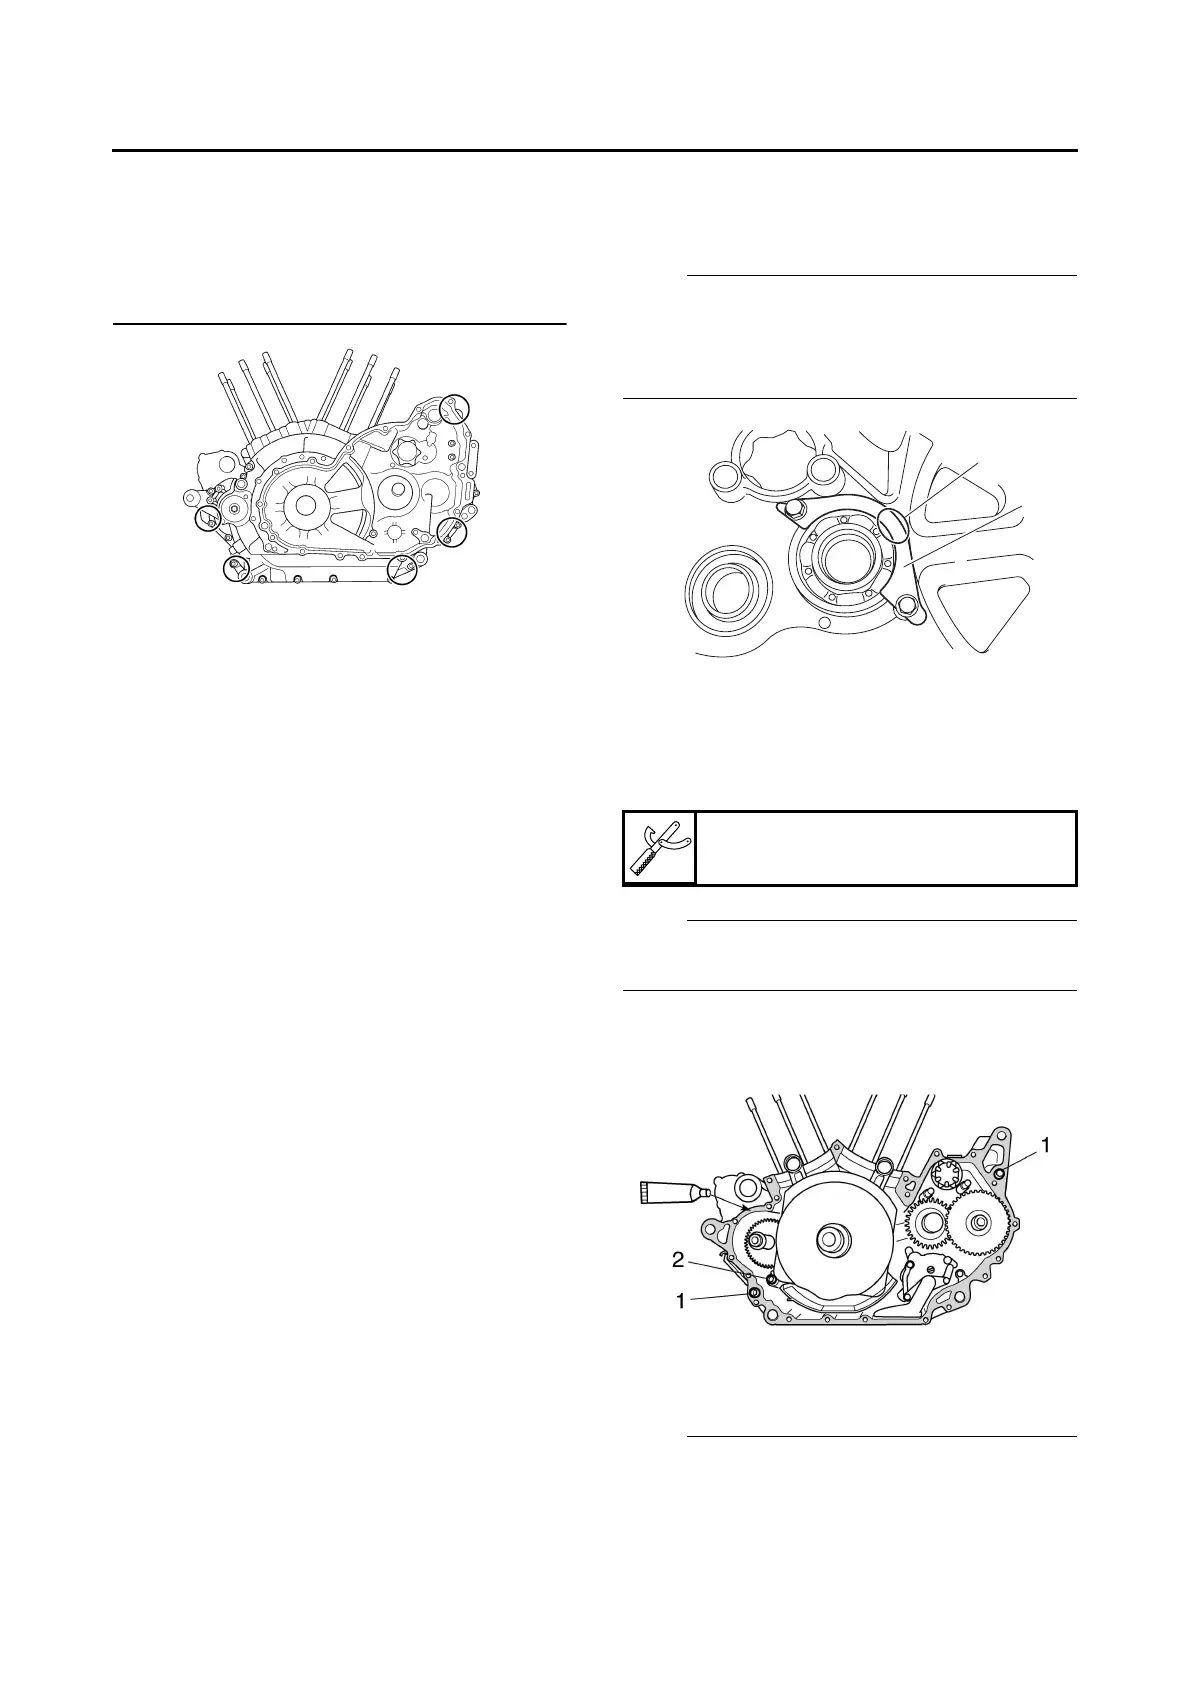
ASSEMBLING THE CRANKCASE
1. Apply:
• Sealant
(onto the crankcase mating surfaces)
NOTE:
Do not allow any sealant to come into contact
with the oil gallery.
2. Install:
• Dowel pins “1”
• Joint pipe “2”
3. Install:
• Left crankcase
(onto the right crankcase)
NOTE:
• Turn the shift drum segment “1” to the position
shown in the illustration. In this position, the
shift drum segment’s teeth will not contact the
crankcase during crankcase installation.
Yamaha bond No. 1215
90890-85505
OUT
a
1

 Loading...