12 13
1
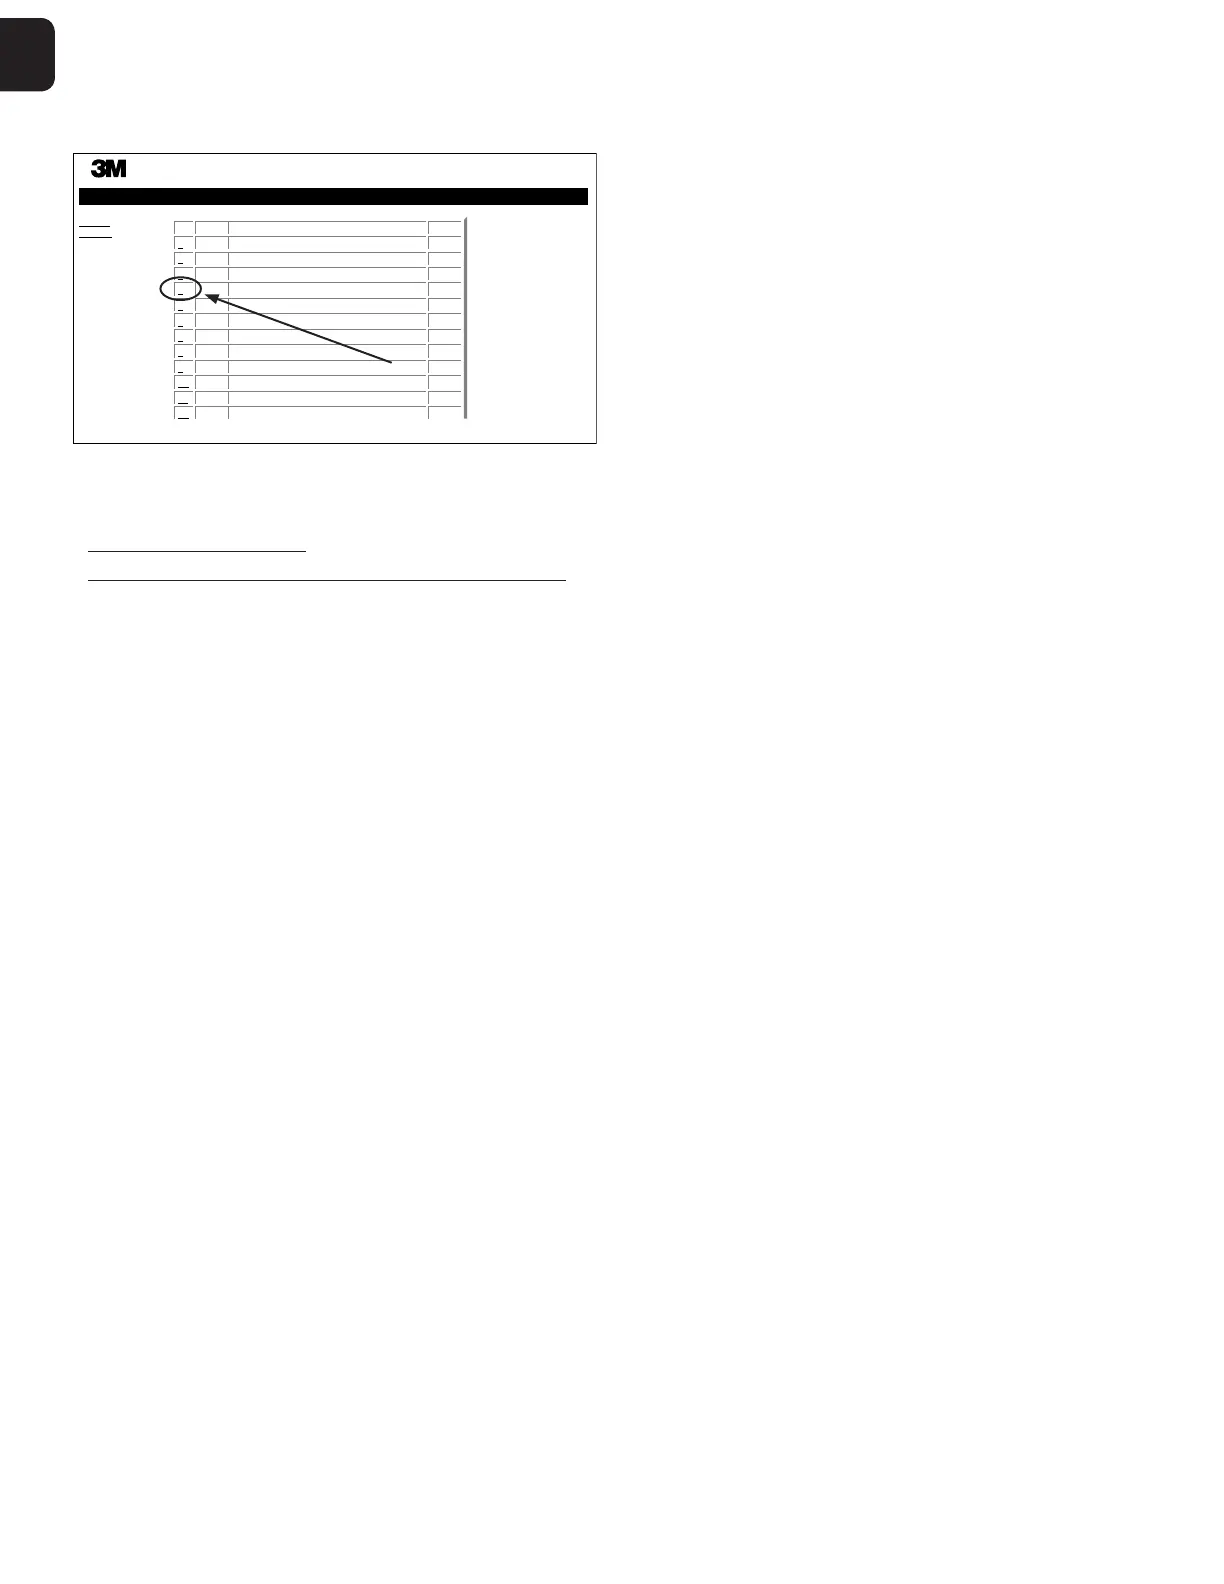
Using the BI History Page
To view or print an individual record, click on the ID number of the desired record to
navigate to the Results Detail page for that BI.
Status
History
Well#
#3
#9
#2
#1
#10
#9
#10
Start Time
2017-09-16 08:30:38
2017-09-16 07:19:47
2017-09-16 07:08:18
2017-09-16 07:07:53
2017-09-16 07:05:11
2017-09-16 06:47:08
2017-09-16 06:40:54
Result
...
–
–
+
+
–
+
3M™ Attest™ Auto-reader
ID
1
2
3
4
5
6
7
#2
#1
#10
#9
#10
2017-09-16 06:39:49
2017-09-16 06:39:05
2017-09-16 07:32:00
2017-09-16 07:23:37
2017-09-16 07:20:24
–
+
–
–
+
8
9
10
11
12
Note 1: Column 1, ID is the assigned ID number with ID 1 representing the newest
record and ID 100 representing the oldest record. To help find a particular record, all
columns are sortable, simply click once on the column heading to sort in ascending order
and click a second time to reverse the order.
Note 2: The History page refreshes less frequently than the Status page. Until the BI result
is available, the History page displays in the Results column indicating incubation is
still inprocess.
Using the Configuration Page
Certain setup and configuration options are available on the password protected 3M™ Attest™ Autoreader 490 Web App Configuration page. Ideally, the 3M™ Attest™ Autoreader
490 should be empty (i.e. have no incubating BIs) when it is reconfigured. Navigate to the Configuration page by entering either:
1) http://attestxxxxxx/protect/config.htm (where xxxxxx is the 6digit unit serial number), or
2) http:// xxx.xxx.xxx.xxx/protect/config.htm (where xxx.xxx.xxx.xxx is the IP address) in the web browser address bar and pressing Go or enter. A security screen will appear. Fill in the
editable fields as follows:
User name: manager
Password: Attest
and pressOK.
 Loading...