EasyManua.ls Logo

Acom B6 User Manual

Acom B6
130 pages
To Next Page IconTo Next Page
Page #1 background imageLoading...
Page #1 background image
Operation Manual
You must read the Usage and Safety Precautions before use.
©2021 ZOOM CORPORATION
Copying or reprinting this manual in part or in whole without permission is prohibited.
Product names, registered trademarks and company names in this document are the property of their respective companies. All trademarks and
registered trademarks in this document are for identification purposes only and are not intended to infringe on the copyrights of their respective owners.
Proper display is not possible on grayscale devices.

Table of Contents

Question and Answer IconNeed help?

Do you have a question about the Acom B6 and is the answer not in the manual?

Acom B6 Specifications

General IconGeneral
BrandAcom
ModelB6
CategoryComputer Hardware
LanguageEnglish

Summary

B6 Structure and Signal Flow

Input and DI Functions

Bypass and Memory Management

Play Mode Overview

Touchscreen Operation

Menu Screen Navigation

Hardware Overview

Top Panel Controls

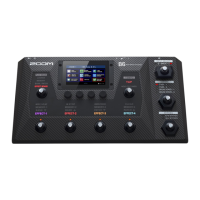
Details the PLAY MODE selection, parameter knobs, touchscreen, TAP Switch, INPUT SELECT, and DI TYPE switches.

Rear and Side Panel Connections

Describes the output jacks, input jacks, external loop jacks, and SD card slot.

Making Connections

Connecting Audio Sources

Instructions for connecting basses, music players, amps, monitors, headphones, and external effects.

Connecting Peripherals and Computer

Details on connecting wireless adapters, expression pedals, and computers via USB.

SD Card Management

Power Operations

Turning the Power On

Detailed procedure for powering up the B6 unit.

Turning the Power Off

Detailed procedure for powering down the B6 unit.

Master Level Adjustment

Adjusting Master Volume

How to control the overall output volume of the B6.

Output EQ and Volume

Adjusting Output EQ/Volume

How to set the equalizer and volume for output signals.

Effect Control During Playback

Turning Effects On/Off

How to toggle individual effects on or off using footswitches in EFFECT BOARD mode.

Bank and Patch Memory Switching

Switching Memories While Playing

How to select different banks and patch memories during performance.

Patch Memory Navigation

Switching Memories in a Bank

How to select patch memories within the current bank using touchscreen or footswitches.

Looper Operation

Looper Functions

Advanced Looper Settings

SD Card Looper Functions

Effect Management

Replacing Effects

Substituting Effects

How to replace existing effects with different ones in a patch memory.

Adjusting Effect Parameters

Adding Effects

Adding New Effects

How to insert additional effects into existing patch memories.

Deleting Effects

Removing Unnecessary Effects

How to delete effects from patch memories.

Patch Memory Customization

Master Tempo Adjustment

Patch Memory Management

Deleting Patch Memories

How to remove unwanted patch memories.

Patch Memory Creation and Editing

Creating New Patch Memories

How to create new patch memories by selecting effects and preamps.

Bank Management

Deleting Banks

Removing Unused Banks

Steps to delete banks and their associated patches.

Creating Banks

New Bank Creation

How to create new banks and assign patch memories to them.

Using the Tuner

Tuner Activation and Operation

How to turn on the tuner and adjust bass pitch.

Rhythm Functionality

Impulse Response (IR) Usage

Loading Impulse Response Data

Audio Interface Functions

Driver Installation (Windows)

Steps to install the necessary drivers for Windows computers.

Connecting to Computer

How to connect the B6 to a computer or mobile device via USB.

Audio Interface Settings

How to adjust recording levels and monitoring balance.

System Settings

Firmware Management

Factory Default Restoration

Resetting the B6

How to restore the B6 to its original factory default settings.

SD Card Information

Formatting SD Cards

Troubleshooting Guide

Power and Sound Issues

Solutions for power-on failures and quiet/no audio output.