142 1100 Series DAD and MWD User Manual
8Maintenance
20
Insert the flow cell capillaries and tighten them fingertight.
Use the wrench and torque adapter as described on
page 143 and tighten the fittings alternately.
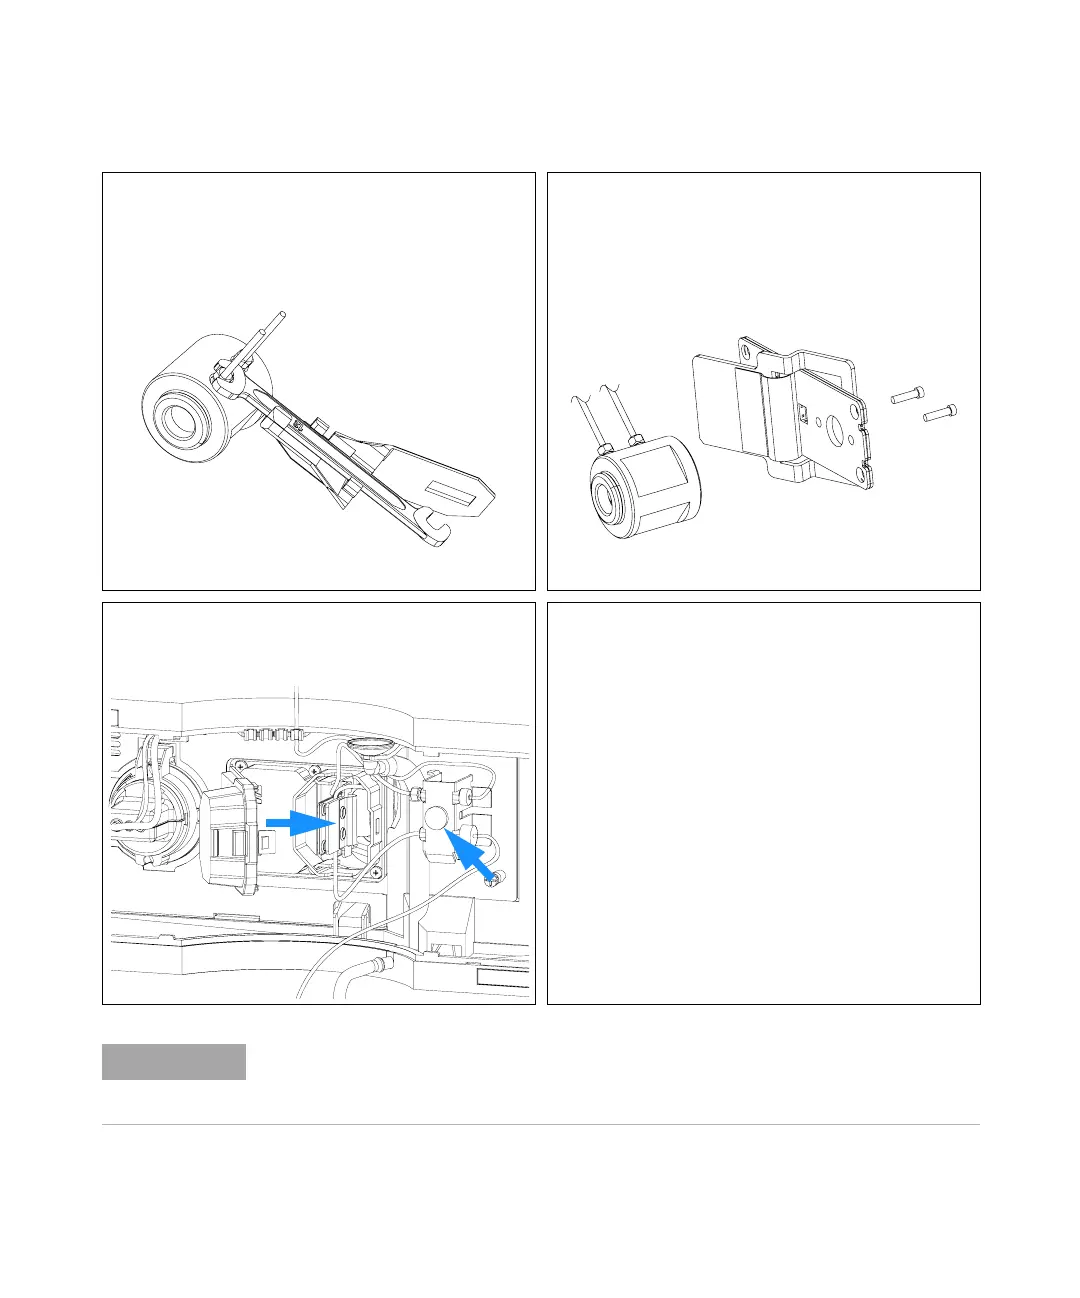
21 Reassemble the flow cell body to the holder.
22 Re-install the flow cell and connect the capillaries to the
union holder.
Next Steps:
23
Perform a leak test with the flow cell outside of the
detector.
24 If no leak is observed, install the flow cell and you are
ready to work.
25 Make sure that the flow cell assembly is inserted correctly
and fits perfectly in the optical unit (especially when PEEK
capillaries are used).
NOTE
The cell body can be fitted in two positions to allow the capillaries routed upwards or
downwards (depending on where the column is located). Route the capillaries directly
column (inlet) and waste assembly (outlet).
 Loading...


