Using the Removable Ion Source 5
To Change the Ion Source
Operation Manual 95
3 Click the Begin button to purge the instrument.
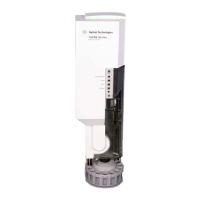
4 When prompted, remove the RIS chamber door and attach
the RIS probe extraction tool. See “To Install the RIS Probe
Extraction Tool” on page 97.
5 Click Next to purge the chamber and pump down.
6 When the system is ready for source removal, click Next to
retract the transfer line and open the gate valve.
The RIS status area will note when the Gate Valve is Open and
the Transfer Line is Full Out.
7 When prompted, remove the source. See “To Remove the
Source from the Analyzer Chamber” on page 99.
8 Once the source is retracted fully into the chamber, click Next
to close the gate valve and purge the cooling chamber. The
purge takes approximately 10 minutes.
9 When prompted, open the cooling chamber and change the
ion source. See “To Change the Ion Source on the RIS Probe
Extraction Tool” on page 101.
10 After replacing the source and securing the cooling chamber
door, click Next to purge and pump down.
11 When prompted that the system is ready for source
installation, click Next to retract the transfer line and open
the gate valve.
12 When prompted, install the ion source in the analyzer
chamber. See “To Install the Ion Source in the Analyzer
Chamber” on page 103.
13 Verify in the RIS Status that the ion source temperature
readback shows a source temperature. This ensures that the
source is fully inserted into its socket.
14 Click Next to close the gate valve and vent the RIS cooling
chamber.
CAUTION
If the ion source is not fully installed, it may interfere with the gate
valve as it closes. Damage to the RIS, the valve, or the transfer line may
occur.
 Loading...


