Using the Removable Ion Source 5
To Install the Ion Source in the Analyzer Chamber
Operation Manual 103
To Install the Ion Source in the Analyzer Chamber
This procedure is part of an automated series of steps
controlled by MassHunter. Do not attempt this procedure unless
prompted by MassHunter. The RIS Status area on the GC/Q-TOF
Tune tab must show the Gate Valve is Open and the Transfer Line is
Full Out.
Procedure
1
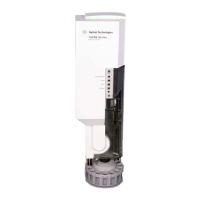
Make sure the alignment guide on the RIS handle is in the
twelve o’clock position. Push the RIS handle gently towards
the analyzer chamber and allow it to extend into the analyzer
chamber. This will seat the ion source securely into its socket.
2 Once the RIS handle is fully extended, turn the RIS handle
clockwise until the alignment guide is in the two o’clock
position to release the ion source body from the RIS bayonet.
3 Pull the RIS handle toward you until it is fully retracted into
the RIS cooling chamber.
4 Return to step 13 in the “To Change the Ion Source” on
page 94.
CAUTION
Take care when walking past the front of the instrument when the RIS
handle is fully extended, to avoid damage to the instrument. When
closed, the RIS handle extends 19 inches out from the front of the
instrument.
CAUTION
Do not try to guide the ion source in manually. Push the RIS handle
gently and allow the RIS bayonet to slide on its own. The RIS bayonet
will slide in straight if it is allowed to move naturally.
 Loading...


