CHAPTER 5. OPERATING INSTRUCTIONS
HF-2500A HIGH FREQUENCY WELD CONTROL
5-22 990-371
Press the voltage V key to save the setting as a lower voltage limit.
Make several more welds and verify that under normal circumstances, the limits are not reached
and the welds are not aborted. If the limits are reached under normal welding conditions, adjust
the levels and times of the upper and lower voltage limits accordingly.
RUN
screen and make several welds. Observe that under normal conditions,
the welds are not aborted, and that consistent, strong welds can be produced.
Try making welds with only one part present. Also try making welds with misaligned parts.
Observe that the power supply terminates the weld as soon as the voltage limits are reached. If
the voltage limits are not being reached with these conditions present, return to the voltage
monitor screen and adjust the limits accordingly.
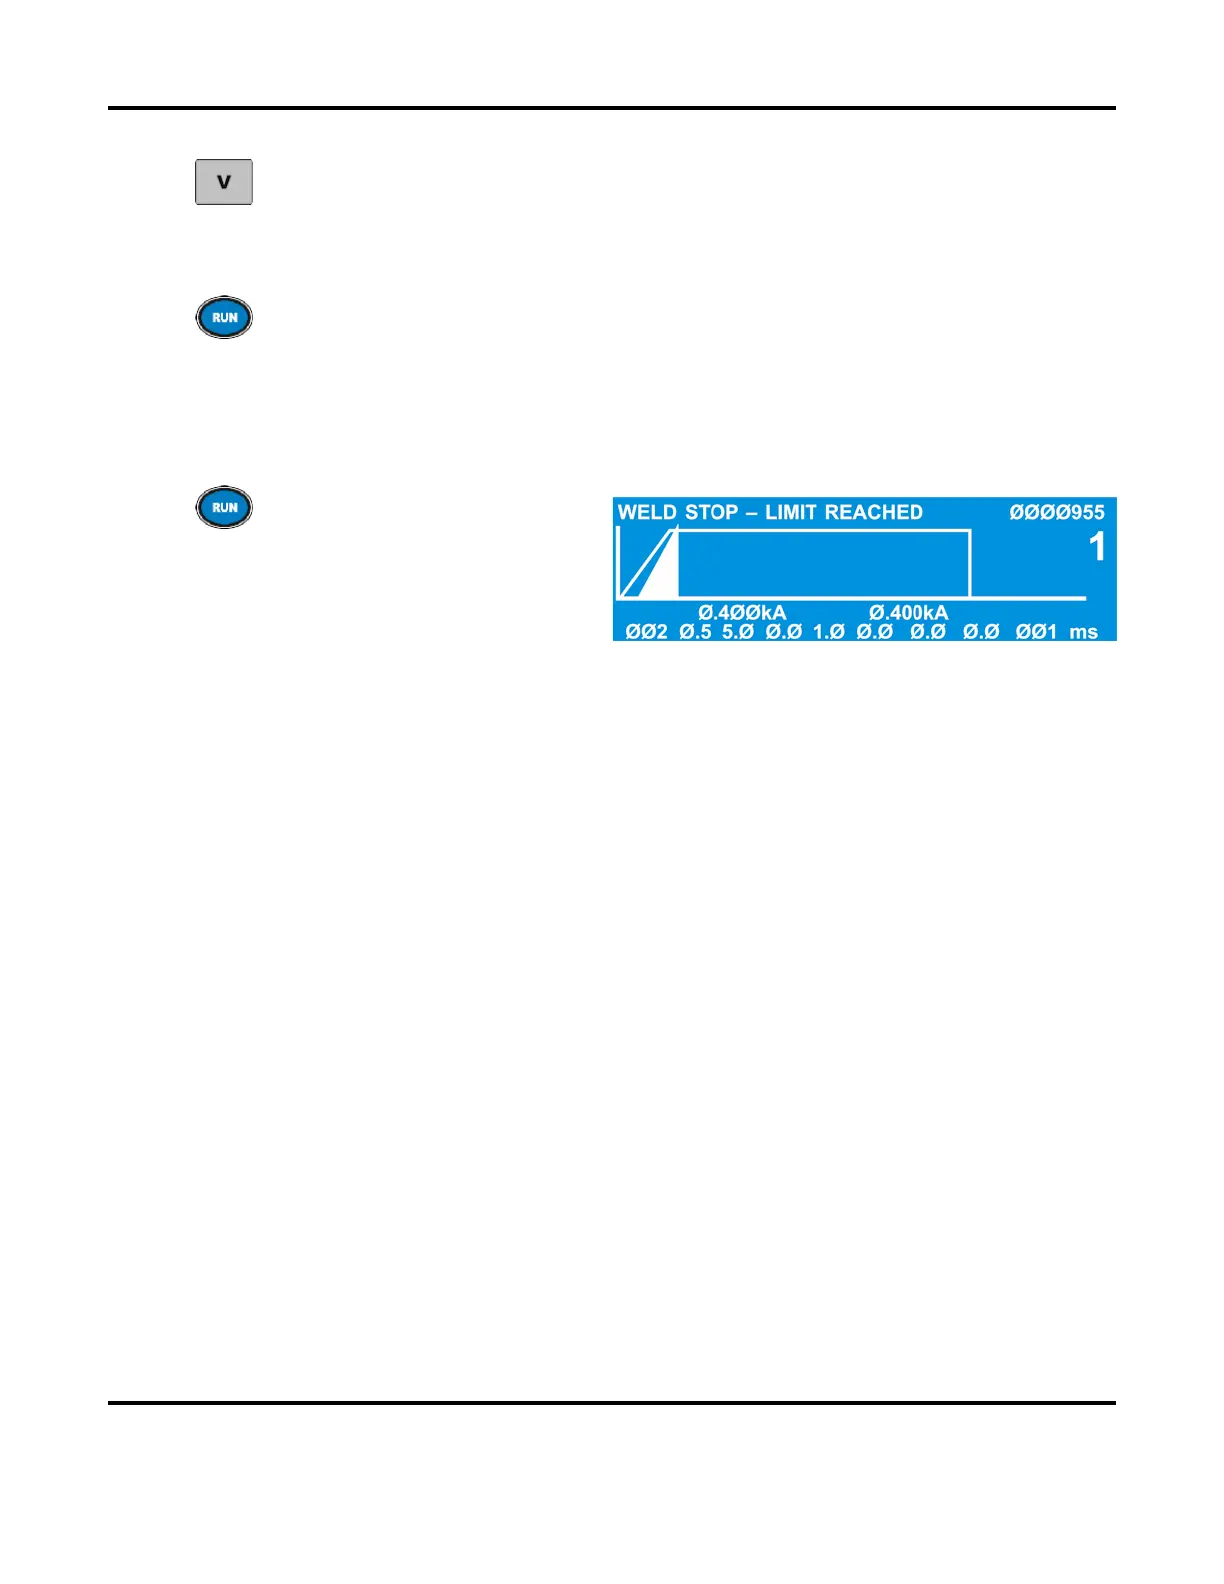
Return to the RUN screen and
make several welds. Verify that
the Weld Stop function detects
missing and misaligned parts.
When using the Weld Stop function, always select a monitor mode that is different
from
the feedback mode. For example:
• If you are welding in constant current, put limits on voltage.
• If you are welding in constant voltage, put limits on current.
• If you are welding in constant power, put limits on current or voltage.