CHAPTER 3: SYSTEM CONFIGURATION
HF-2500A HIGH FREQUENCY WELD CONTROL
990-371 3-11
9 When you finish programming the chain, press the MENU key to return to the CHAIN SCHEDULES
menu.
10 Press the 1 key to toggle between ON or OFF.
11 Press the RUN key on the front panel, then use the keys to select the first weld schedule in
the chain you want to use. The Power Supply will now weld in the "chain" mode until you turn
the Chain Schedules feature OFF.
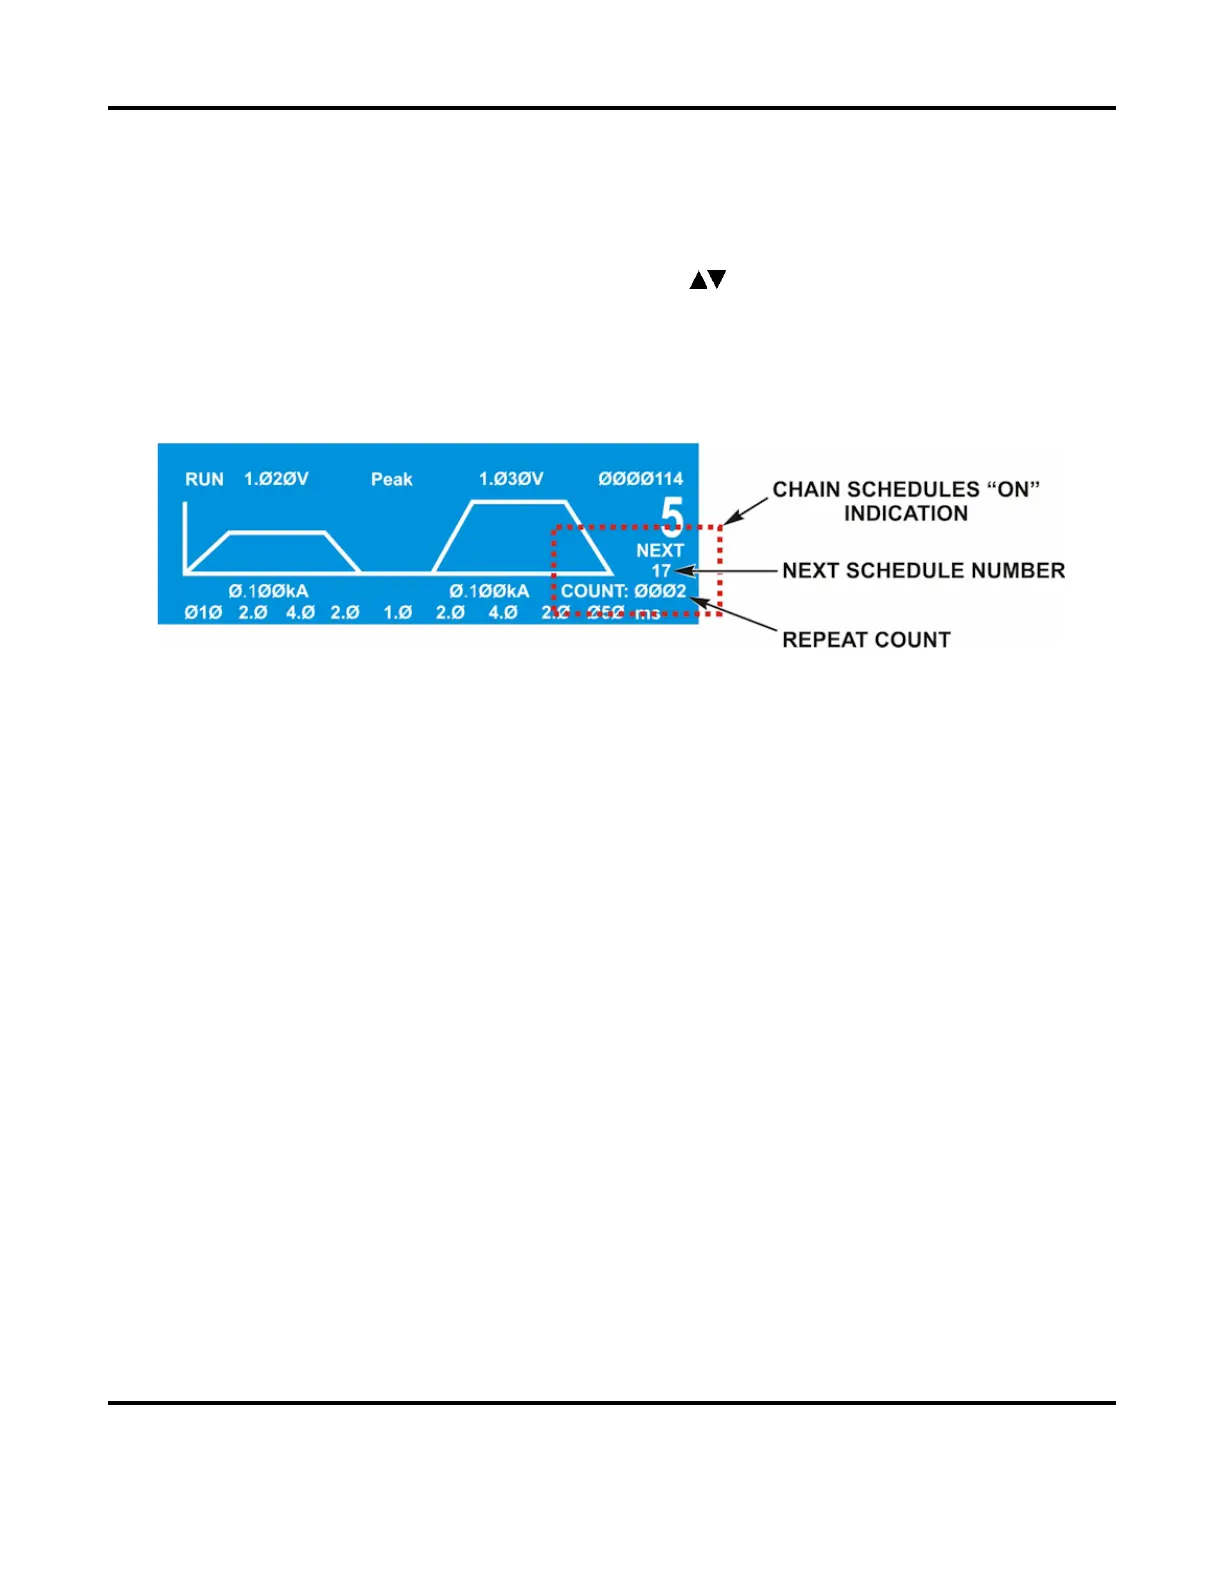
NOTE: When Chain Schedules is turned ON, the LCD screen changes to show the chain
information on the right side of the screen.
Below the current schedule number, you can see the number of times the current schedule will
be repeated, and the number of the next schedule in the chain.
Setup 1
1. Footswitch Weld Abort
From the
SETUP 1 screen, press the 1 key to toggle between ON and OFF. This function controls how the
Power Supply interfaces with a foot switch, a force firing switch, or a programmable logic control (PLC).
Any of these switches could be the weld initiation switch in your system setup.
ON means that the welding process is initiated by closure of the initiation switch and continues to its
conclusion while the initiation switch remains closed. If the initiation switch opens during the welding
process, the welding process will terminate. The
ON state is preferred for human operated welding stations
since it allows you to abort the weld process by releasing the foot switch (or the foot pedal in the case of
a manually actuated weld head).
OFF is preferred for computer or PLC controlled welding stations since a single start pulse can be used to
initiate the welding process. To select the ON/OFF states, press the 1 key. The FOOTSWITCH WELD
ABORT
line will now reflect your selection.
2. Switch Debounce Time
The contacts of single pole mechanical firing switches “bounce” when they close. The switch de-bounce
time function allows you to specify that the initiation switch contacts must remain closed for 10, 20, or 30
milliseconds before the weld period can be initiated, thereby avoiding false starts caused by the switch
contact bouncing.