MU-100A
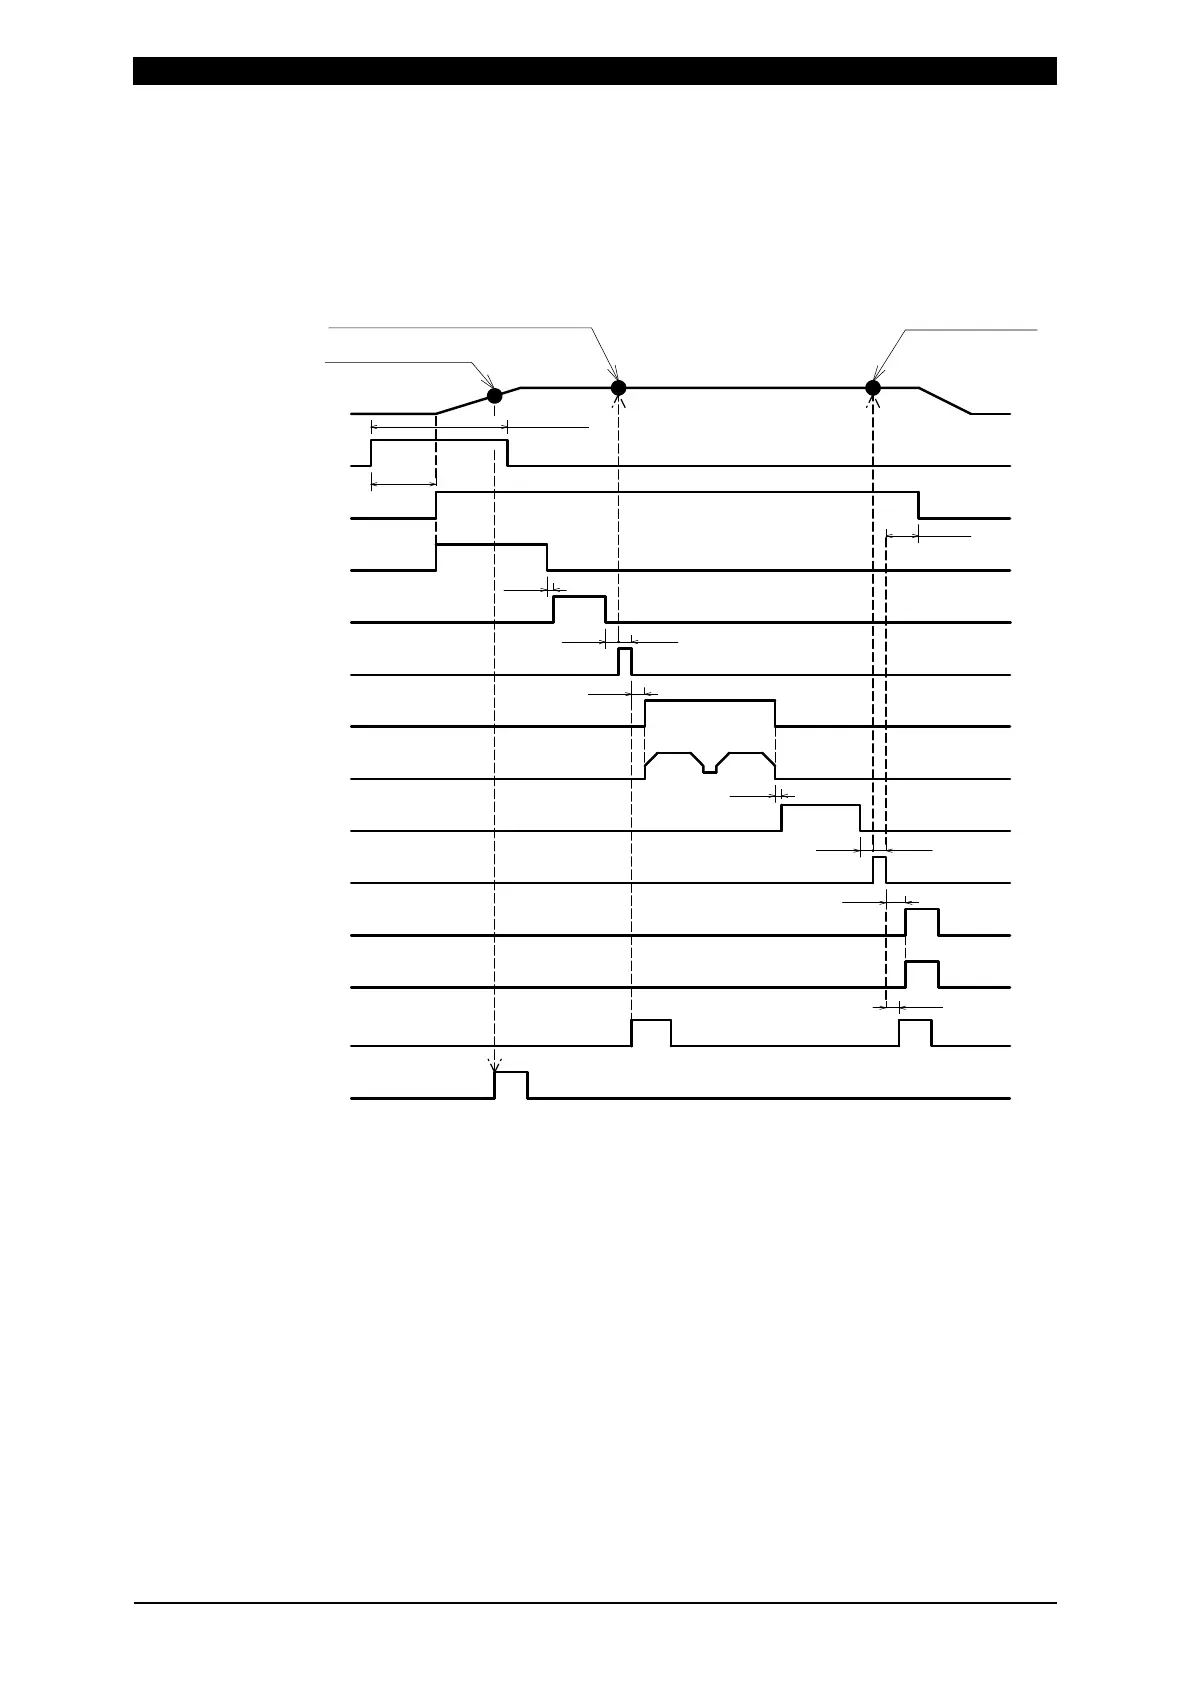
11. Timing Chart (1-axis Type)
11-11
When 0=Setup parameter of the function menu is set as follows:
1 Force Measure Mode setting: SQNC(0)
2 LS Input Validity setting: Invalid(1)
3 Self Hold Validity setting: Valid(0)
13ms
3ms
2ms
2ms
5ms
2ms
2ms
1ms
1ms
Hold-Time(setting)
Weld-Time(setting)
Squeeze-Time(setting)
(*3)
(*3)
(*2)
(*1)
(*6)
(*4)
ST-FORCE1 input
GOOD output(*5)
FINISH output(*5)
NG output(*5)
(Weld Start output)
Before Weld Force measurement position
After Weld Force measurement
Before Weld Force measurement
SV11 to 13 output
LEV-FORCE11 to 13 output(*7)
20ms min.
Force change
Vibration check
Welding(power supply)
LEV-FORCE1 set force
After Weld Force
measurement position
*1 When Self Hold Validity is set to Invalid(1), hold the ST-FORCE input until the
vibration check ends.
*2 Varies depending on the allowable vibration range setting and vibration stability
time.
*3 The output time of Before/After Weld Time varies depending on settings of Force
Sampling and Force Average.
*4 Set the time longer than the total weld time of welding machine for Weld-Time.
*5 The output time can be selected with Output Select Time.
*6 When NG is output, the sequence ends.
*7 The output time can be selected with Level Select Time.