MU-100A
10. Setting of Measurement Mode and Schedule
10-16
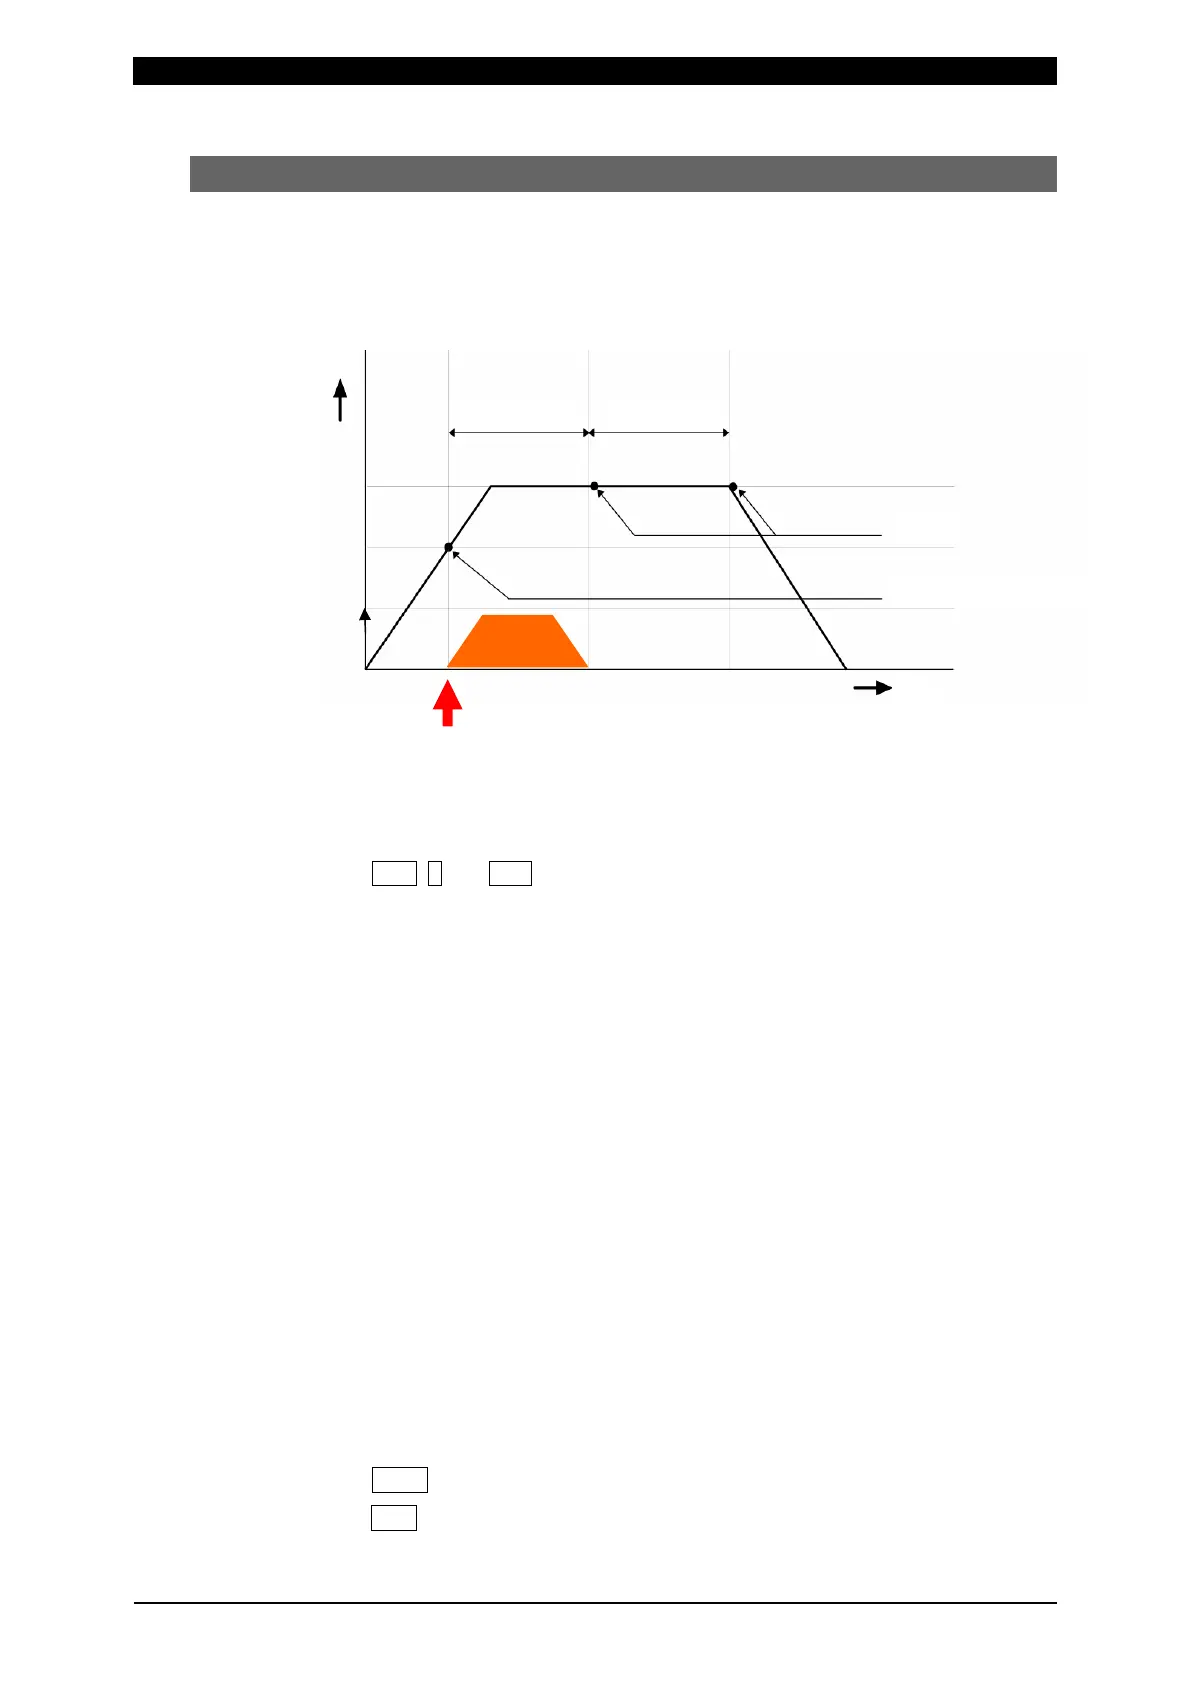
(9) Tangential Mode “Force Measure Mode : TANG(3)”
This is the mode for measuring force. The welding starts when the set weld force value
is reached, and the after-welding force can be measured and judged.
The welding can be started with a given weld force.
a. Setting of measurement mode
1
Press FUN, 0 and ENT keys in this order to select “0=Setup”.
2Select the setting object between “Axis1(0)” (first axis) and “Axis2(1)” (second
axis).
3Set No.3 “Disp Measure Mode” (measurement mode of displacement sensor) to
an item other than “SYNC(0)” (synchro mode); “SQNC(1)” (sequence mode),
“SH1(2)”, “SH2(3)”, or “SH3(4)” (sample hold mode).
4Set the rated capacity of the connected load cell in No.4 “L.C. Rated Capacity”.
The rated capacity of the load cell is shown on the certificate of the load cell.
5Select the force unit from “N(0)”, “kgf(1)”, and “lbf(2)” in No.5 “Loadcell Unit”.
6Set the rated output of the connected load cell in No.6 “L.C. Rated Output”. The
rated output of the load cell is shown on the certificate of the load cell.
7When there is a limit switch for force check, set No.7 “LS Input Validity” (use of
force-detecting signal input) to “Valid(0)”. When not using the force-detecting
signal (LS), set it to “Invalid(1)”.
8Set No.8 “Force Measure Mode” (measurement mode of load cell) to “TANG(3)”
(tangential mode).
9Set the measurement point for “After Weld Force” in No.24 “Tang Measure
Point” to “Weld(0)” or “Hold(1)”.
b. Setting of measurement schedule
1
Press MONI key to display the normal screen.
2Press SCH key to select “SCH Axis”.
Welding start with
the set weld force !
Welding
[Tang Measure Point]
Select either measurement point:
Force start with
ST-Force signal
Time
Force
Force
measurement
Weld start output
force point
Hold time Weld time


 To Next Page