4-49
5) Set the trigger delay.
Pressing the [TD] key brings up the burst monitor screen. You can also bring up the burst monitor screen for
trigger delay setting by pressing the [<] key on the burst monitor screen for gate width setting.
"
Trig Delay" is displayed at the lower left. Pressing the [Enter] key highlights "Trig Delay", allowing you to
change the set value using the [ ] and [ ] keys. You can enter a value directly using numeric keys.
After setting a new value, pressing the [Enter] key again displays "Trig Delay" in normal video.
6) Set the gate width.
Pressing the [GW] key brings up the burst monitor screen for gate width setting. You can also bring up the burst
monitor screen for gate width setting by pressing the [>] key on the burst monitor screen for trigger delay setting.
20 000 000 000 Hz Trig Delay
Trig Delay Gate Width
100.000 us 120.000 us
20 000 000 000 Hz Trig Delay
Trig Delay Gate Width
100.000 us 120.000 us
20 000 000 000 Hz Trig Delay
Trig Delay Gate Width
100.000 us 120.000 us
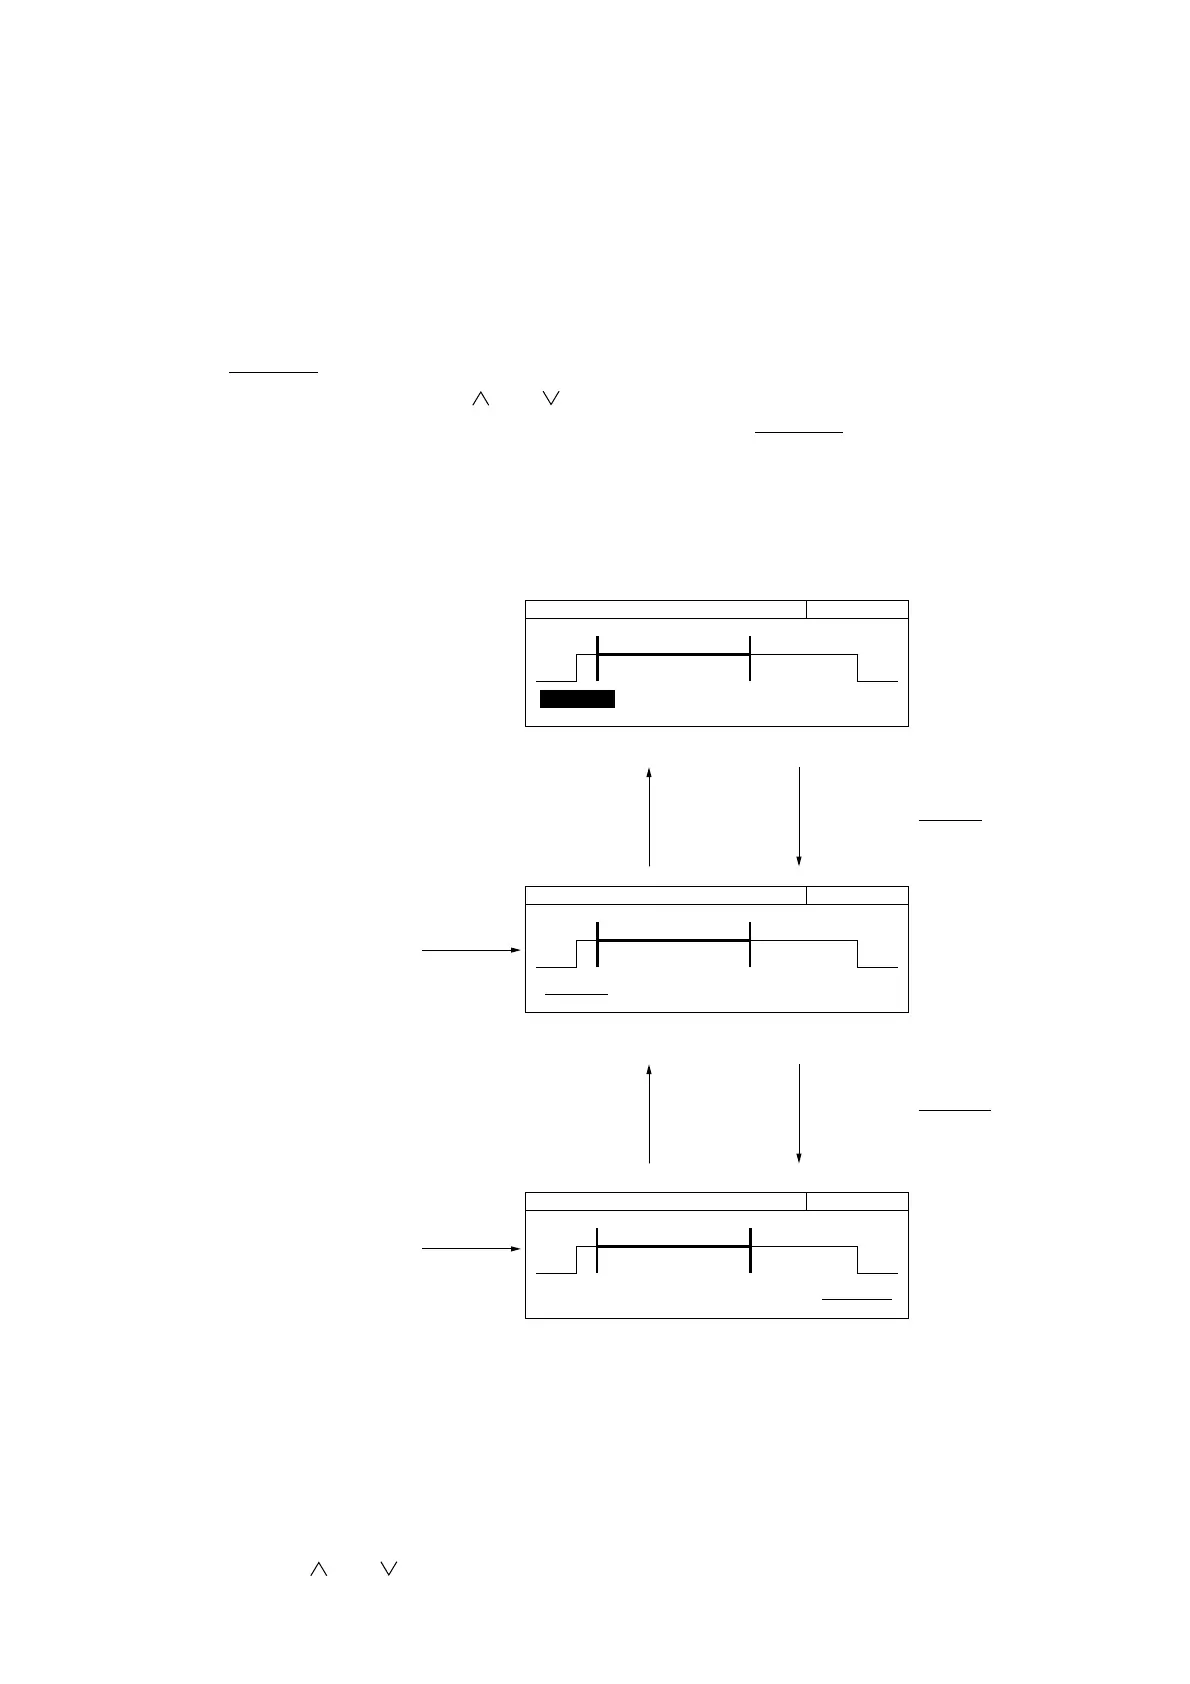
Burst Monitor Screen for Trigger Delay Setting (Numeric Input Mode)
Burst Monitor Screen for Trigger Delay Setting
Burst Monitor Screen for Gate Width Settin
Pressing the [Enter]
key highlights "Trig
Delay", allowing you to
enter a numeric value
directly.
Pressing the [TD] key
displays the burst
monitor screen for
trigger delay setting.
Pressing the [GW] key
displays the burst
monitor screen for gate
width setting.
Pressing the [>] key
displays "Gate Width"
on the burst monitor
screen for gate width
setting.
Pressing the [Enter] key
displays "Trig Delay".
Pressing the [<] key
allows you to return to
the burst monitor
screen for trigger delay
setting.
Fig. 4-54 Burst Monitor Screen
7) Pressing the [Return to Meas] key displays the normal measurement screen.
8) Using the [<] and [>] keys, set a desired frequency measurement resolution.
9) Using the [ ] and [ ] keys, set a desired sample rate.
4.4 Measuring