Section 4 Unit Operation
4-2
4.1 Turning on Power/Self Check Screen
4.1.1 Turning on Power
Follow the procedure in order starting with step 1.
Step 1 :
Make sure that the voltage is the proper rating (100 to 230 V, 47.5 to 63 Hz) and the unit is properly grounded.
(See Sections 2.2 and 2.3).
Step 2 :
Turn power on from the back panel and front panel in that order.
If the backup memory contains settings stored when power was turned off the last time, the unit will read and then set those
values. If there are no setting stored in memory, the unit will set the initial values listed in Appendix A. Note that setting
the Power switch to ON with the [Enter] key pressed down allows you to operate the unit according to the initial values
listed in Appendix A without using the settings stored in the backup memory.
Step 3 :
The unit will warm up until the frequency of the crystal oscillator has reached the rated level of stability. The time it takes
for the crystal oscillator to reach the necessary level of stability depends on the type of crystal oscillator as shown in Table
4-1. Note that the time starts from the moment the back panel power switch is set to the On position.
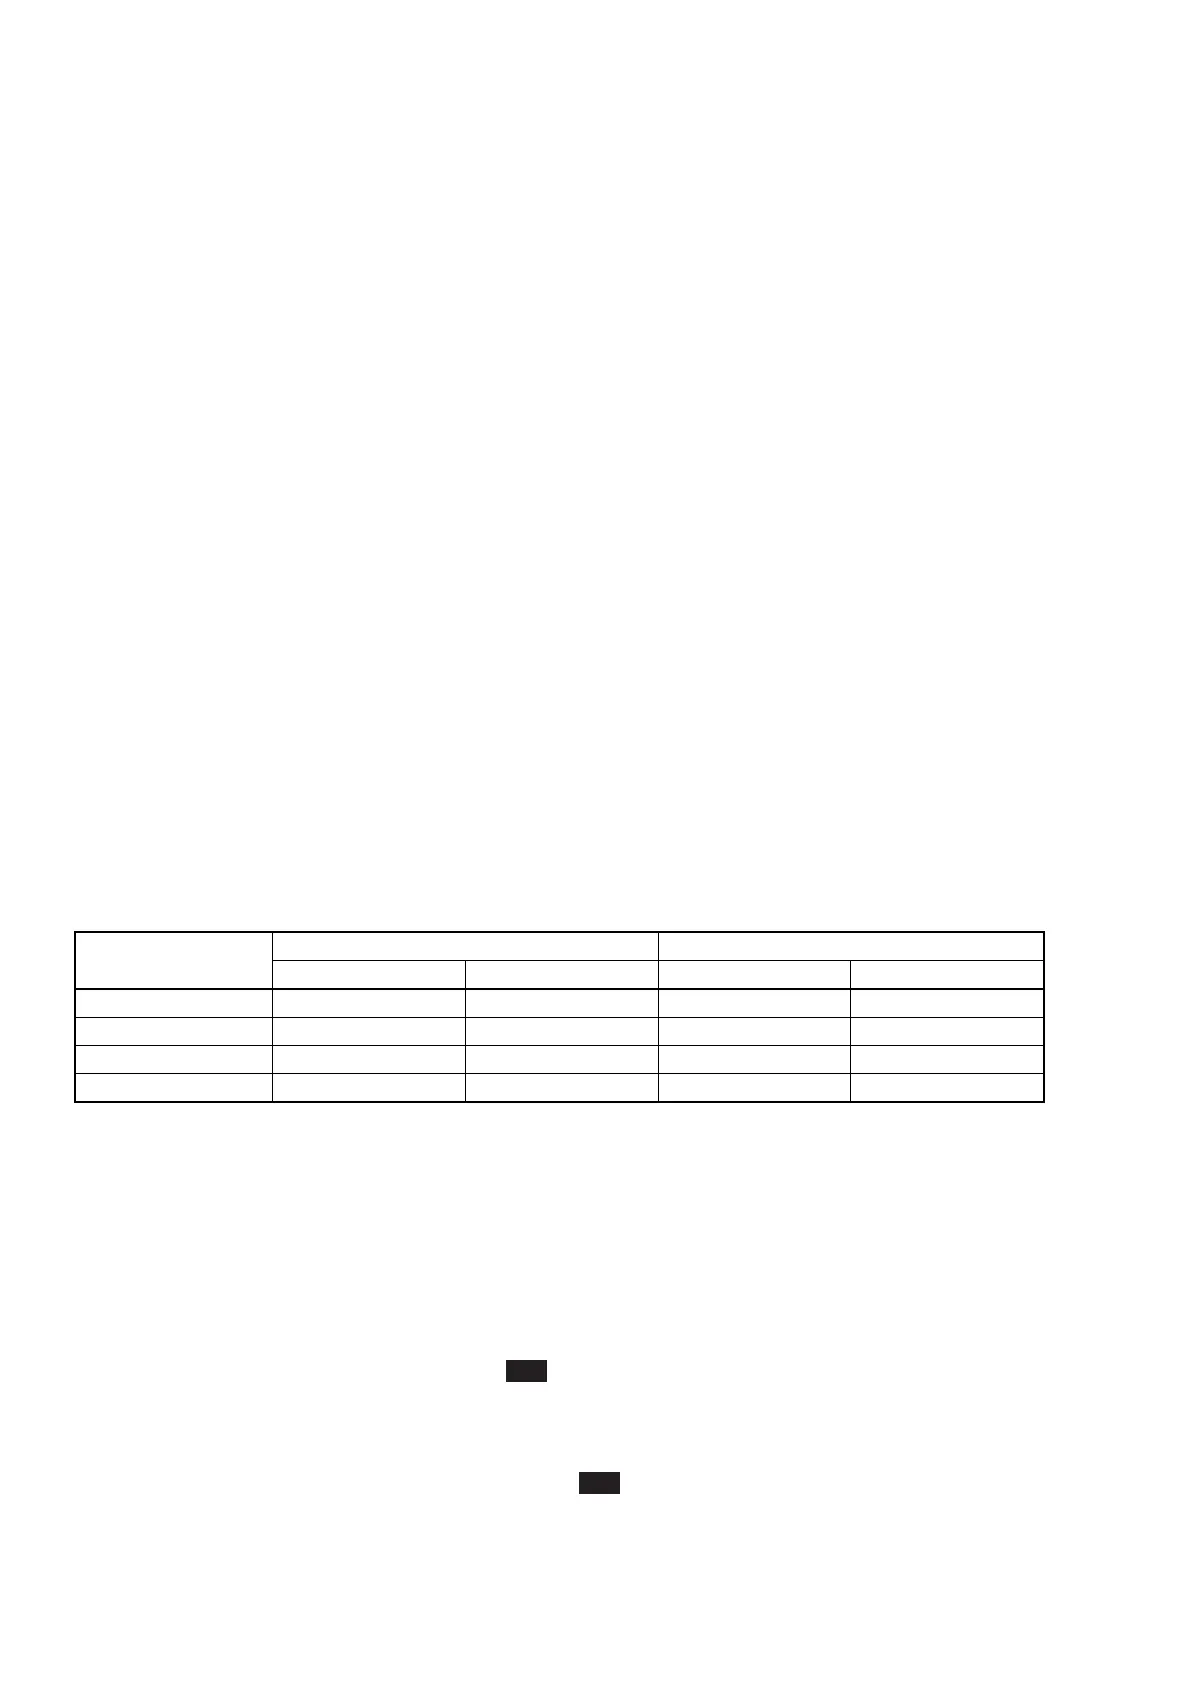
Table 4-1 Required Warm-Up Time
Type of Crystal
Oscillator
Standard Part
Option 01
Option 02
Option 03
Warm-Up Time
At least 30 min.
At least 1 hr.
At least 1 hr.
-----------
Typical Value
5 × 10
–8
3 × 10
–8
2 × 10
–8
-----------
Warm-Up Time
At least 24 hrs.
At least 24 hrs.
At least 24 hrs.
At least 48 hrs.
Typical Value
2 × 10
–8
/day
5 × 10
–9
/day
2 × 10
–9
/day
5 × 10
–10
/day
Startup Characteristics Aging Rate
Step 4 :
You can now use the unit to measure frequency.
4.1.2 Self-Check
When you turn on power, the unit displays the self-check screen shown in Fig. 4-1(a). If the self-check is completed
successfully, you will the self-check completion screen for about one second (see Fig. 4-1(b)), and then the measurement
screen will appear. Measurement will begin according to parameters set in advance.
If the self-check finds something wrong with the unit, Fail will be displayed (see Fig. 4-1(c)), and then the unit will stop.
You can also conduct a self-check by holding down the [Return to Meas] key while turning on power using the front panel
power button. This will perform a detailed self-check. The screens during a detailed self-check are the same as those
during a simple self-check (see Fig. 4-1(a) and 4-1(b)).
If the detailed self-check finds something wrong with the unit, Fail will be displayed (see Fig. 4-1(d)), and then the unit
will stop.
When the only problem discovered during a simple self-check is with GPIB as shown in Fig. 4-1(e), you will be able to
continue operation by pressing the [Preset] key since the GPIB feature will be rendered unusable.