4 - 10
Using the Settings Pages
Before testing begins it is important to set up the Hand-held so that it is able to control
the load bank correctly.
The Hand-held provides two Settings pages for this purpose. The first of these is used
to set the details of the Supply-on-Test. The second allows you to check the load bank
capacity and make adjustments to the Hand-held and load bank’s operation.
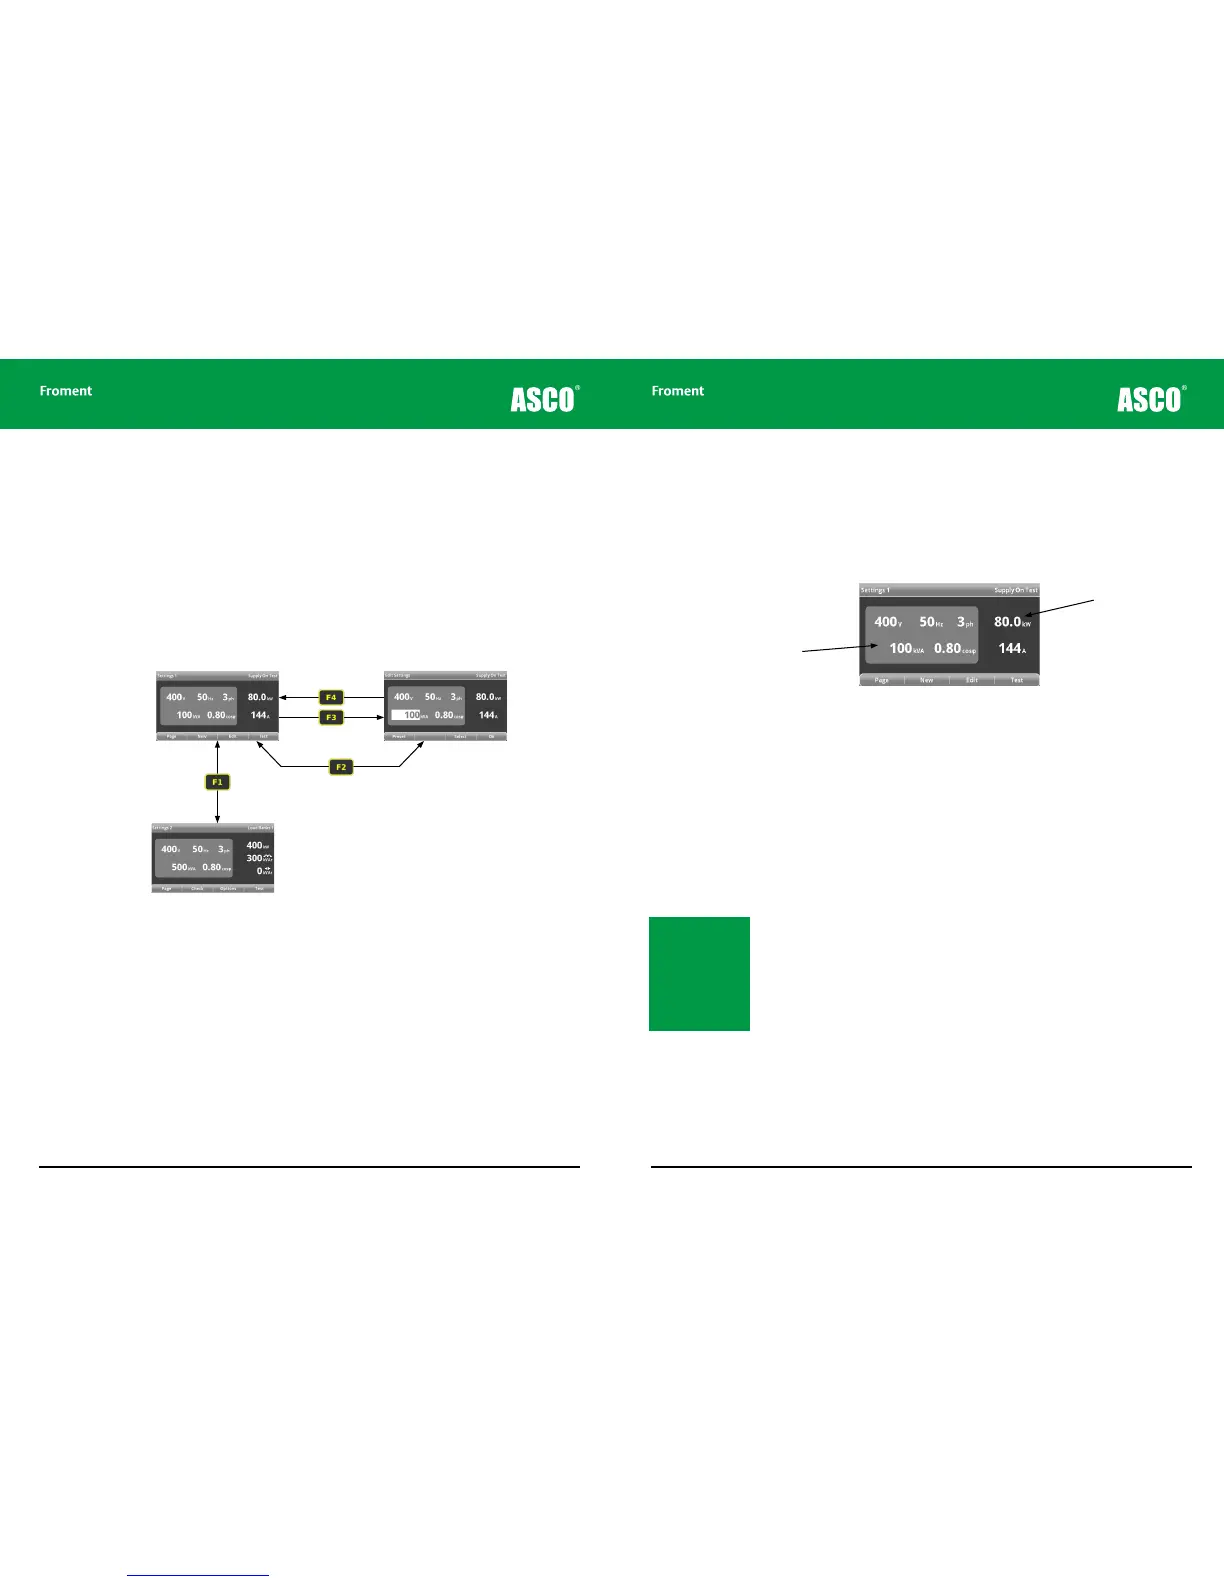
Figure 4-6 The settings menu pages.
Settings 1
This page is the starting point of the Hand-held menu
system. It is displayed immediately after start-up and
shows details of the supply-on-test.
New supply on test
Press F2 (NEW) to measure
and reset the supply on test
voltage, frequency and number
of phases.
Edit settings
Use the + or - keys (or F1 (PRE-
SET) to adjust the supply. Press
F3 (SELECT) to change the value
being edited (kVA, V, Hz, ph or
cos φ).
Settings 2
This screen displays the capacity of the load bank
and the number of load banks connected. Press F3
(OPTIONS) to access the load bank options pages.
Hand-held Reference Guide
4 - 11
Settings 1 - Supply-on-test
The Settings 1 page is used to set up the details of the Supply-on-Test and it is important
to make sure that these are set correctly before applying any load. The load bank uses the
values set here to limit the load that is applied. If the values are incorrect the generator
may be overloaded and damaged during the test.
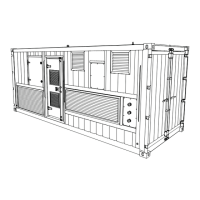
Figure 4-7 The Settings 1 page.
Setting the Supply-on-Test rating values
If the Supply-on-Test is connected to the load bank and F2 (NEW) is pressed the Hand-
held will carry out the following sequence of operation:
• Check the voltage and frequency on each load bank connected.
• Check voltage and frequency stability.
• Check phase rotation on each load bank.
• Checks voltages to determine whether this is a three or single phase connection.
At the end of this sequence the Hand-held will:
• Display a warning message if any of the above checks fail.
• Automatically set the supply voltage, frequency and number of phases to the nearest
standard values.
• Enter the Edit Settings page so you can to verify the supply size (kVA).
Note: The Standard
Supply Voltage values
are: 120, 200, 208, 220,
230, 240, 277, 380, 400,
415, 440, 460, 480,
500, 600, and 660. The
Standard Supply Fre-
quency values are: 50,
60 and 400
Editable supply
on test values
Calculated
maximum values
Chapter Four