Hardware Installation Manual Contents
Media Gateways & SBCs 5 Mediant 1000B Gateway & E-SBC
List of Figures
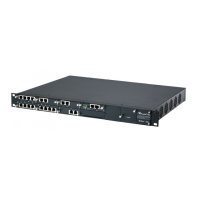
Figure 3-1: Front Panel of Mediant 1000B SBC and Gateway .............................................................. 15
Figure 3-2: FXS Module ......................................................................................................................... 17
Figure 3-3: FXO Module ........................................................................................................................ 18
Figure 3-4: BRI Module .......................................................................................................................... 19
Figure 3-5: TRUNKS Module ................................................................................................................. 20
Figure 3-6: Media Processing Module (MPM) ....................................................................................... 21
Figure 3-7: CRMX Module Ports (without Dry-Contact Relays) ............................................................ 22
Figure 3-8: CRMX Module Ports (with Dry-Contact Relays) ................................................................. 22
Figure 3-9: CRMX Module LEDs (without Dry-Contact Relays) ............................................................ 23
Figure 3-10: CRMX Module LEDs (with Dry-Contact Relays) ............................................................... 24
Figure 3-11: SWX LAN Expansion Module – Ver. 02 ............................................................................ 25
Figure 3-12: SWX LAN Expansion Module – Ver. 01 ............................................................................ 25
Figure 3-13: Fan Tray Module ............................................................................................................... 26
Figure 3-14: Power Supply Module ...................................................................................................... 27
Figure 3-15: Rear Panel of Mediant 1000B SBC and Gateway ............................................................ 28
Figure 4-1: Location of Grooves for Rubber Feet .................................................................................. 29
Figure 4-2: Rear-Mounting Brackets Attached to Rear-Rack Posts (60 cm) ......................................... 33
Figure 4-3: Rear-Mounting Brackets Attached to Rear-Rack Posts (80 cm) ......................................... 33
Figure 4-4: Attaching Rear-Mounting Flange to Chassis' Rear-Side Mounting Holes (60 cm) ............. 34
Figure 4-5: Attaching Rear-Mounting Flange to Chassis' Rear-Side Mounting Holes (80 cm) ............. 34
Figure 4-6: Sliding the Rear-Mounting Flanges into the Rear-Mounting brackets (60 cm) ................... 35
Figure 4-7: Sliding the Rear-Mounting Flanges into the Rear-Mounting Brackets (80 cm) ................... 35
Figure 4-8: Fastening Rear-Mounting Flange to Rear-Mounting Bracket (60 cm) ................................ 36
Figure 4-9: Fastening Rear-Mounting Flange to Rear-Mounting Bracket (80 cm) ................................ 36
Figure 4-10: Front-Mounting Brackets Flush and Aligned with Front Rack Posts (60 cm) ................... 37
Figure 4-11: Front-Mounting Brackets Flush and Aligned with Front Rack Posts (80 cm) ................... 37
Figure 5-1: Grounding the Device .......................................................................................................... 40
Figure 5-2: Default Ethernet Groups and Web Interface String Names ................................................ 41
Figure 5-3: RJ-45 Connector Pinouts for LAN ....................................................................................... 42
Figure 5-4: Connecting to LAN .............................................................................................................. 42
Figure 5-5: RJ-11 Connector Pinouts for FXS ....................................................................................... 44
Figure 5-6: FXS Cabling for Indoor Routing .......................................................................................... 44
Figure 5-7: RJ-11 Connector Pinouts for FXS ....................................................................................... 45
Figure 5-8: FXS Cabling for Outdoor Routing ....................................................................................... 46
Figure 5-9: RJ-11 Connector Pinouts for FXO ...................................................................................... 47
Figure 5-10: RJ-11 Connector Pinouts for FXO .................................................................................... 48
Figure 5-11: FXO Cabling for Outdoor Routing ..................................................................................... 49
Figure 5-12: RJ-11 Connector Pinouts for Analog Lifeline .................................................................... 50
Figure 5-13: Cabling the Analog Lifeline ............................................................................................... 51
Figure 5-14: RJ-45 Connector Pinouts for BRI ...................................................................................... 52
Figure 5-15: Cabling (Ports 1 and 2) PSTN Fallback ............................................................................ 53
Figure 5-16: RJ-48c Connector Pinouts for E1/T1 ................................................................................ 54
Figure 5-17: Cabling (Ports 1 and 2) PSTN Fallback ............................................................................ 55
Figure 5-18: Orderable RS-232 Cable Adapter ..................................................................................... 56
Figure 5-19: Dry-Contact Terminal Block (Example) ............................................................................. 57
Figure 5-20: Wires Inserted in Terminal Block ...................................................................................... 58
Figure 5-21: Plugging Terminal block into Dry-Contact Relay Connector ............................................. 58
Figure 5-22: Connecting to AC Power Supply ....................................................................................... 60
Figure 6-1: Chassis Front-Panel Slot Assignment for Modules ............................................................ 61
Figure 6-2: Example of Module Slot Assignment ................................................................................. 62
Figure 6-3: Chassis Rear-Panel Slot Assignment for OSN Server Modules ........................................ 62
Figure 6-4: Screws on Blank-Panel Slot Cover .................................................................................... 63
Figure 6-5: Inserting a Module into the Empty Slot .............................................................................. 64
Figure 6-6: Captive Screws on Module.................................................................................................. 64
Figure 6-7: Clicking Module Title ........................................................................................................... 66
Figure 6-8: Software-Removed Module ................................................................................................. 66
Figure 6-9: Captive Screws on Module.................................................................................................. 66

 Loading...