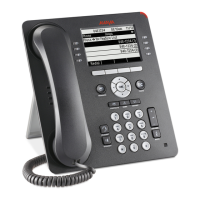
Figure C2: Attaching cable connection of the DHA to an optional button module and the
deskphone.
Installing 9641G Call Center faceplate
About this task
The 9641G IP deskphones used in a call center come with special faceplate kits: 9641G Call
Center Faceplate Kit (PK25) (Comcode 700500728). The removeable faceplate has the following
features:
• Covers the handset pockets
• Maintains the switch hook “down” position
• Covers the Forward and Headset buttons
• Relabels the Speaker button as the Release button to facilitate ending calls
Note:
To allow Release button operation for 9641G deskphones, administer the Release button with
the AGTSPKRSTAT parameter set to 2 and the CALLCTRSTAT parameter set to 1.
Procedure
1. If already connected, remove the HAC cord from the underside of the phone.
2. With the phone facing up and resting flat on a hard surface, pry up a corner of the standard
faceplate until the faceplate is released from the phone.
Installing the Deskphone
March 2018 Installing and Maintaining Avaya 9608/9608G/9611G/9621G/9641G/9641GS IP
Deskphones H.323 28
Comments on this document? infodev@avaya.com

 Loading...


