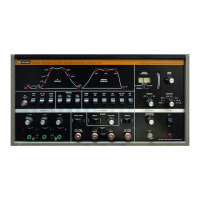
12.4.5.3 CALIBRATION OF THE SPARE MKR
OSCILLATOR FOR VARIABLE FREQUENCY
OPERATION
12.4.6
The internal crystal markers of the Model
415 can be used to calibrate the spare
marker oscillator when it is used as a vari-
able marker generator. Because the 100 KHz
markers will modulate every reference
marker used, they cannot be used for inter-
mediate frequency calibration of the vari-
able oscillator. Calibration must therefore
be performed by interpolating between the
standard crystal-controlled markers of the
Model 415. For example, if it is desired to
calibrate the spare marker oscillator at
44.5 MHz, turn on the 44 MHz and 45 MHz
markers and adjust Ll and C2 of the spare
marker oscillator circuit as required to cen-
ter the variable marker midway between
the reference markers. Because the sweep
is linear, the frequency is proportional to
distance along the oscilloscope base line.
To illustrate, if calibration at 44.3 MHz is
desired, the variable oscillator is adjusted
so that its marker falls at three-tenths the
distance from the 44.00 MHz marker to 45.00
MHz. This method can be used between
any pair of markers. Once calibrated, the
spare marker can be used for spot align-
ment and is available at the RF-IF-VIDEO
jack of the Model 415 when the FUNCTION
switch is in the MKR or MOD MKR position.
BALANCING SWEEP OUTPUTS OF
HORIZONTAL SWEEP AMPLIFIER Q14
If replacement of QI4 is required, the fol-
lowing balancing adjustment should be
performed to insure that the oscilloscope
trace length does not vary when the sweep
direction is reversed by use of the HORIZ
SWEEP NORM/REV switch. This can be
done by use of a VTVM as follows:
12.4.6. l Set the VTVM range switch to a peak-to-
peak voltage range greater than 15 volts.
If a
B&K Model 177 is used, use the 40-volt
P-P range with the VTVM probe switch in
the AC position.
12.4.6.2 Turn
qn the Model 415 and place the
CHROMA switch in the OFF position and
place the HORIZ SWEEP switch to the
REV position. Connect the VTVM to the
center pin of the SCOPE HORIZ INPUT jack
and note the peak-to-peak reading on the
VTVM. Place the HORIZ SWEEP switch to
the NORM position and adjust the trimpot
R69 (refer to Figure 12.2) for an equal peak-
to-peak reading.
88
12.4.7
ADJUSTMENT OF SWEEP OSCILLATOR
VARACTOR BIAS
(Refer to Figure 12.4)
If any repair work has been performed on
the sweep oscillator assembly board, the
setting of the varactor bias adjustment
should be rechecked. Set SWEEP WIDTH
control to minimum.
12.4.7.1 With the Model 415 turned on, connect a
VTVM (negative d-c voltage range) to TP-
207 (center arm of potentiometer R202) as
indicated in Figure 12.4. Adjust potentiom-
eter R202 as required to obtain a reading
of I 1.0 volts de.
12.4.7.2 To test for excessive varactor leakage,
place the VTVM at TP-201. The voltage at
this point should be greater than 9.8 volts
de (negative polarity). A d-c reading of a
lower value indicates that either varactor
D201 or D202 has excessive leakage and
must be replaced.
12.4.8
SWEEP LINEARITY ADJUSTMENT
(R64, Figure 12.2)
This adjustment has been preset at the
factory and should seldom if ever require
readjustment.
If however, any repair or re-
placement work has been performed in the
waveform generator circuitry or in the
sweep oscillator circuitry, particularly var-
actor replacement, it is possible that the
linearity may have to be readjusted. Pro-
ceed as follows:
12.4.8. l The most convenient method of performing
this adjustment is to set the SWEEP WIDTH
control to maximum, set the FUNCTION
switch to the
IF position, and turn on all
IF markers. Set the MARKER AMPLITUDE
control for suitable marker height as ob-
served on an oscilloscope. Adjust the
CENTER FREQUENCY control to move the
marker display from one end of the oscil-
loscope trace to the other. Observe the
marker spacing as this is done. If the mark-
ers suddenly compress or separate as they
approach either end of the sweep, this
indicates that some non-linearity exists.
Adjust R64 slightly in either direction and
repeat the CENTER FREQUENCY adjust-
ment and observe the effect on relative
marker position. Continue to adjust R64 in
small increments until the marker separa-
tion appears to remain constant as the
markers are moved from one end of the
oscilloscope trace to the other.
I