42
After having finished the work
Basic Sewing Procedures
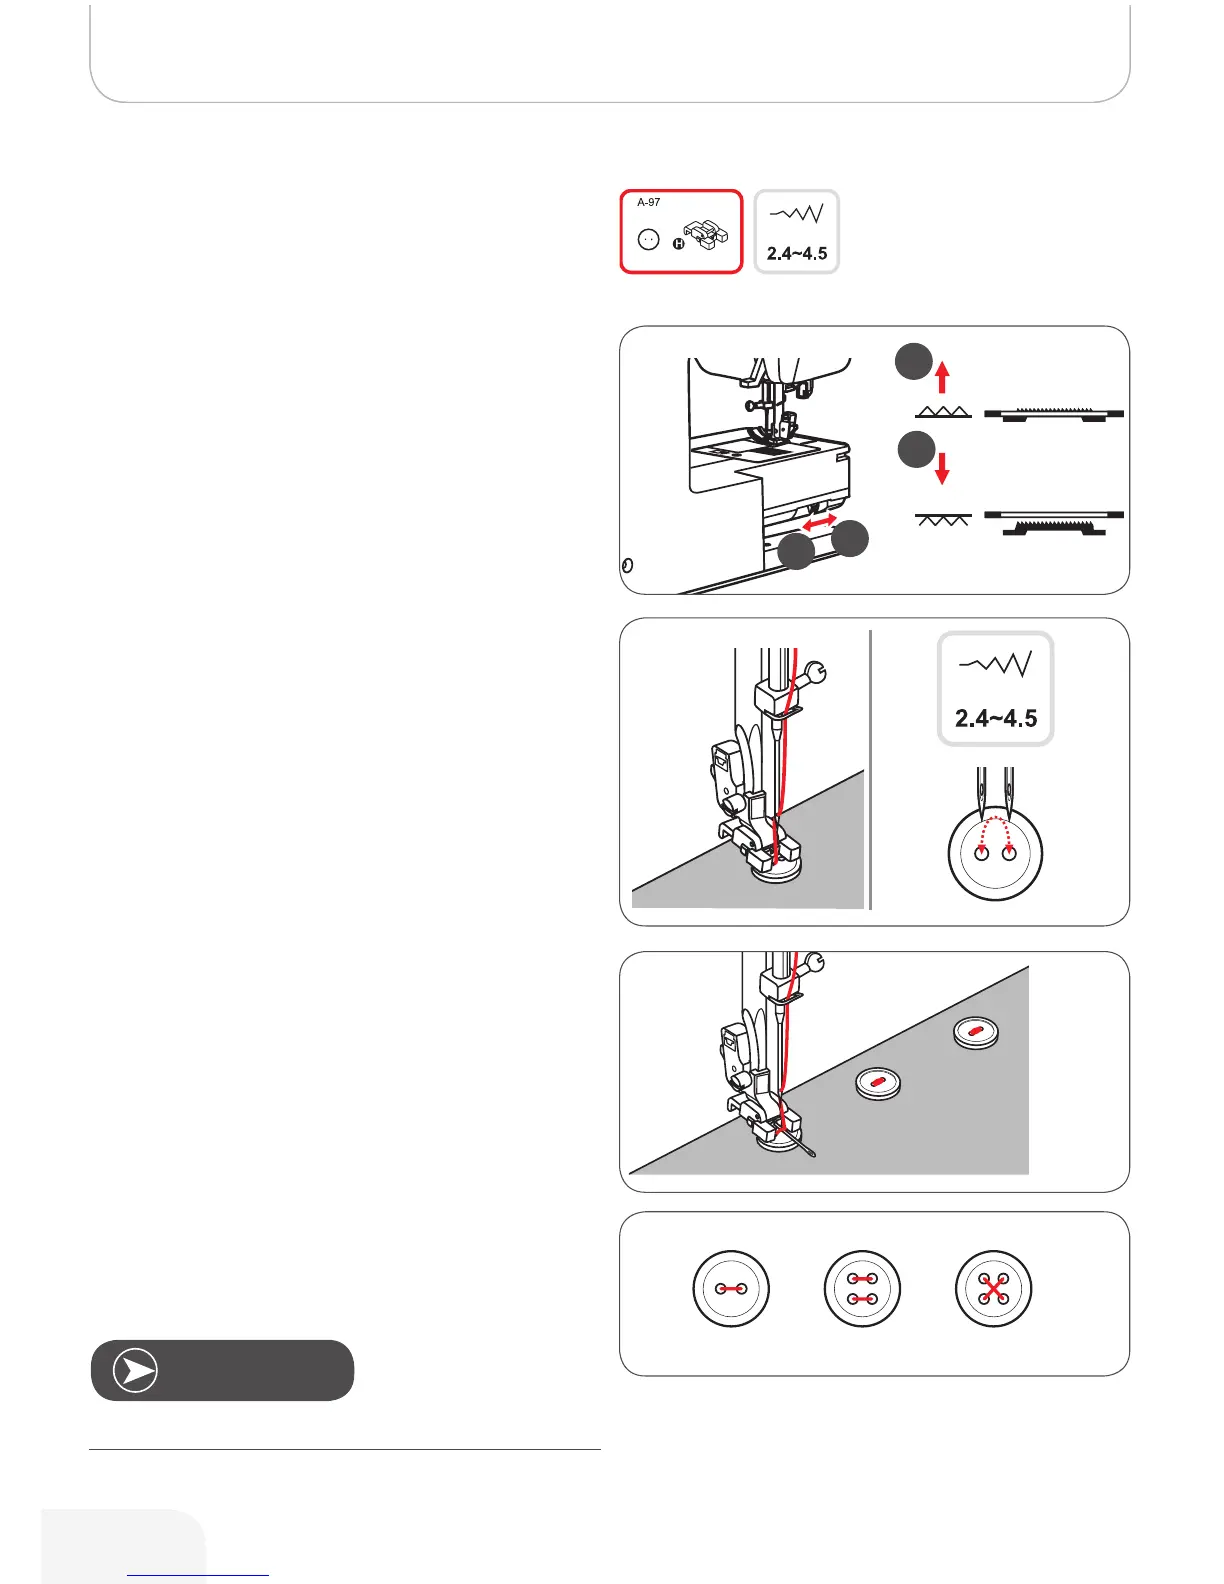
Change the presser foot to the button sewing-on foot.
• Move the feed dog control to lower the feed dog (b).
• Position the work under the foot.
• Place the button in the desired position, lower the foot.
• Select zig-zag pattern.
• Adjust the stitch width to «2.5-4.5» according to the
distance between the two holes of the button.
• Turn the handwheel to check that the needle goes
cleanly into the left and right holes of the button.
• Before sewing, press the Auto-lock button to sew
securing stitches automatically at the beginning and at
the end of the stitch.
• If a shank is required, place a darning needle on top of
the button and sew.
• For buttons with 4 holes, sew the front two holes first,
push the work forward and then sew the back two
holes.
Button Sewing-on
Note
502020.83.11_2013_06_bernette chicago 7_EN