Appendix A: Configuring VLAN
Note: On the Microsoft Windows Server 2012 R2 appliances, the Broadcom Advanced Control Suite 4
application is already installed. Access the application from the Start menu.
For all other appliances, you can use the following procedures.
Tagged VLAN configuration on Physical UVM20/50
Broadcom BCM5709C NetXtreme II GigE
1. Download “Gigabit Management Applications Installer for Windows (x64)”
Contact BeyondTrust Technical Support to get the installer file.
2. Install utility (rename setup.exe if required).
3. Run Broadcom Control Suite 4 from Control Panel or Start Menu.
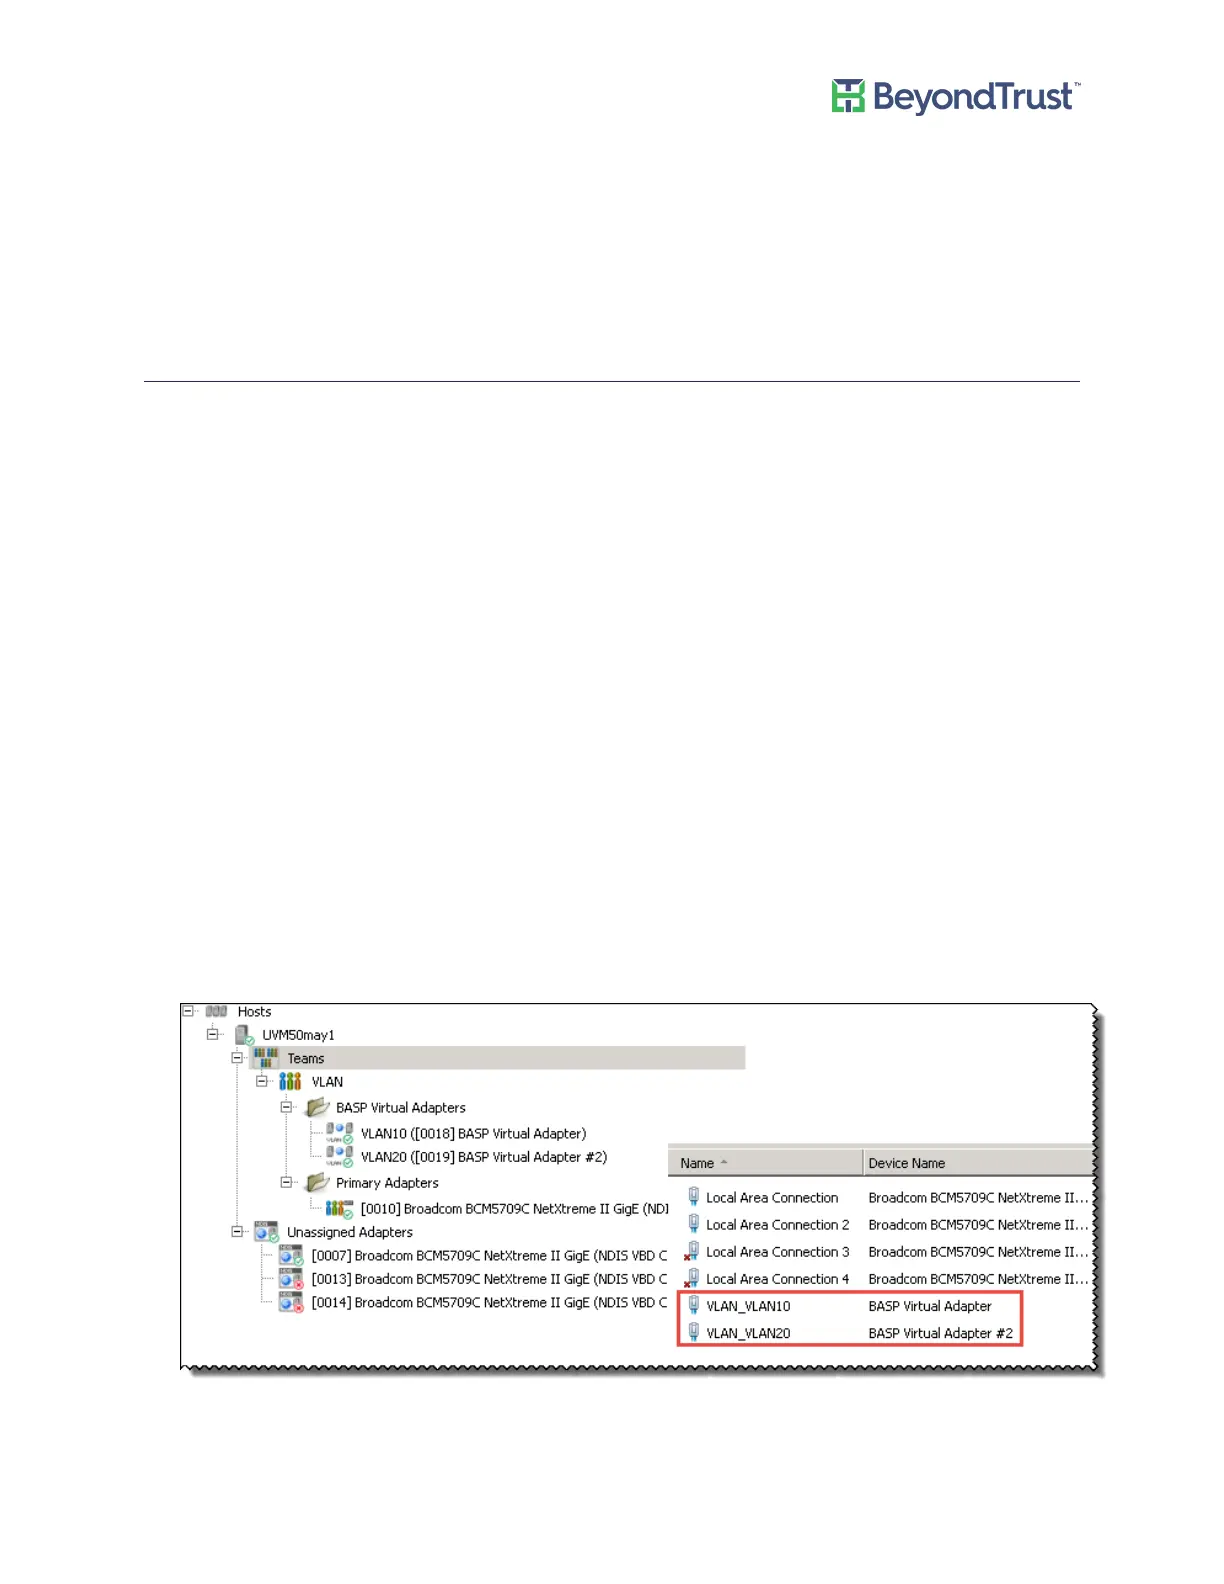
a. Filter by Team View from the menu at top.
b. Under Unassigned Adapters select the Adapter being used (if connected it will have a green checkmark).
c. Right-click and click Create a VLAN > Next.
d. Enter name for team (i.e. VLAN).
e. Enter name for VLAN (i.e. VLAN10) > Next.
f. Click Tagged > Next.
g. Enter VLAN Tag (i.e. 10) > Next.
h. Click Finish.
i. Click Yes to acknowledge there may be a temporary network interruption.
j. Right-click on the Team that was created from the previous step (i.e. VLAN) and click Add VLAN.
k. Enter name (i.e. VLAN20) > Next.
l. Select Tagged > Next.
m. Enter VLAN Tag (i.e. 20) > Next.
n. Click Yes to add more VLAN's and repeat, or No if finished.
o. Click Finish.
Appendix A: Configuring VLAN
UVM Appliance User Guide 54 © 2018. BeyondTrust Software, Inc.