130
LEGACY
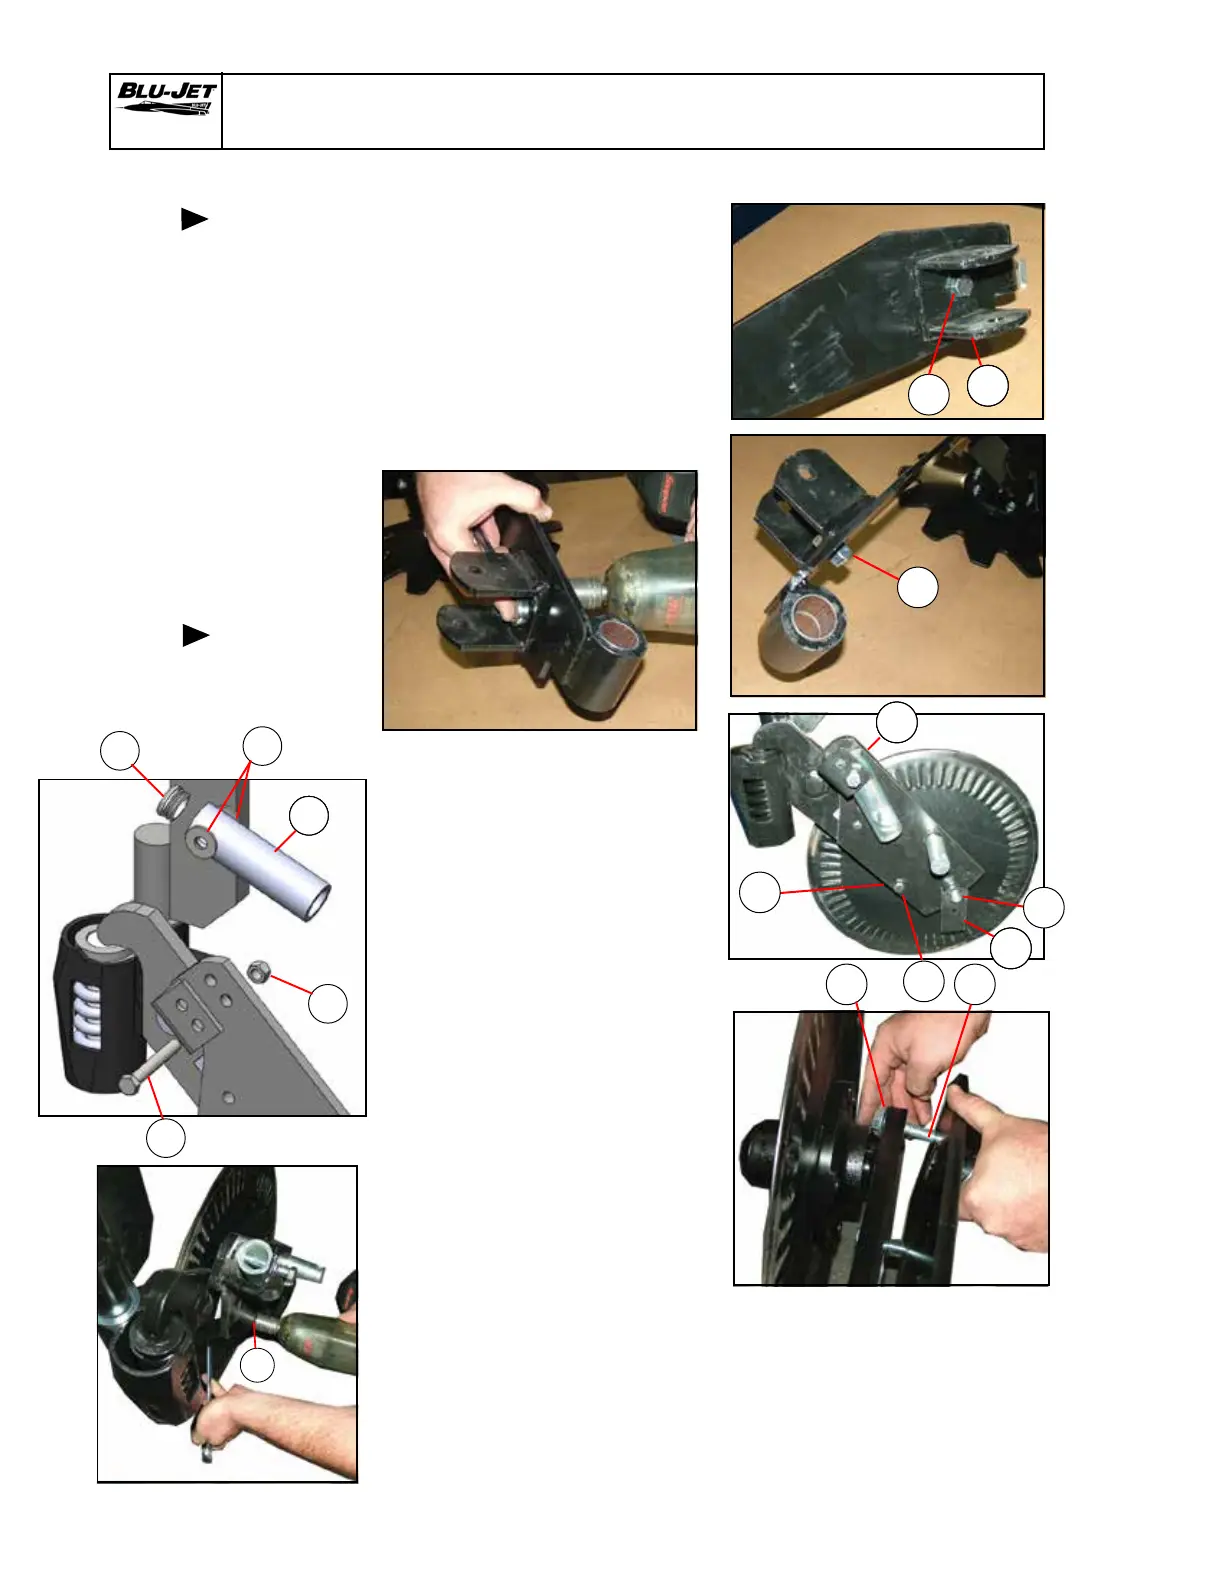
8. Attach (1) (AM2489) lower
sealer spring clevis with
(17) (BP3125) 1/2” x 1” hex
cap screw and (23) (BP3244)
1/2” hex lock nut. NOTE: the
hole is off centered. Position
long edge toward the blades.
9. Tighten 1/2” hex nut.
10. Insert (12) (AP3116) 1-5/16”
ID Black tube plug into end
of (2) (AM 2490) upper spring
tube. Place (16) (BP3050) 1/2”
at washers on both sides of
(2). Insert (21) (BP3130) 1/2” x
3-1/2” hex cap screw through
washers and tube. Secure
with (23) (BP3244) 1/2” hex
lock nut.
Do not over tighten. Allow
tubes to pivot.
Attach (7) (AM7667) pivot arm
spring mounting bracket on
coulter arm with (15) (BP3041)
1/2” x 2” hex cap screw. Place
(23) (BP3244) on hex cap screw
on 1/2” hex nut.
11. Place (16) (BP3050) 1/2” at
washer on (19) (BP3128)
1/2” x 2-1/2” hex cap screw.
Insert into slot at the bottom
of coulter arm. Position pivot
arm spring mounting next to
coulter arm over (19).
Place (8) (AM7669) arm stop
bracket on (19).
Install (23) (BP3244) 1/2” hex
lock nut.
Tighten the hex lock nut on (15).
Tighten the lock nut on (19)
until snug. The arm stop must
rotate down so the spring
assembly can be installed
before (18) (BP3126) 1/2” x
1-1/2” hex cap screw is installed.
StripTill Residue Manager
Mounting
spring
clevis
111
7
15
23
16 19
111
8
23
111
2
12
16
23
21
15
Attaching
pivot arm
bracket
111
1
23
17