TRANSMISSION
KUKJE MACHINERY CO., LTD.
95
5. CHECKING, DISASSEMBLING AND SERVICING
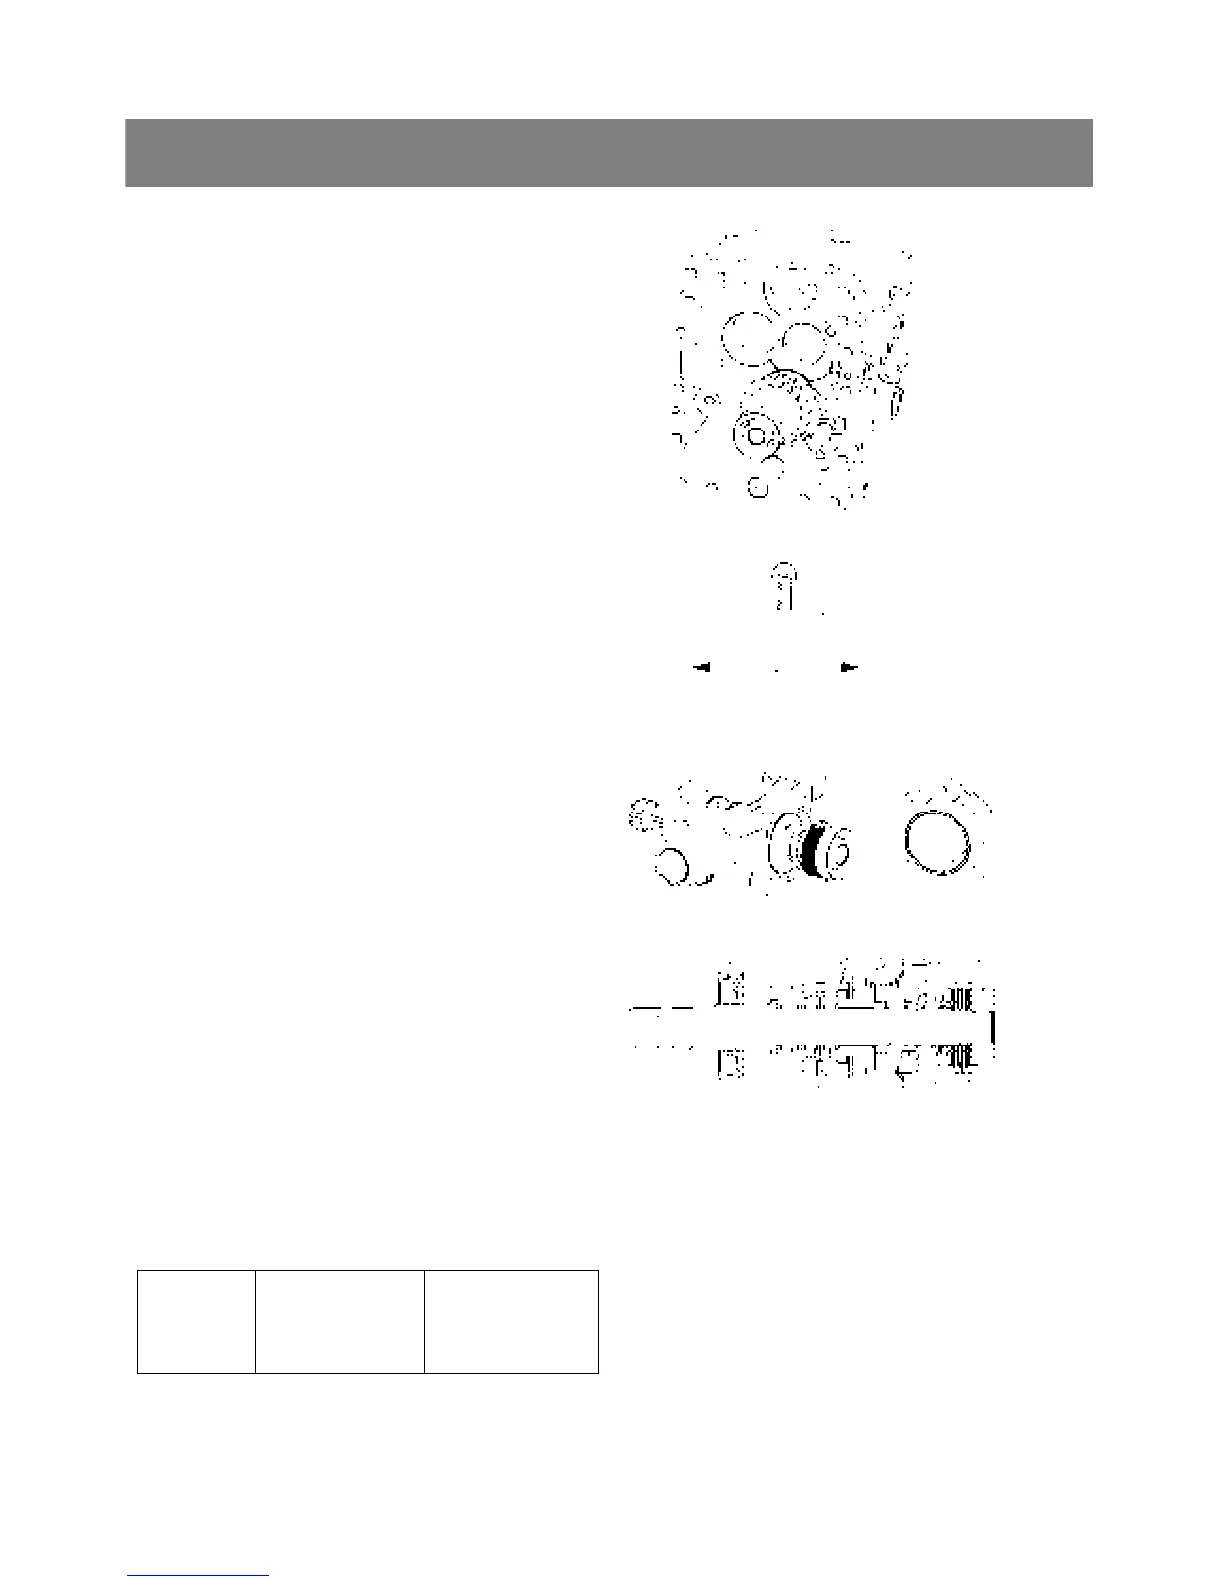
< Middle shaft and 3
rd
shaft >
1. Tap out the middle shaft(1) and remove the 19T
gear with bearing.
2. Draw out the 3
rd
shaft(2) with 13T-17T shifter
gear(3) and shift fork(4) with shift rod.
▷ Reassembling
9 Install the shift fork(4) and shift rod(5) as shown
in the figure.
*. PART NAME
1) Middle shaft 2) 3
rd
Shaft
3) 13T-17T Shifter gear 4) PTO Shifter fork
5) Shifter fork rod
A) Front B) Rear
< Mid-PTO shaft and one-way clutch >
1. Remove the mid-PTO case rear cover mounting
screws and separate the rear cover(1).
2. Remove the bearing(2) and remove the friction
plates, brake discs(10) and spring(9).
3. Remove the external snap ring and remove the
spring(11) and one-way clutch cam(8).
4. Remove the oil seal(4) and internal snap ring(5).
5. Remove the mid-PTO shaft(3) with bearing(13),
11T gear(6) and coupling(7).
▷ Reassembling
9 Apply grease to lip and outer of oil seal.
9 When installing the needle bearings(12) into the
11T gear and one-way clutch cam, apply
transmission oil to the needle bearings.
9 Install the longer needle bearing to front side.
Tightening
torque
Mid-PTO rear
cover mounting
screw
23.5 to 27.5 Nm
2.4 to 2.8 kgfm
17.4 to 27.3 ft-lbs
*. PART NAME
1) Mid-PTO case rear cover 2) Bearing
3) Mid-PTO Shaft 4) Oil seal
5) Internal snap ring 6) 11T Gear
7) Coupling 8) One-way clutch cam
9) Spring
10) Friction plate and brake disc
11) Spring 12) Needle spring
13) Bearing
(1)
(2)
(3)
(4)
(5)
(5)
(4)
(2) (1)
(3)
(4) (5)
(6)
(7)
(8)
(9) (2)
(12) (11) (10)
A B