Brocade DCX 8510-4 Backbone Hardware Reference Manual 15
53-1002177-06
Preparing for the Brocade DCX 8510-4 installation
2
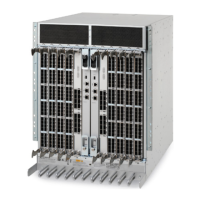
1. Provide a space that is 9 rack units (9U) high, 61.19 cm (24.09 in.) deep, and 43.74 cm (17.22
in.) wide. 1U is equal to 4.45 cm (1.75 in.). If you do not use the provided port side exhaust kit,
the space needs to be only 8 rack units (8U) high.
Plan to install the Brocade DCX 8510-4 with the nonport side facing the air-intake aisle. The
Brocade DCX 8510-4 can be installed facing either direction, if serviceability and cooling
requirements are met.
2. Ensure that dedicated electrical branch circuits with the following characteristics are available:
Refer to “Power specifications” in Appendix A, “Specifications” for specific requirements
depending on your chassis configuration.
• 200 – 240 VAC, 50–60 Hz (two branch circuits) - recommended for high availability and
maximum blade usage
• Two cables for 200 - 240 VAC service
• Protected by a circuit breaker in accordance with local electrical codes
• Supply circuit, line fusing, and wire size adequate to the electrical rating on the chassis
nameplate
• Location close to the chassis and easily accessible
• Grounded outlets installed by a licensed electrician and compatible with the power cords
To maximize fault tolerance, connect each power cord to a separate power source.
3. Plan for cable management before installing the chassis.
Cables can be managed in a variety of ways, such as by routing cables below the chassis, to
either side of the chassis, through cable channels on the sides of the cabinet, or by using
patch panels.
4. Ensure that the following is available for configuration of the Brocade DCX 8510-4:
• Workstation with an installed terminal emulator, such as HyperTerminal
• Serial cable (provided)
• Three Ethernet cables (including one spare)
• Access to an FTP server for backing up the switch configuration or collecting supportsave
output data (optional)
• A Brocade USB stick for collecting supportsave output data (optional)
• Transceivers (copper and optical) and compatible cables
5. Ensure that the air intake and exhaust vents have a minimum of 5.1 cm (2 in.) of airspace.
6. Ensure that the air temperature on the air intake side is less than 40°C (104°F) during
operation.
 Loading...