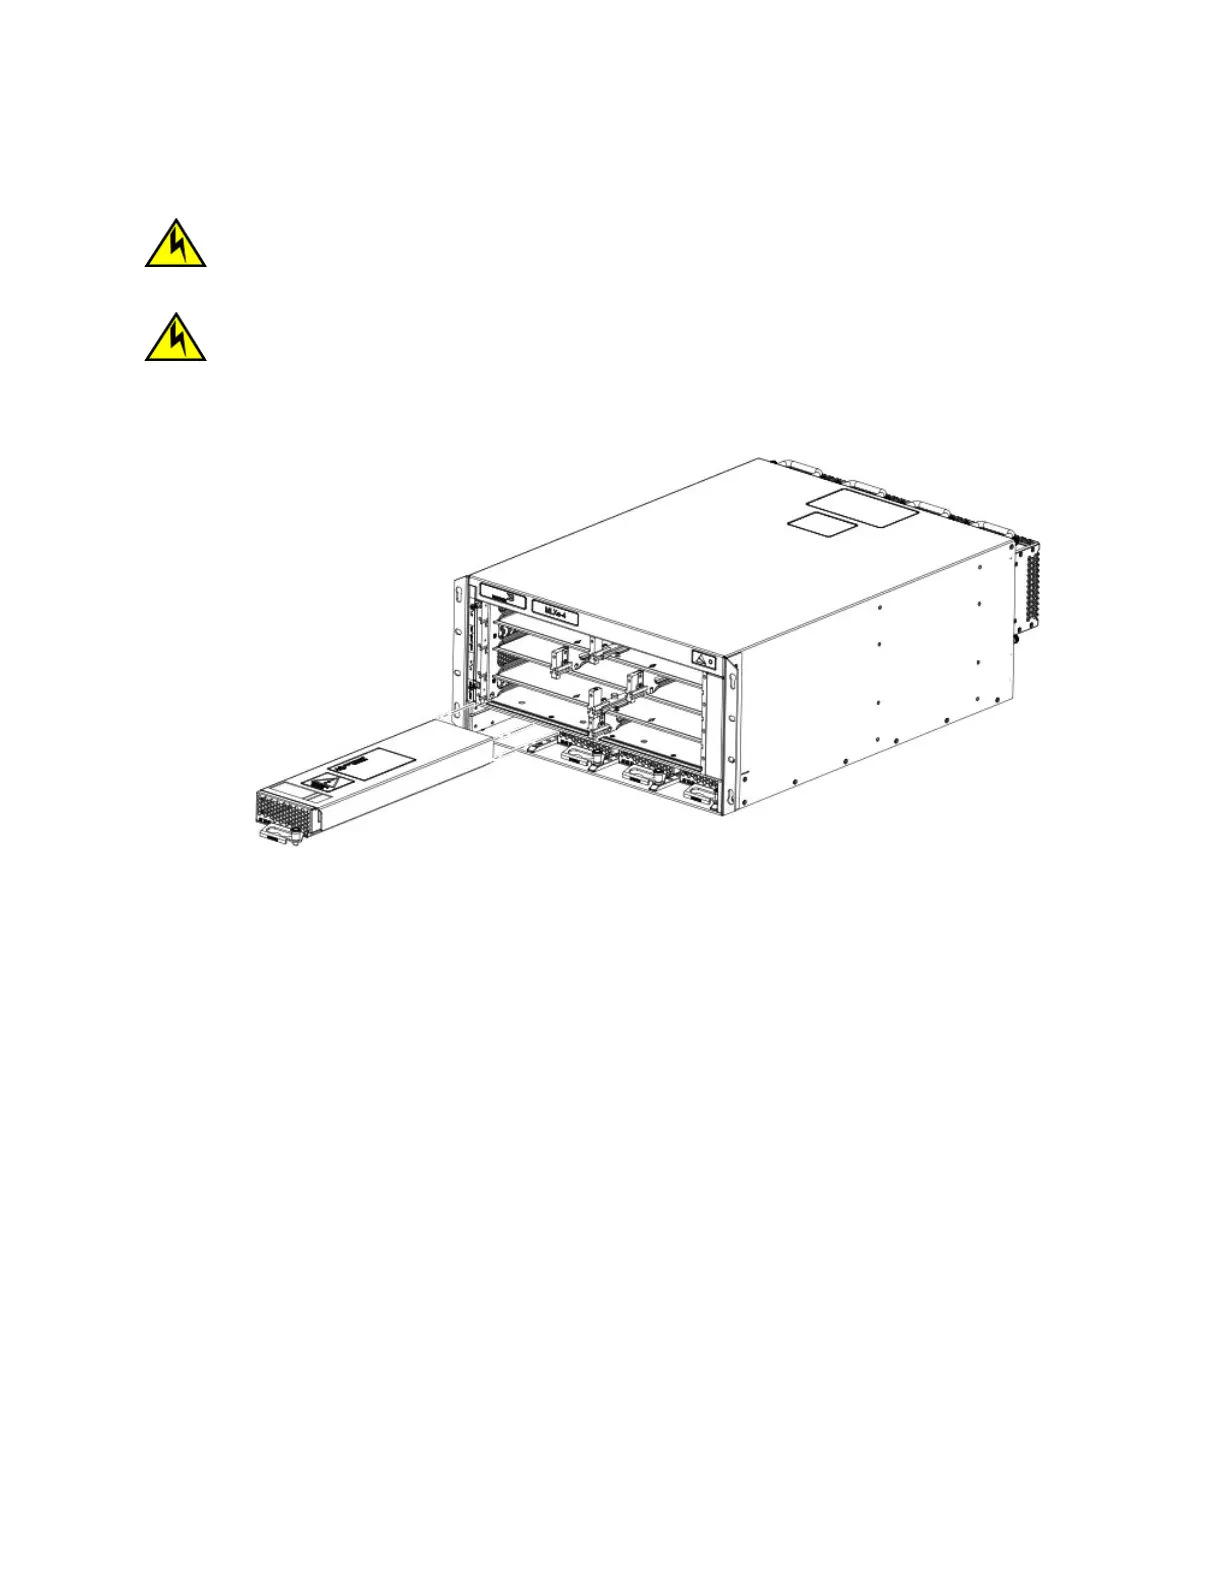
3. Insert the power supply into the slot and slide it along the guides on each side of the slot., as shown in the following gure.
CAUTION
If you do not install a module or a power supply in a slot, you must keep the slot ller panel in place. If you run the
chassis with an uncovered slot, the system will overheat.
CAUTION
Carefully follow the mechanical guides on each side of the power supply slot and make sure the power supply is
properly inserted in the guides. Never insert the power supply upside down.
FIGURE 30 Installing a power supply
4. Push the power supply front panel into the router until it engages the backplane connector, and the latch pin clicks into place.
For information about connecting power to the router, refer to Connecting AC power on page 99.
Connecting AC power
AC power is supplied through a power cord connected to the AC power supply installed in the router.
NOTE
For the NEBS-compliant installation, AC power connections must use a surge protection device (SPD) to protect the AC power
supplies from damage due to excessive power line surges.
Follow these steps to connect the AC power cord.
1. Locate the power supply AC inlet on rear of chassis for the associated installed power supply.
2. Lift the cord retainer and connect the AC power cord to the AC inlet.
Installing a Brocade MLXe Series-4 router
Brocade NetIron MLXe Series Hardware Installation Guide
53-1004203-04 99
 Loading...