6-1 Confidential
6.1 IF YOU REPLACE THE MAIN PCB
6.1.1 Load Update Programs/data
If the main PCB is replaced with a new one, write the update programs/data onto the flash ROM.
Refer to Appendix 2, page App. 2-2.
6.1.2 Initialize the EEPROM on the Main PCB (Function code 01)
Refer to Chapter 8, Section 8.4.1.
6.1.3 Customize the EEPROM on the Main PCB (Function code 74)
Refer to Chapter 8, Section 8.4.14.
6.1.4 Check the Control Panel PCB for Normal Operation (Function code 13)
Refer to Chapter 8, Section 8.4.8.
6.1.5 Make a Sensor Operation Check (Function code 32)
Refer to Chapter 8, Section 8.4.9.
6.1.6 Acquire of White Level Data and Set the CCD Scanner Area (Function code 55)
Refer to Chapter 8, Section 8.4.12.
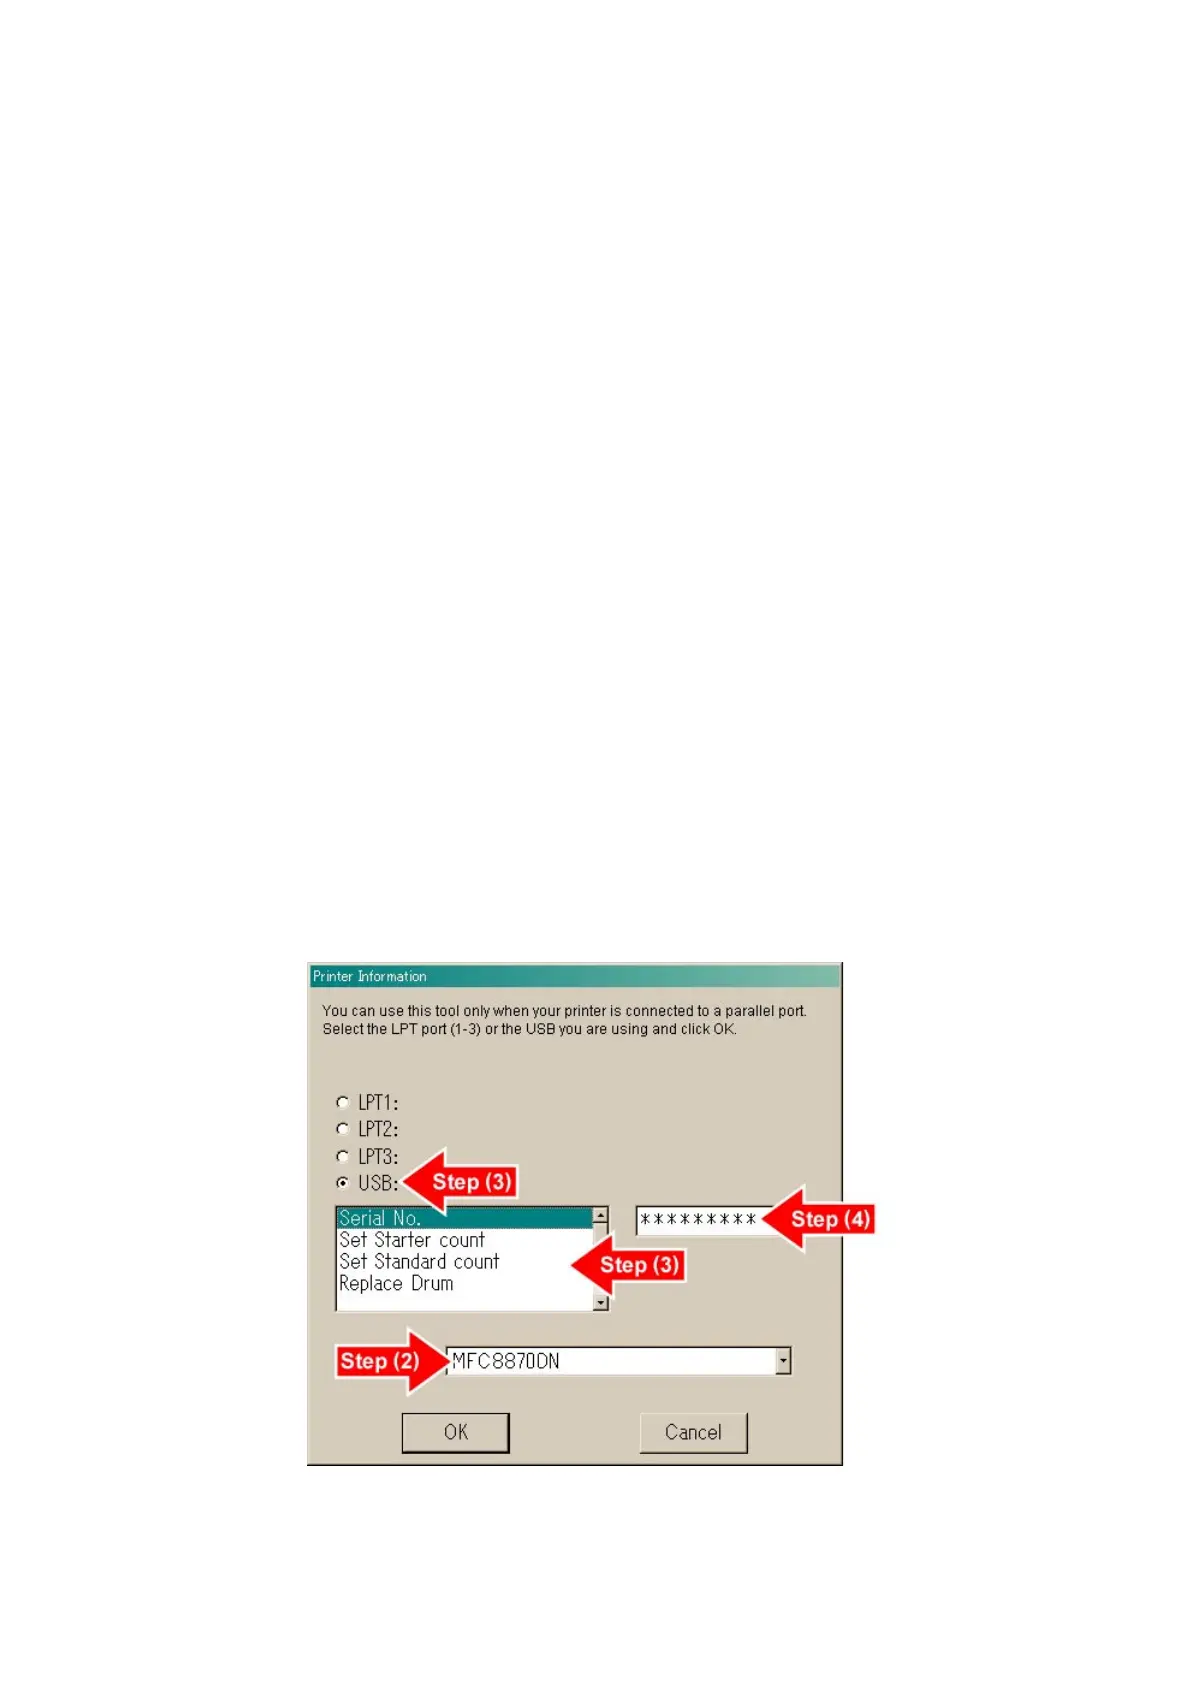
6.1.7 Setting the Serial Number
(1) Double-click the brmainte.EXE file (maintenance utility).
(2) Select Input Information from Menu. Select the applicable model name.
(3) Check the port (USB) which the machine is connected through and click “Serial No.”
(4) Enter the serial number (the last nine digits) of the machine into the box and click the OK button.
(Refer to the NOTE below for the serial number label.)
(5) The serial number is shown in the window, and check that it is correct. The setting of the serial
number is completed.
Fig. 6-1
 Loading...