Getting Ready to Sew 2-3
1 —
2 —
3 —
4 —
5 —
6 —
7 —
8 —
?
!
9 —
CONTENTS
Index
6
1
Sewing Reinforcement Stitches
Reverse/reinforcement stitches are generally necessary at
the beginning and end of sewing. You can use “Reverse/
Reinforcement Stitch” button to sew reverse/reinforcement
stitches manually (see page 1-3).
On the screen if the automatic reinforcement stitch key is
selected, reverse stitches (or reinforcement stitches) will
be sewn automatically at the start of sewing when press-
ing the “Start/Stop” button. Press the “Reverse/Reinforce-
ment Stitch” button to sew reverse stitches (or reinforce-
ment stitches) automatically at the finish of the sewing
(see page 2-14).
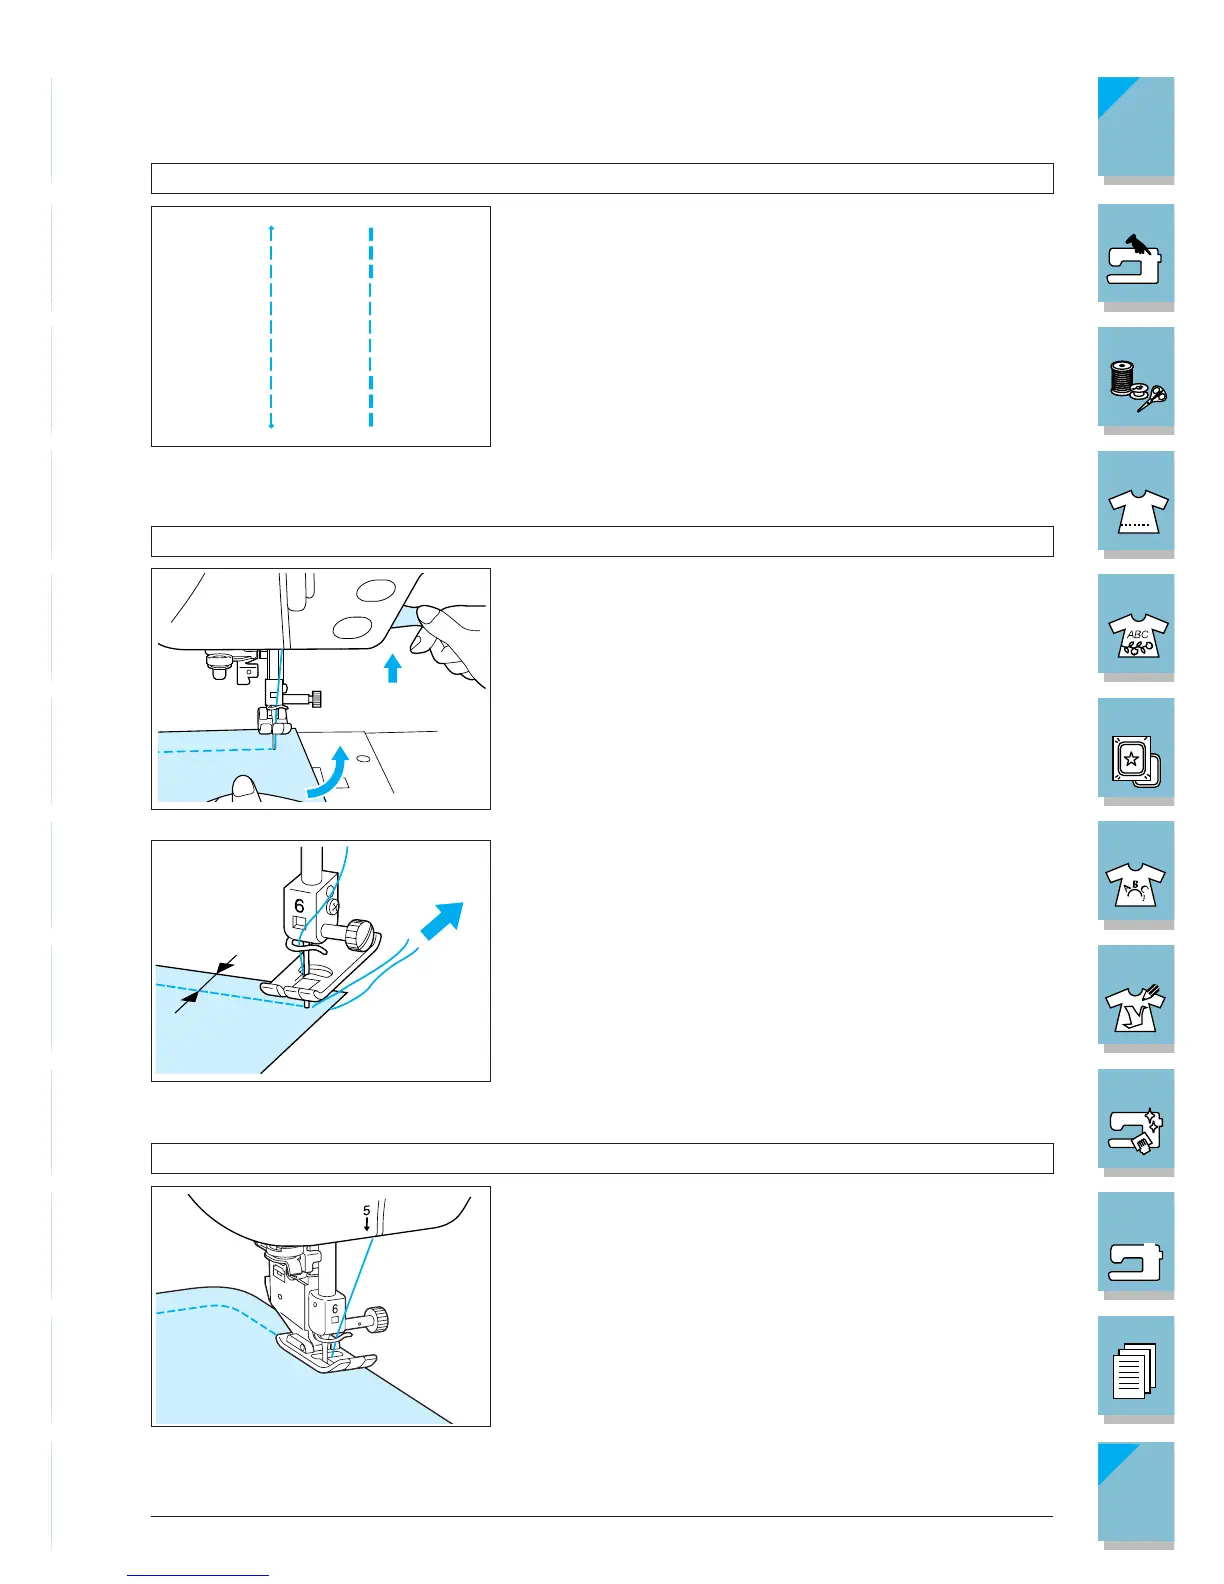
Changing Sewing Direction
Stop the machine. Leave the needle in the fabric, and raise
the presser foot. Using the needle as a pivot, turn the fab-
ric so that you can sew in the new direction. Lower the
presser foot lever and start sewing.
When edge stitching a short stitch length and close to the
edge of the fabric, the presser foot may not cover enough
fabric for proper feeding. Before you begin to sew, sew a
basting thread at the corner point. When you change di-
rection at the corner, start sewing as you pull the basting
thread toward the back.
1 5 mm (3/16 inch)
Sewing Curves
Sew slowly while keeping the seam parallel with the fab-
ric edge as you guide the fabric around the curve.