Basic Operations and Maintenance 3-9
at the lower left. Click and drag to move the stage to another area of interest and display it in the Live Video
Pane. When you have obtained the correct stage position, release the mouse button.
• Click the Edit Mode button . Either type your locations in the X and Y fields or click the
Move button to move the stage to those locations.
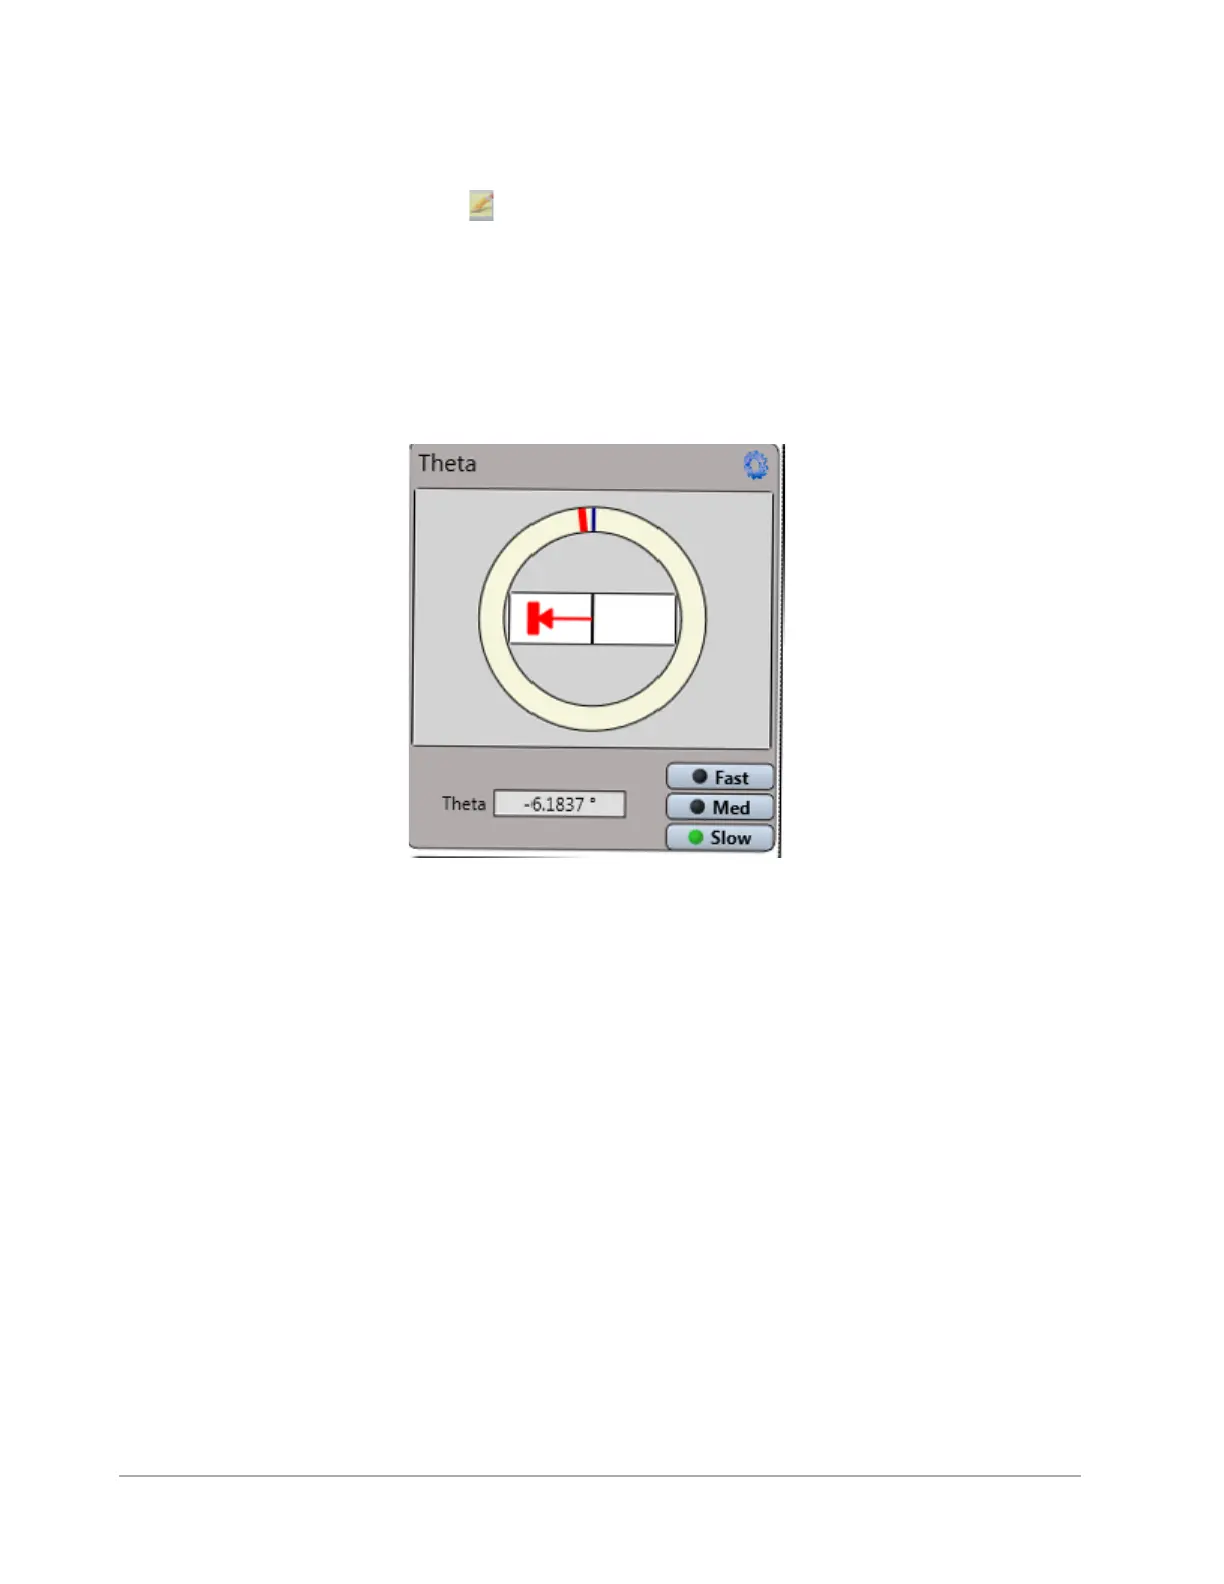
Theta Control Panel
Prior to a taking measurement, you must place the area of interest on the sample under the stylus by
adjusting the position of the motorized theta sample-positioning stage. Instructions for doing this
appear after the figure.
Figure 3-12: Theta Stage Control
To set the position of the motorized theta sample-positioning stage:
1 In the Theta Control Panel in the Live Video Display (see Figure 3-12), click the blue Gear icon in the upper
right corner to enter the units as well as the speeds for Fast, Medium, and Slow on both the R Axis and the
Theta Axis (see Figure 3-13). If you select the Grab Rectangle to Move check box, you must grab the red
rectangle in the middle of the Theta Control Panel before you can adjust the theta position of the motorized
stage.When your settings are complete, click OK.