ENGINE DISMANTLING for DECARBONISING
When decarbonising, it is not necessary or desirable
to dismantle the cylinder barrel, unless it is suspected
that the valves, pistons or its rings are the cause of
some trouble. It is sufficient to remove the cylinder
head and gasket thus exposing the piston and
valves.
REMOVING CYLINDER HEAD
To detach cylinder head, disconnect sparking plug
lead, remove steady strap and the 10 cylinder head
bolts. Head can then be lifted off.
Rotate the engine until the piston is at the top of its
stroke and scrape it with an old penknife, taking great
care not to damage the piston crown. Then clean the
cylinder head and replace, tightening the bolts in the
order shown in Fig. 24.
If the valve seats are suspected of gas leakage, due
to insufficient tappet clearances or other causes
these should be remedied. It is possible to grind in
the valves in position, but it is preferable to remove
the barrel from the crankcase so that the work may
be carried out on the bench, and at the same time
the piston and rings inspected.
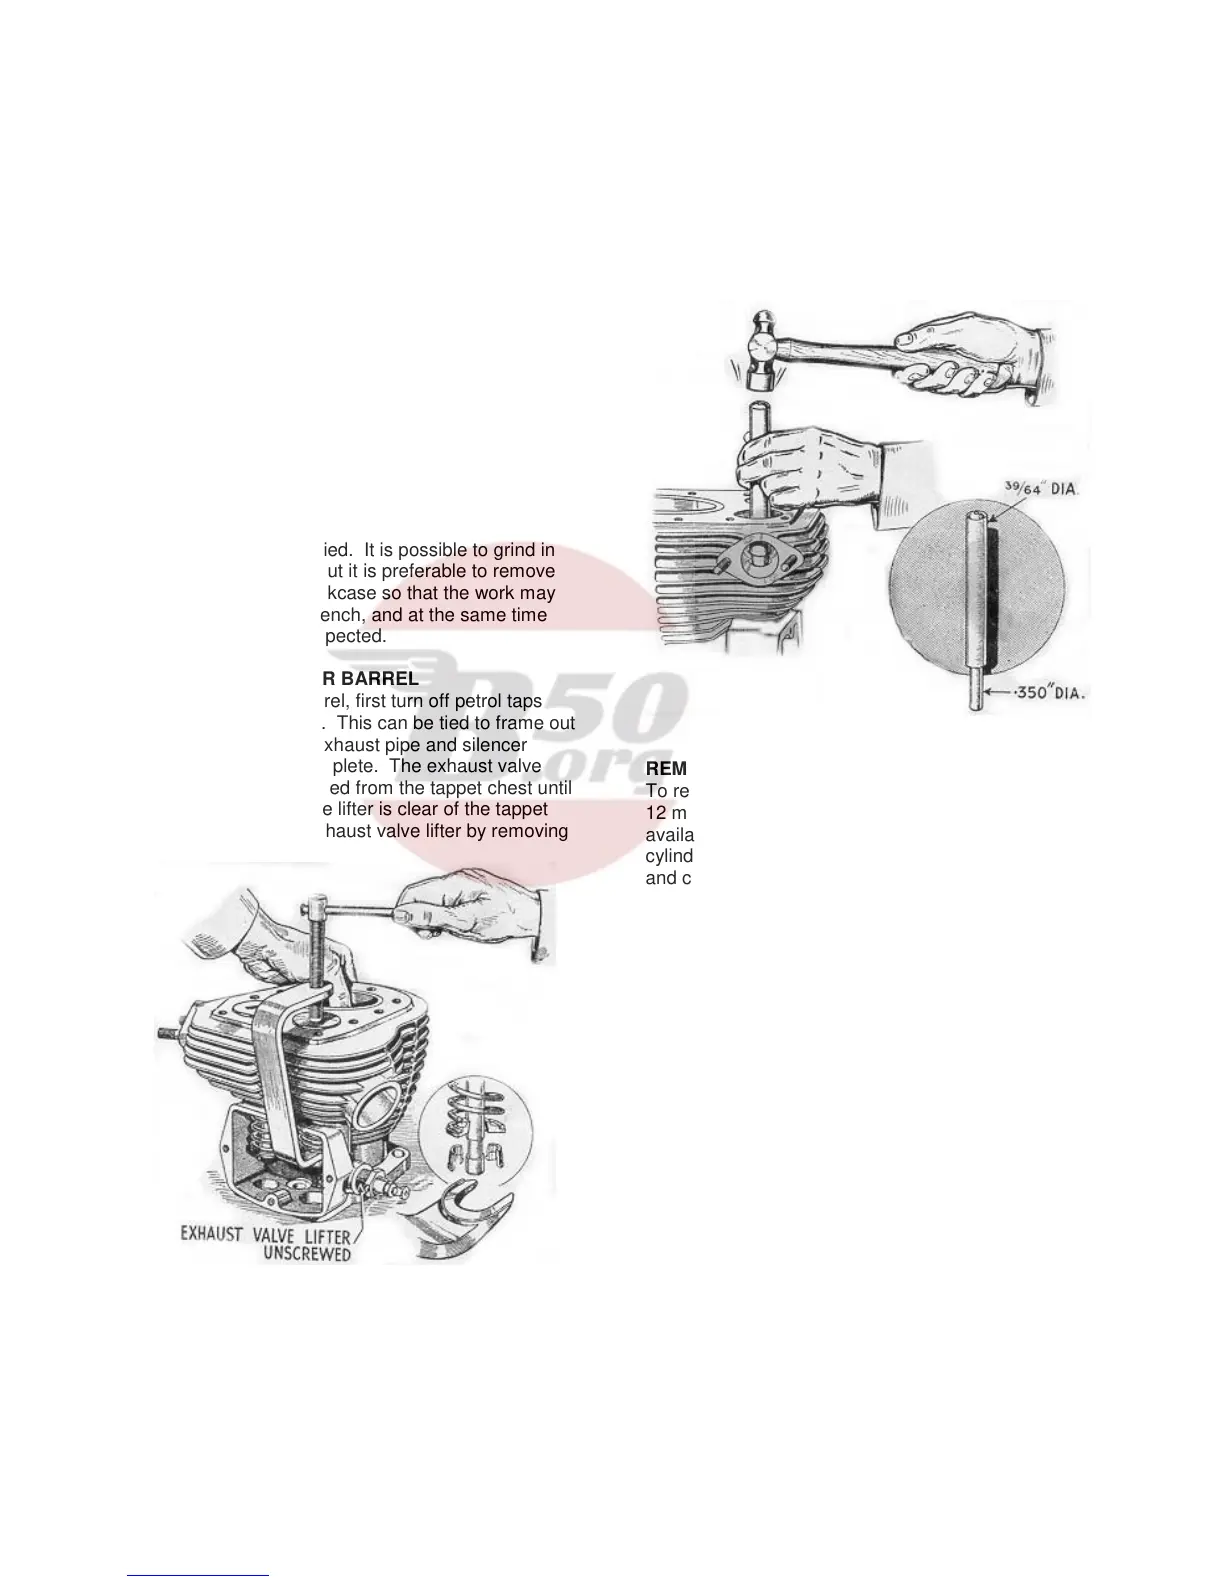
REMOVING CYLINDER BARREL
To remove cylinder barrel, first turn off petrol taps
and detach carburetter. This can be tied to frame out
of the way. Next, the exhaust pipe and silencer
should be removed complete. The exhaust valve
lifter should be unscrewed from the tappet chest until
the eccentric peg on the lifter is clear of the tappet
head. Uncouple the exhaust valve lifter by removing
Fig. 12. B.S.A. Valve removing tool.
the pin at the lever end. Now remove the five
cylinder base nuts (four outside and one inside
tappet chest), and cylinder barrel can be lifted off.
When removing the cylinder barrel, the simplest way
is to lift it up and tilt it forwards into the front angle of
the frame. The piston should be steadied as it
emerges from the barrel to prevent possible damage.
Cover the crankcase mouth with rag to prevent dust
and grit falling in.
Fig. 13. Inserting valve guides
REMOVING THE VALVES
To remove the valves an extractor as shown in Fig.
12 may be used. If the proper extractor is not
available, the valves may be removed by laying the
cylinder barrel on a bench (valve heads downwards)
and compressing the valve springs with the aid of a
piece of tube (suitably slotted), while an assistant
removes the cotters. Clean all carbon from the ports
and check valve guides for wear.
FITTING NEW VALVE GUIDES
If new guides are to be fitted, the old ones may be
extracted (from below) by means of a simple punch
(consisting of a bar of steel of not more than 5/8”
diameter – Fig. 13). The new guides can be driven in
from the top with the same punch and it is important
that the dimensions from the top of the guide to the
cylinder head joint (as shown in Fig. 14) should be
carefully observed. After the new guides have been
inserted, the valve seats should be re-cut with a pilot
cutter to ensure concentricity of seats and stems (see
Fig. 14). Note that the exhaust valve guide only has
it’s upper end counterbored.
GRINDING IN VALVES
If the old valves are to be retained, they should only
be ground in if the seating shows slight pitting. If
badly pitted, they should be refaced, otherwise
excessive grinding
11