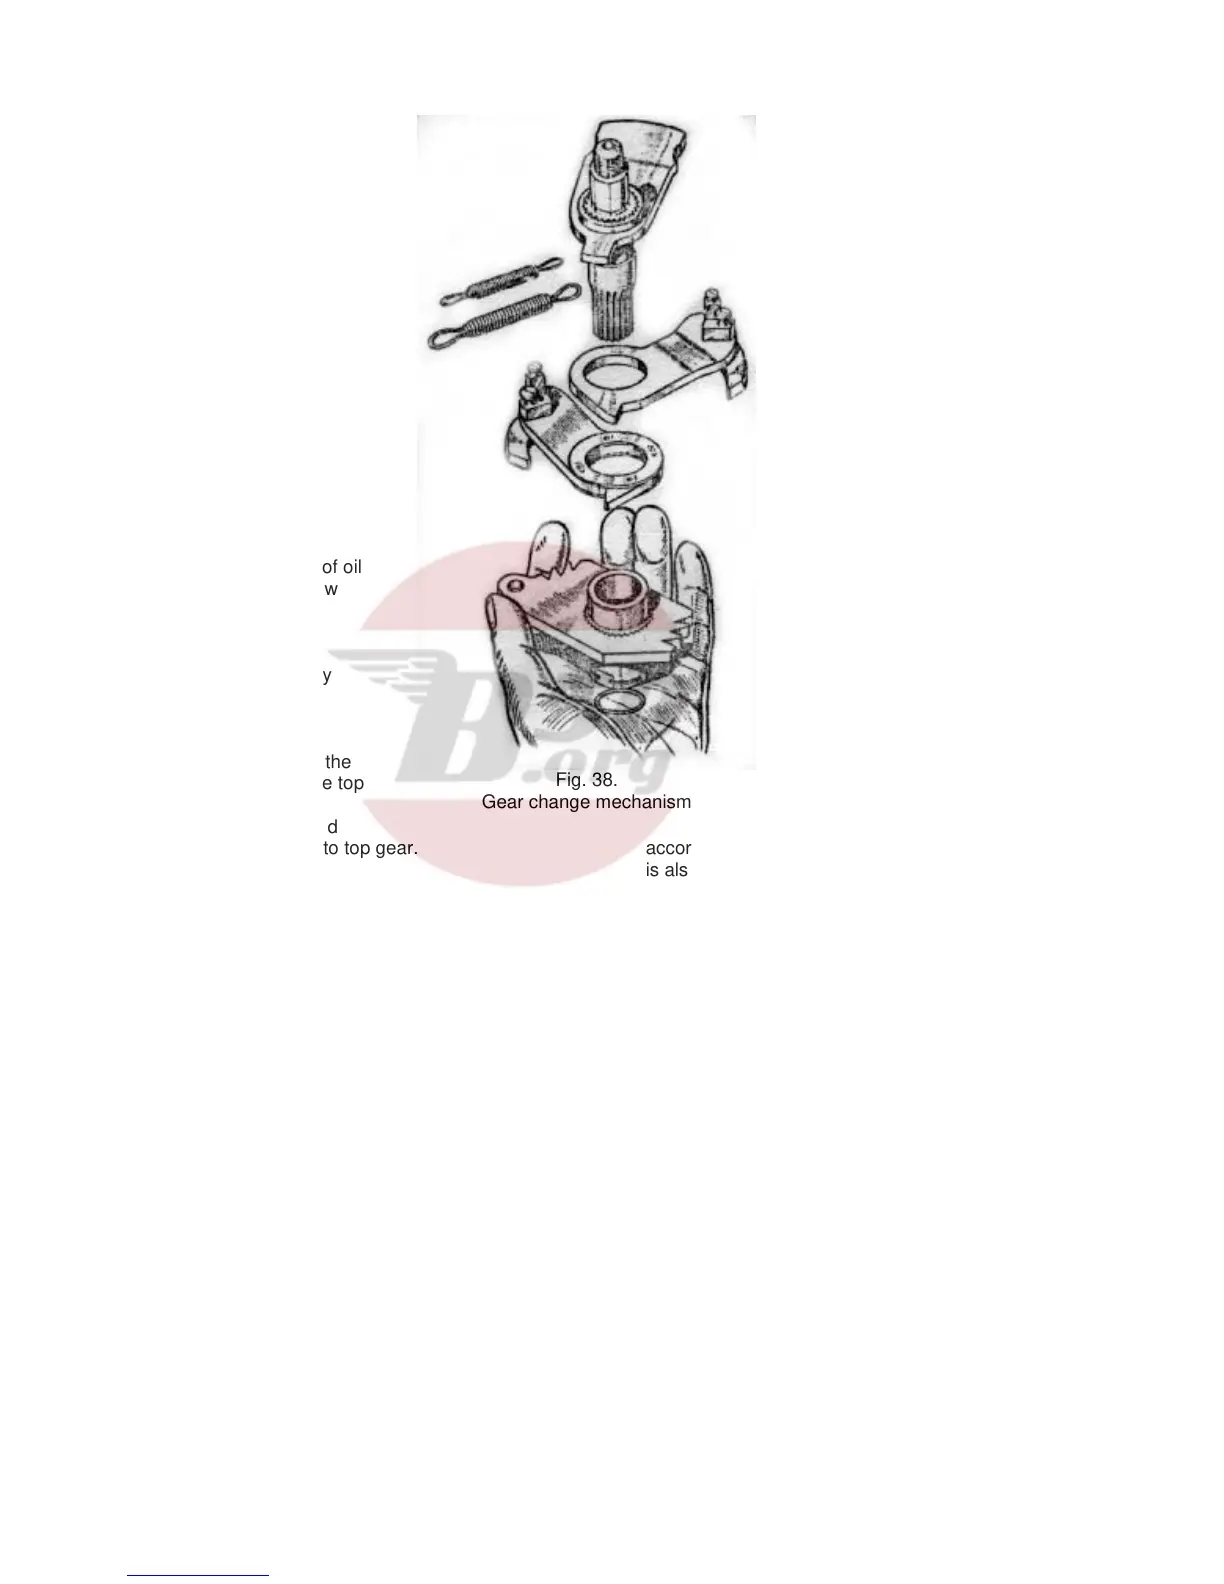
Fig. 38.
Gear change mechanism
Before the re-assembly is
carried out a stage further,
loosely replace the
gearchange pedal and
check the operation of all
gears by inspection through
the cover. It will, of course,
be necessary to move the
gearbox sprocket by hand
when endeavouring to
engage the gears.
When all is found to be
correct, set gears in top gear
position again, and remove
the gearchange pedal. The
clutch push rod is next to be
replaced, and with this in
position the small felt
washer must be added.
This washer is important
since its function is to
prevent any possibility of oil
passing along the hollow
mainshaft, to the clutch
plates.
Finally, put back the
gearbox cover, carefully
tighten all screws, and
carefully replace the
kickstarter crank and
gearchange pedal. As the
gearbox is still set in the top
gear position when the
indicator disc is replaced
this also should be set to top gear.
REPLACEMENT OF THE GEARBOX
The replacement of the gearbox
should not present any difficulties.
When the box is in position and
the fixing bolts are about to be
tightened up, make sure that the
flats just below the bolt heads
register properly in the slots
machined in the yoke plates.
Also, on the rear bolt, an adjuster
is provided for tensioning the
primary chain; this must be in
position and the chain tension
adjusted before the gearbox bolts
are finally tightened. The latter
must be really tight after the
adjustment is made. There should
be about ½ “ total play in the chain
(see “Front Chain”, page 20).
Replace the oil tank pressure
release pipe together with the
clutch cable and its adjuster.
The inner half of the primary
chaincase may now be fitted,
followed by the cush drive, chain
and clutch, together with it’s
pressure plate and cover. Finally
refit the outer half of the chaincase
and then the footrest.
The refitting of the clutch and
primary chaincase is described in
the chapter “Re-assembly of the
Clutch” on page 22. The clutch
adjustment may require setting
and this should be carried out in
accordance with the instructions given on Page 20. It
is also possible that the rear chain will require re-
tensioning and this may be done by movement of the
rear wheel (see page 20).
SPECIAL INSTRUCTIONS FOR THE
CLEANING AND LUBRICATION OF HUBS
Remove bearing cone assemblies from hub as
described in the next section, page 27. Wash
bearings, cones, spindle and inside of hub in paraffin
and dry thoroughly. Do not use compressed air.
Inspect bearing races and replace if damaged.
Replace grease seals if necessary. Lubricate
bearings with grease No. 2 with a wheel-bearing
packer, or by hand, kneading lubricant into all spaces
in the bearing roller cage. Use extreme care to
protect the bearings from dirt and dust.
Pack inside of hub shell with grease No 2.
The lubricant in the hub and bearings is sufficient to
provide lubrication until the next service period.
Reassemble and adjust bearings in accordance with
the instructions given in the next section.
26