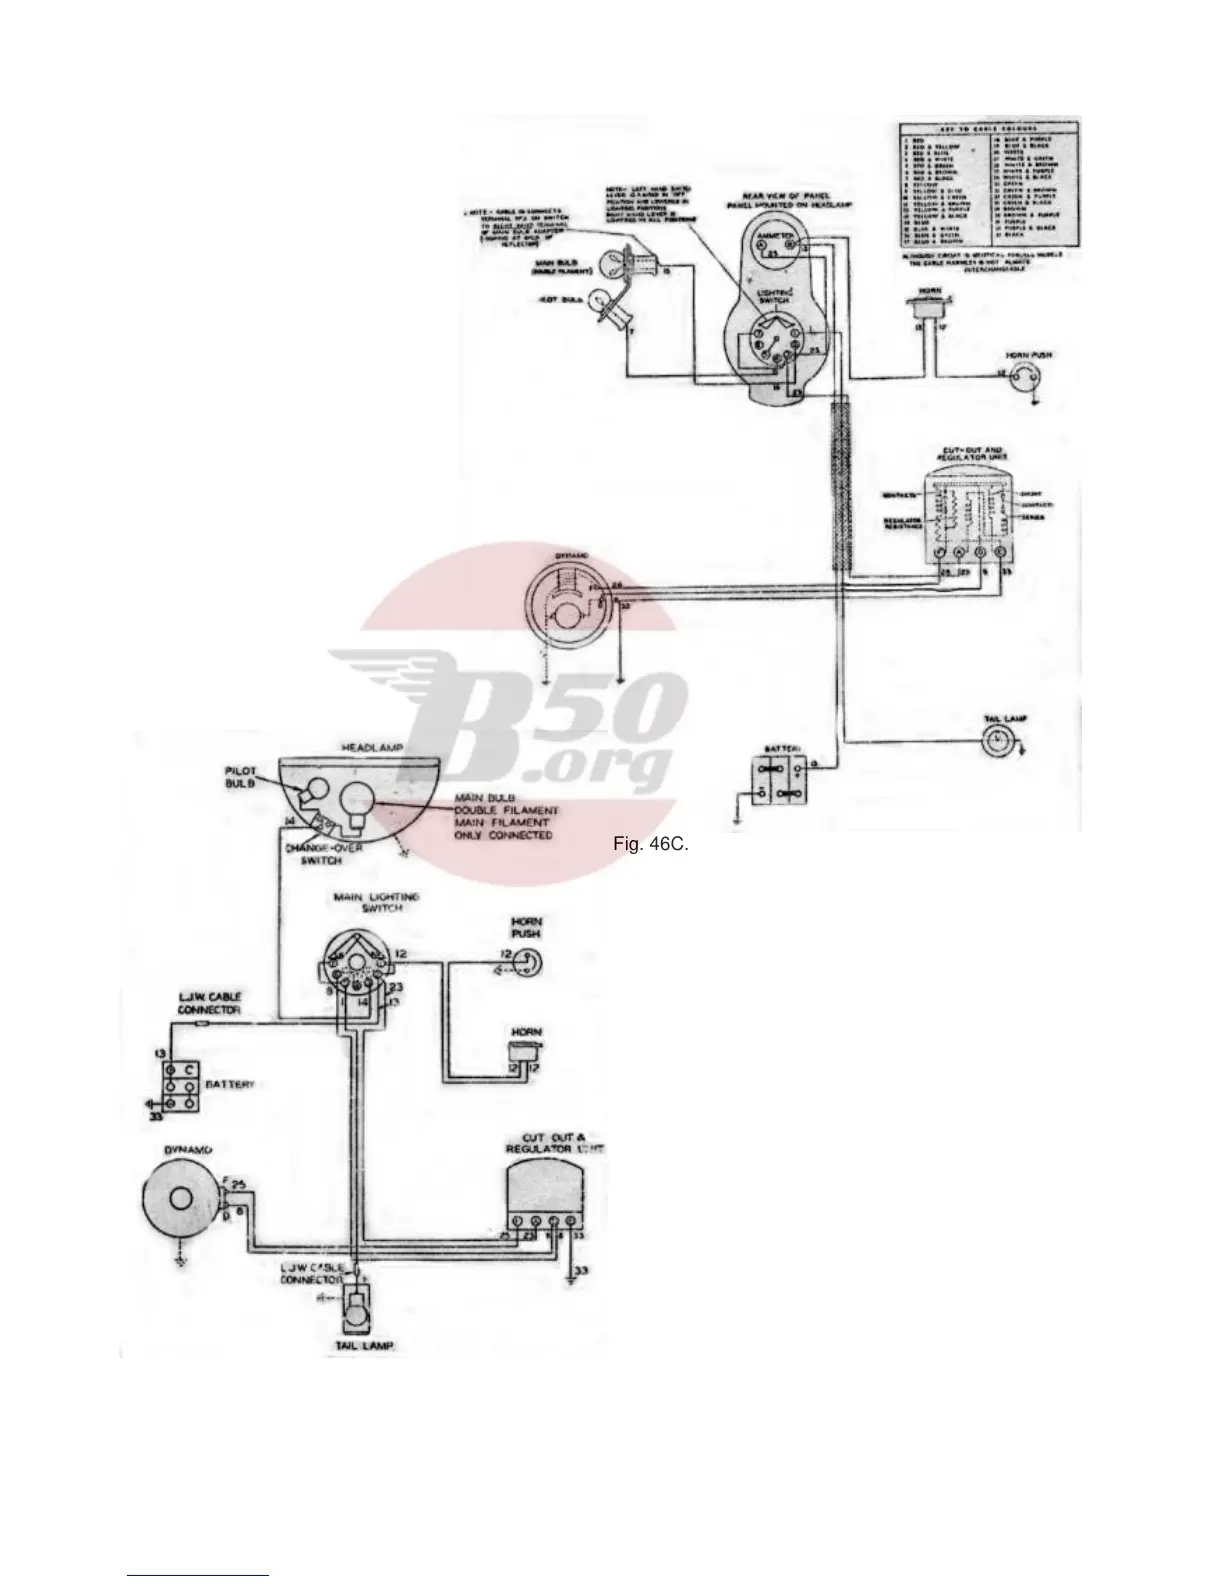
In the event of the wiring system requiring
replacement, no difficulty should be experienced
provided that the diagrams (Figs 46A, B, C and D)
are carefully followed. It should be noted that Figs
46A and C apply only to machines on which an
ammeter is fitted. Figs 46B and D apply only to
later models with a push switch in headlamp and no
ammeter.
The cables from the headlamp and horn are
grouped together in a harness, which is clipped to
the frame top member, and in order to gain access
to this fixing, the petrol tank must be removed.
There is no need to drain it. Set the taps in the “off”
position, uncouple the petrol pipes and release the
front and rear tank mountings, when the tank can
be taken off.
The connections to the regulator, mounted on the
rear mudguard below the saddle, will be much
easier of access if the regulator itself is first
released from the guard.
Fig. 46C. Wiring diagram in models fitted with ammeter.