will wear away the seat in the cylinder barrel and
cause the valve to become pocketed. Take great
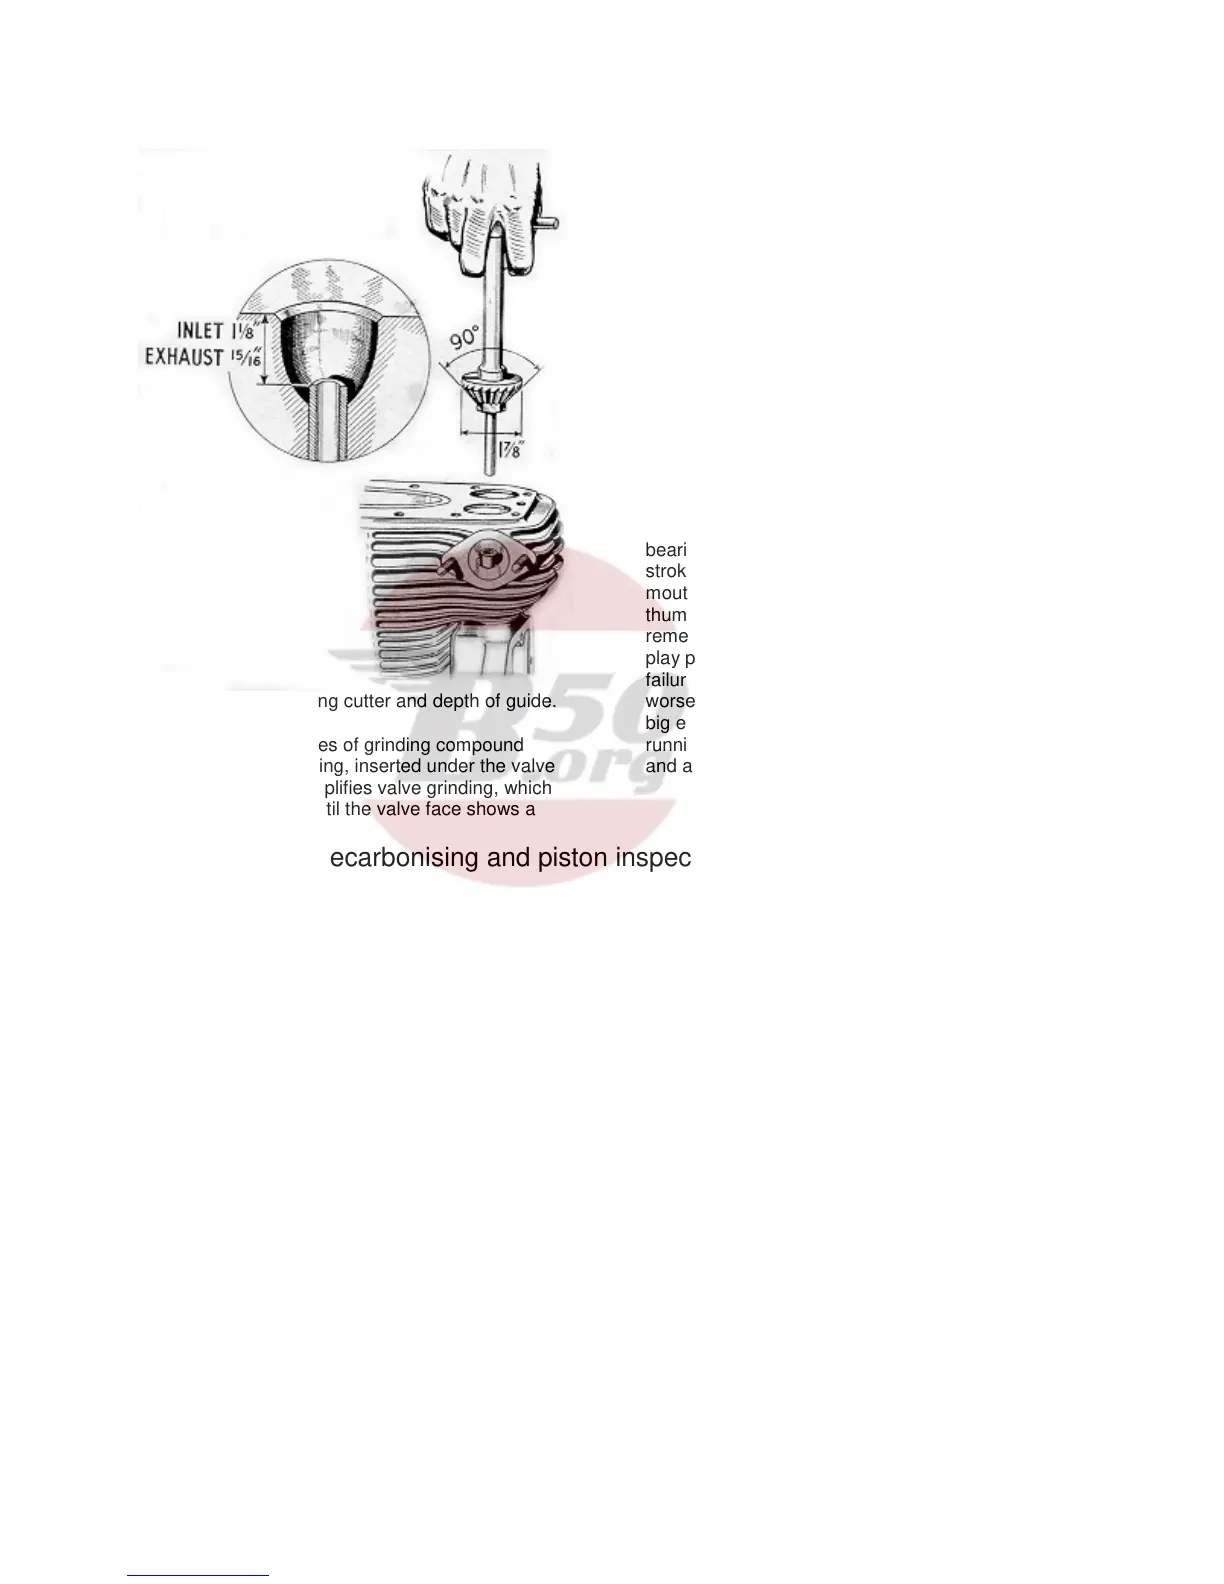
Fig. 14. Valve seating cutter and depth of guide.
care to remove all traces of grinding compound
afterwards. A light spring, inserted under the valve
head, considerably simplifies valve grinding, which
should be continued until the valve face shows a
smooth surface all the way round. If the machine has
covered a considerable mileage, the valve springs
may need replacing. Refit the valves, springs and
cotters with the aid of the tool shown in Fig. 12 after
valve stems have been lubricated.
PISTON AND RINGS. The gudgeon pin is located
by means of wire circlips which must be removed by
means of a tang of a file or similar tool. Withdraw the
gudgeon pin, thus freeing the piston and immediately
after its removal mark the inside of the piston so that
it can be re-assembled in its original position.
If inspection of the piston rings shows that they are
stuck, prise them out very carefully, and clean them.
Remove any carbon from the grooves and rings, but
before replacing them, check the gap with a ring in
the cylinder. If the gap is excessive, new rings must
be fitted having gaps of between .008” and .012”
when in position.
At this stage it is advisable to check the big end
bearing for wear. Turn engine until piston is at top of
stroke, and resting both hands on sides of crankcase
mouth, hold connecting rod between fingers and
thumbs and feel for up and down play. It should be
remembered that, even though there may be a little
play present, it will not necessarily mean sudden
failure of the bearing, though it will inevitably become
worse. Where play seems excessive, and apparent
big end noise has been noticed when engine is
running, the engine should be completely dismantled,
and a new big end assembly fitted.
Dismantling for decarbonising and piston inspection as described so far is carried
out without removing the engine from the frame. Assembly from this point is
described on Page 18.
REMOVING ENGINE FROM THE FRAME AND
COMPLETE DISMANTLING
The procedure for the removal of the engine from the
frame and dismantling will be described from the
point reached in the previous section when the
cylinder head and barrel have been removed. The oil
pipes must next be disconnected, but first the oil tank
should be drained. Alternatively the pipes can be
disconnected and suitably plugged.
Detach the leads to the dynamo (both of which are
held by a small plate and one screw), and then the
earth wire adjacent to the contact breaker housing.
Follow these with the sparking plug lead.
The magneto control cable can be readily detached
from the handlebar lever.
REMOVING CHAINCASE
The oil bath chaincase follows next. Take off the
footrest and then undo all the screws round the rim of
the chaincase. The nuts of these screws are welded
to the other half of the case and so cannot be lost.
When the outer chaincase cover is taken off, careful
note should be made of the positioning of the cork
washers and distance pieces, to facilitate
replacement. Before removing the chain loosen
clutch as described in next paragraph, and then
dismantle engine shaft cush drive. Tap the lock
washer clear of the slot in the cush drive retaining nut
and
12