Using your LinkStation
LinkStation User Manual 31
1
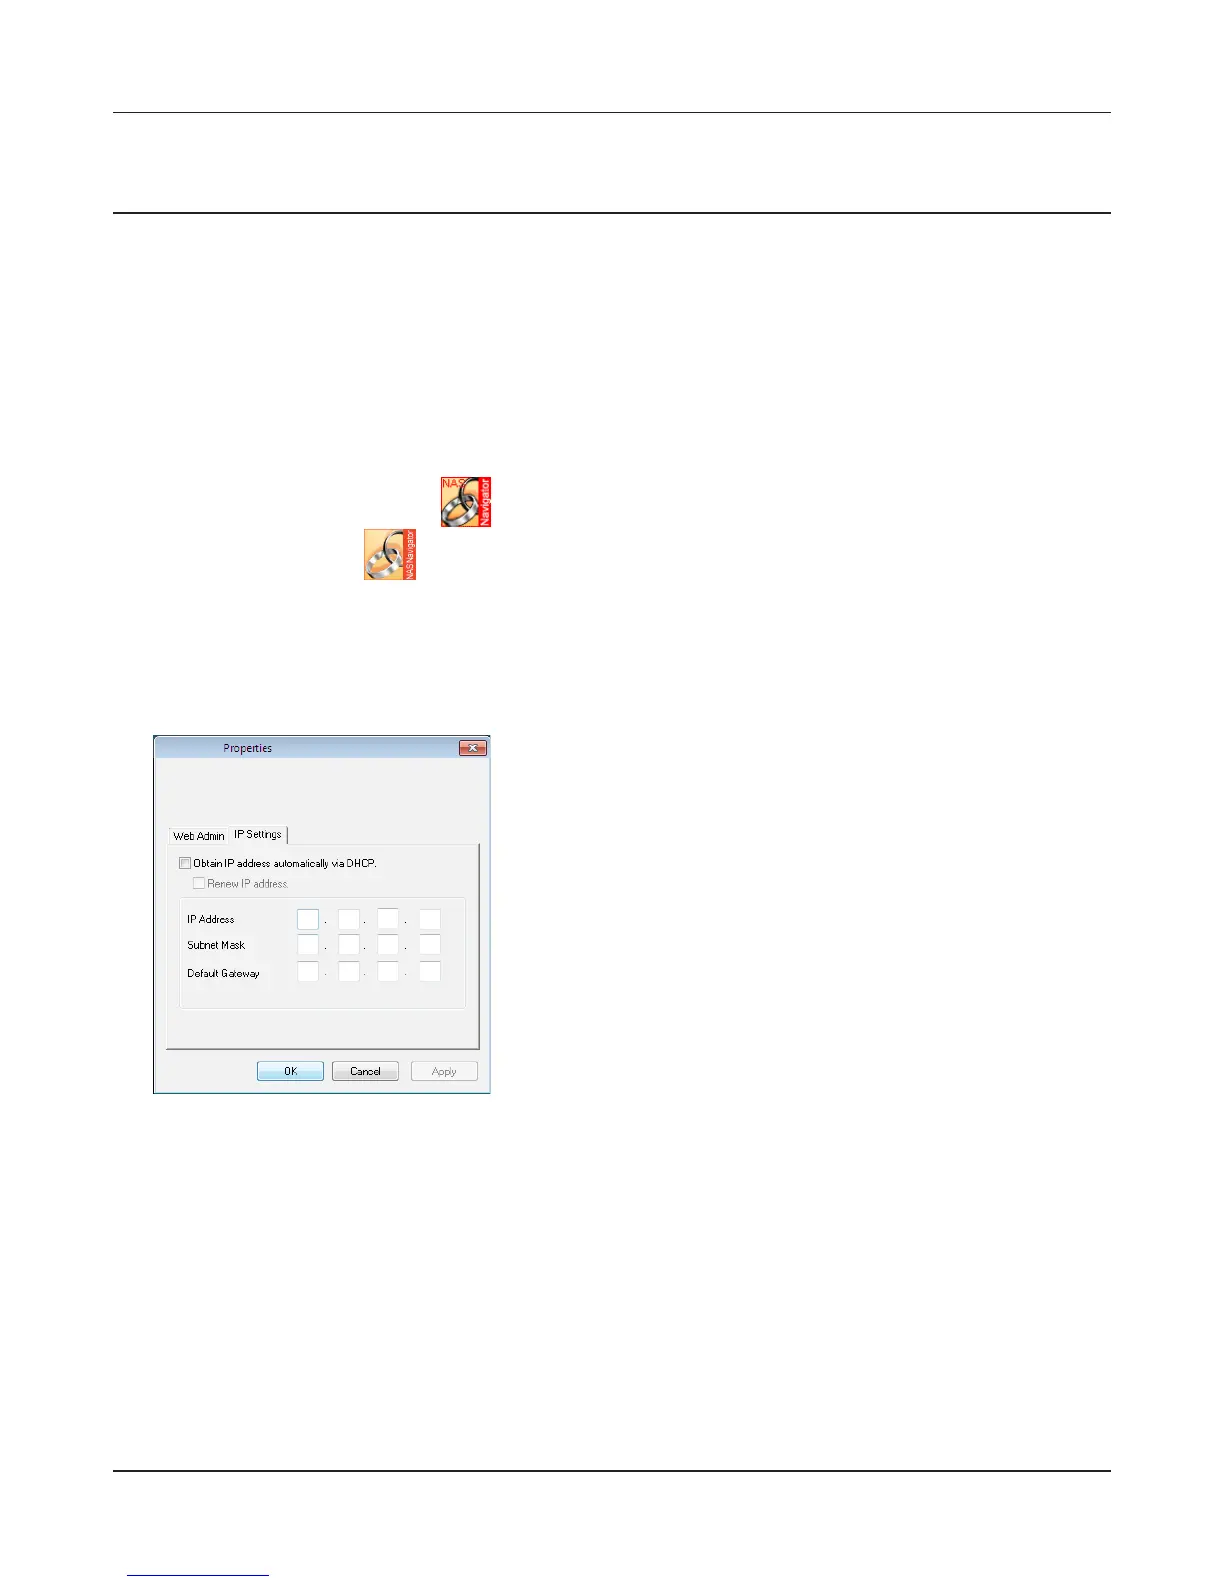
Launch NAS Navigator2.
• Windows: Double-click the icon on the desktop.
• Mac OS X: Click the icon in the Dock.
2
For a PC, right-click your TeraStation's icon and choose [Properties] - [IP Settings]. For a Mac,
hold the Control key, click on your TeraStation's icon, then click [Congure] - [IP Address].
3
You’ve congured a static IP address for the LinkStation. To return to using DHCP, reopen the
Network Properties screen and recheck [Obtain IP address automatically via DHCP].
Changing the IP Address
Normally, the LinkStation’s IP address is set automatically from a DHCP server on your network. If
you prefer, you can set it manually. To change the LinkStation’s IP address settings, your computer
should be connected to the same router (subnet) as the LinkStation and should be running NAS
Navigator2 (included on your LinkNavigator CD).
Uncheck [Obtain IP address automatically via DHCP.].
Enter the desired [IP Address] and [Subnet Mask]. Click
[OK], or [Apply] if you’re using a Mac.